McKenzie River Trail & Clear Lake

Koosah-falls-mckenzie-river-trail

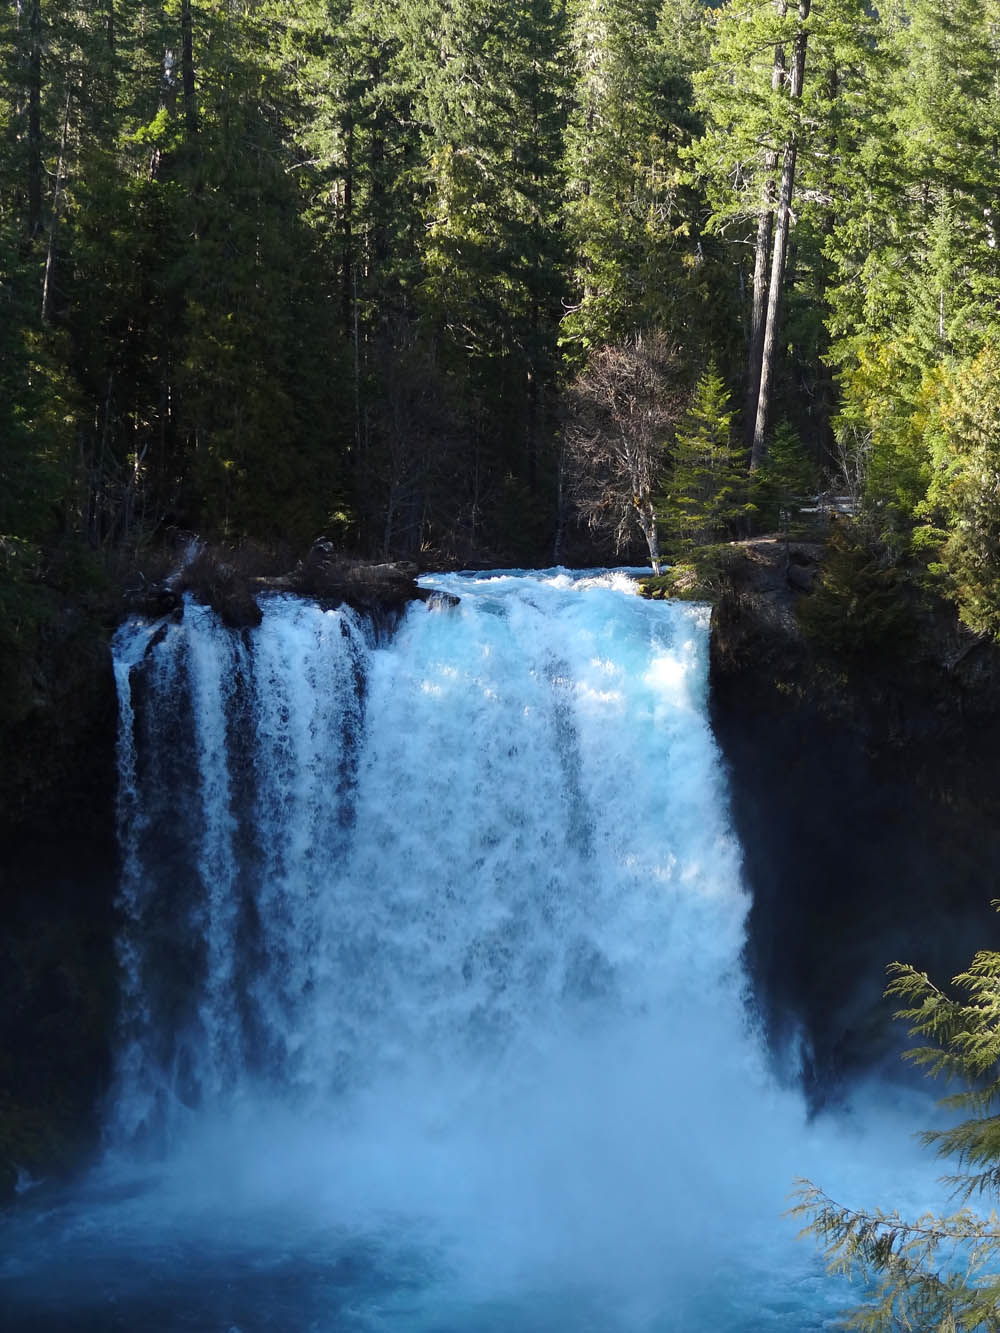
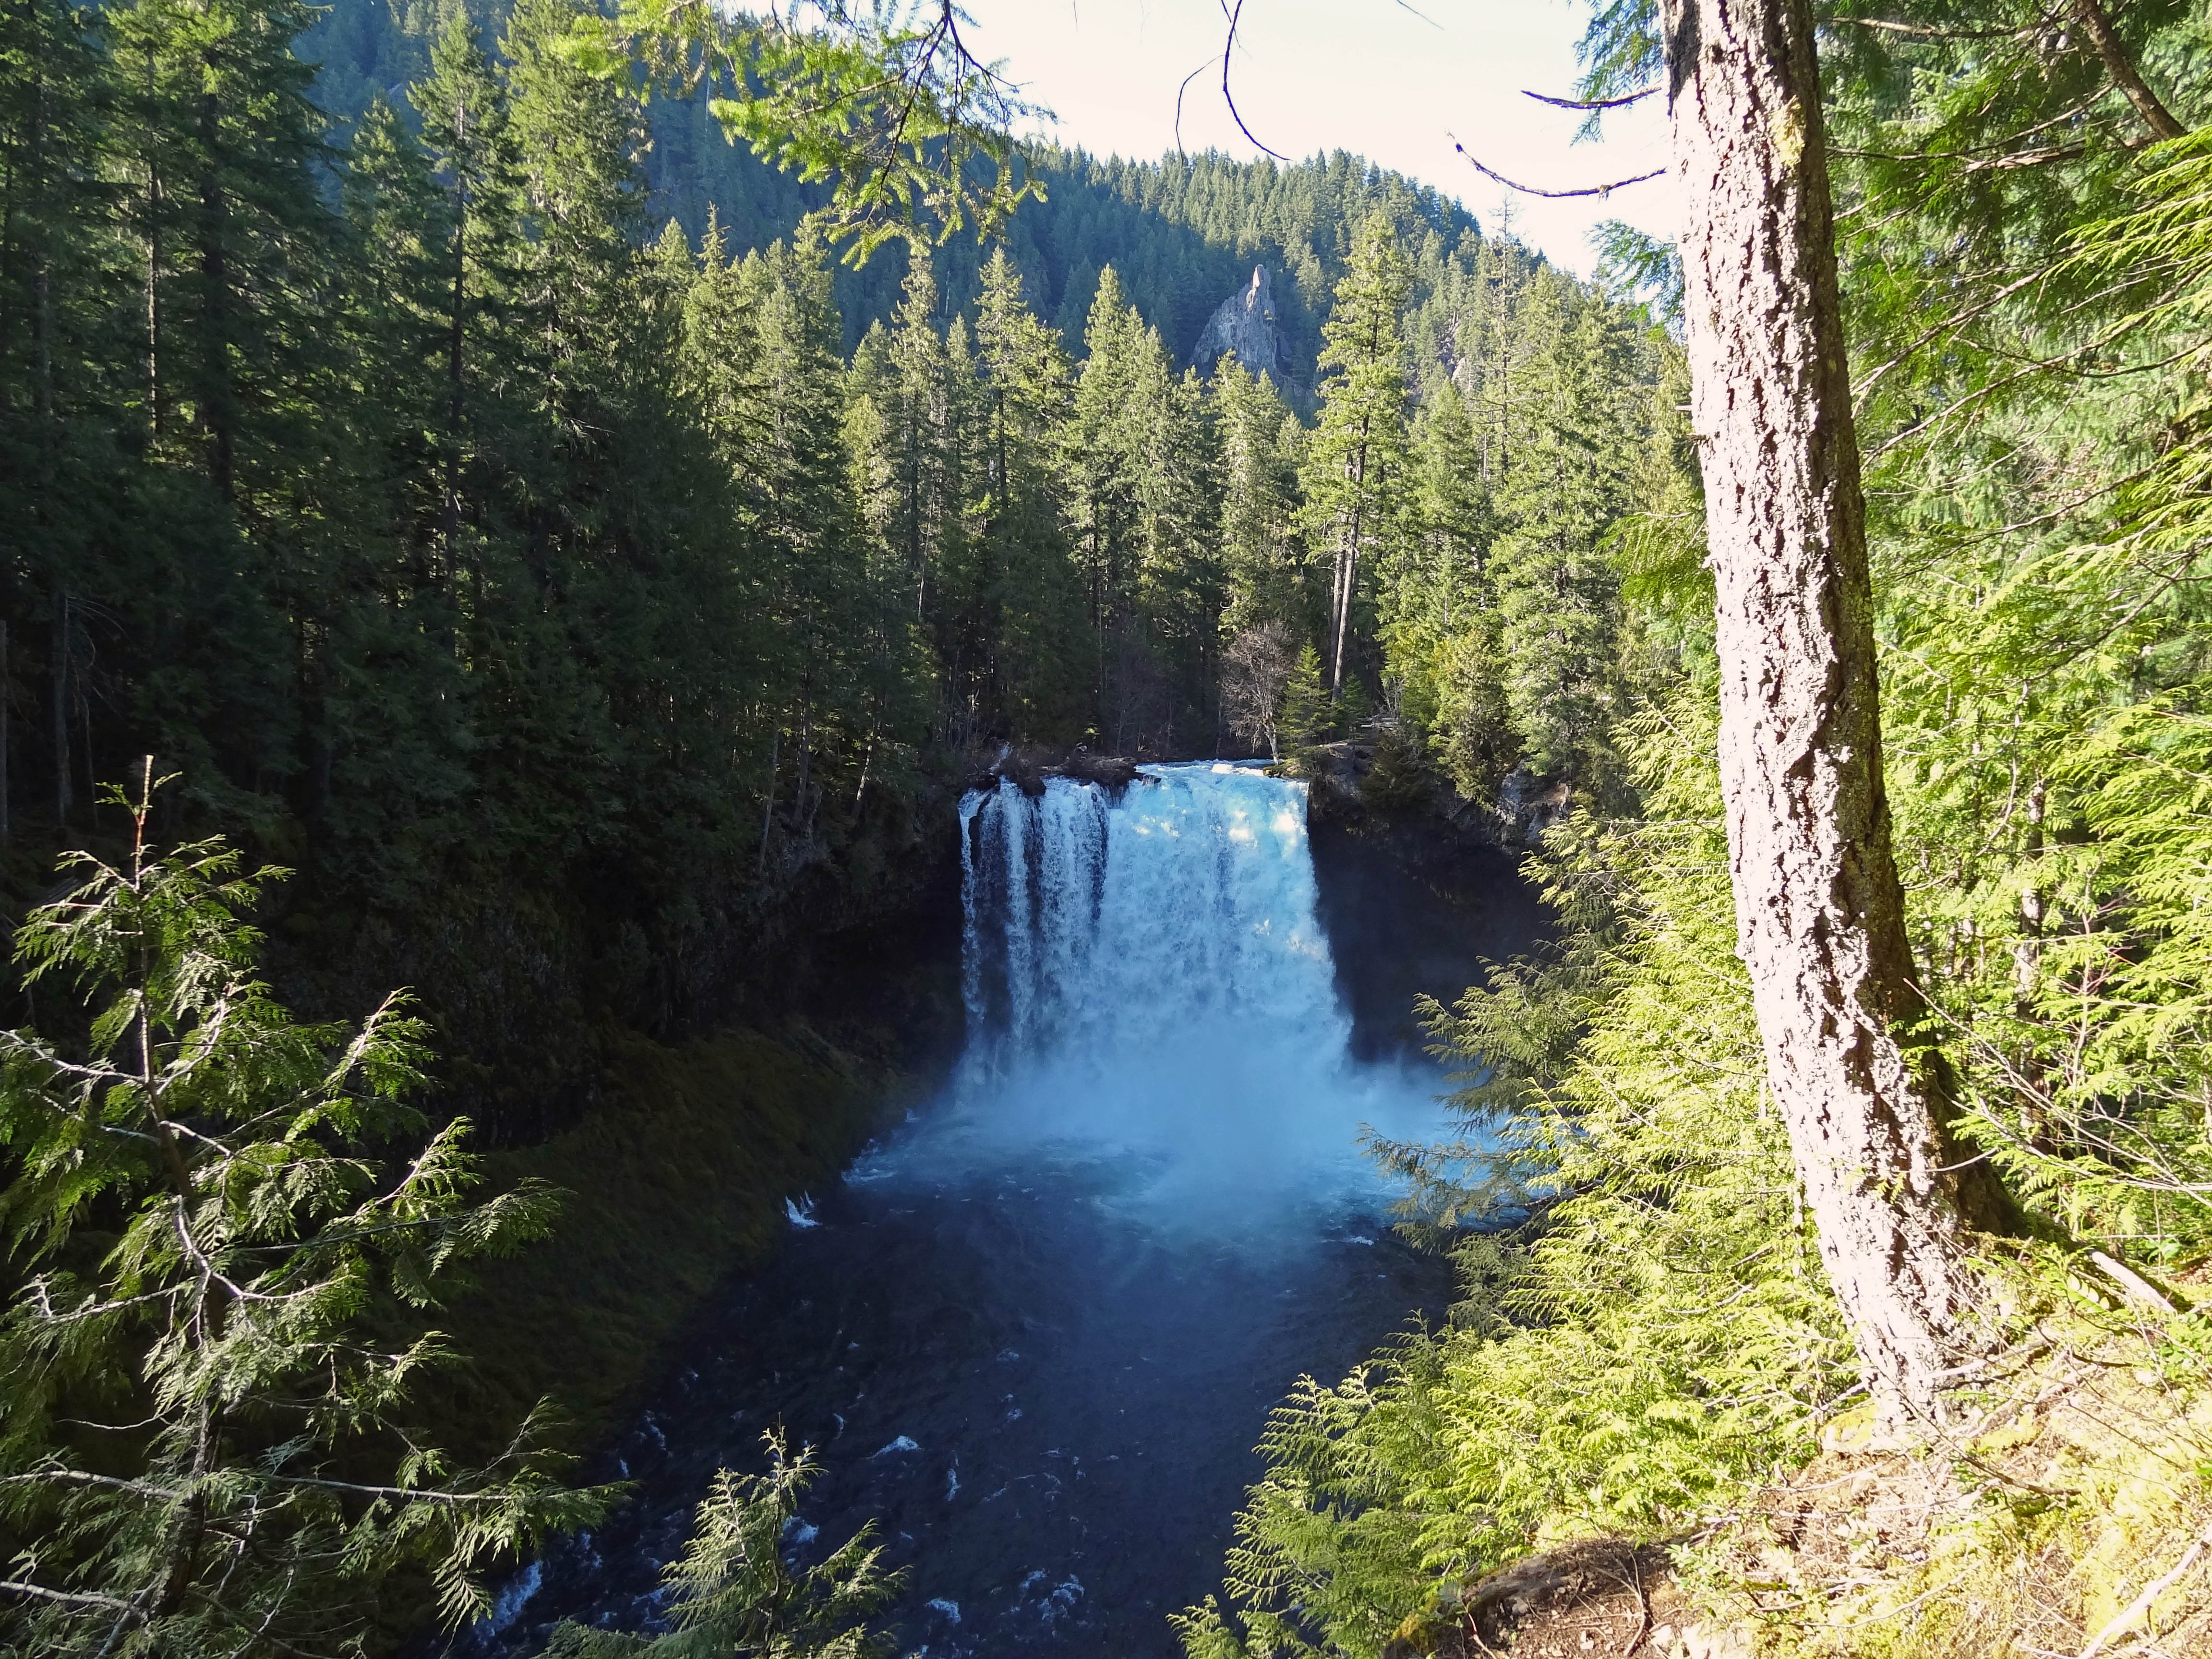
Koosah Falls on the McKenzie River

The McKenzie River Trail is a super popular trail in the Cascade Range. It’s one that I’ve always skipped because I love alpine hiking. After a recommendation from one of my coworkers I figured it was about time to give it a shot, especially with all of the higher hikes still covered in snow.

Quick Stats

Distance: ~26 miles one way from end to end; we did a 12 mile loop taking in Koosah Falls, Sahalie Falls, and Clear Lake.

Time: ~ 5 hrs.

Difficulty: easy to moderate (moderate only due to distance)

Permits: None required

Pros: Beautiful waterfalls, whitewater, and a crystal clear lake

Cons: BUSY!!!! We were up there on a Sunday, once we were away from the falls it wasn’t quite as bad

Dog friendly: So-So, On weekdays it would be fine, but there were loads of people on the Waterfalls Trail, not as much fun for the dogs, but Clear Lake had great swimming for them. Part of the trail crosses lava rock on a paved path with no shade, might be too hot for their paws on a really hot day.

McKenzie-river-trail-view

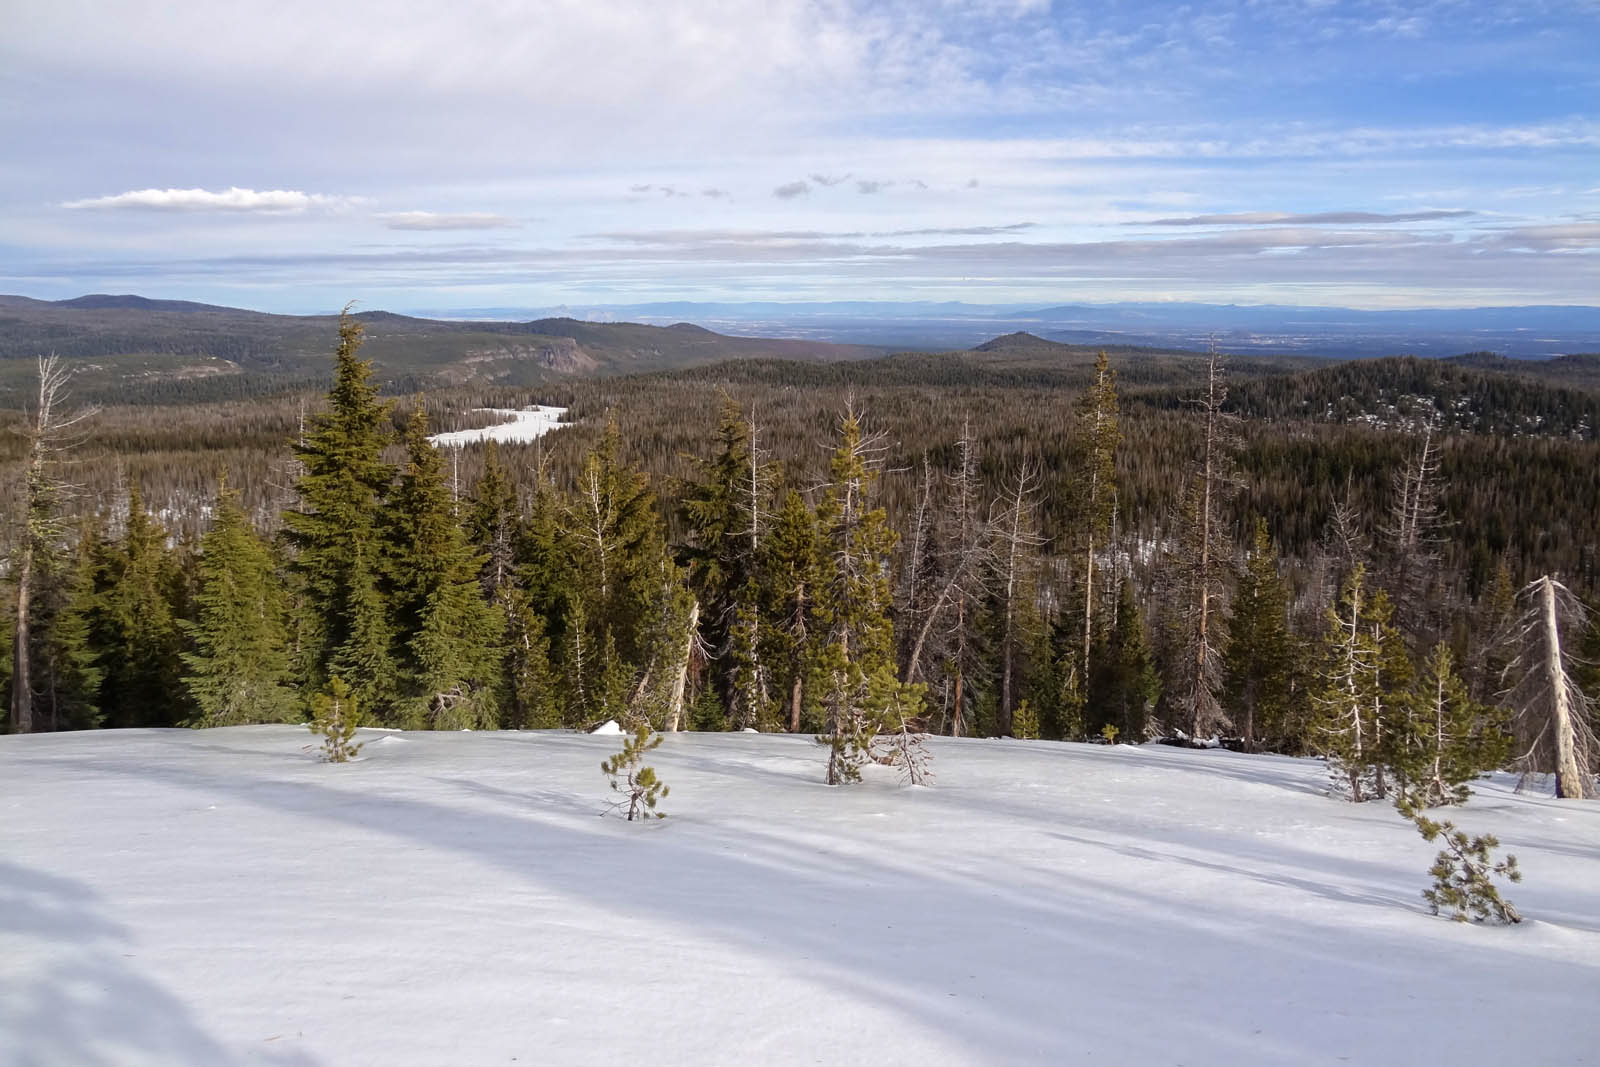
View of the McKenzie River Trail…you can see it’s not that strenuous…. unless you’re on a mountain bike.

We started our hike at the Koosah Waterfall parking area off of Hwy. 126/McKenzie Hwy. The well maintained trail winds down to a couple of different viewpoints for Koosah Falls, where you will find loads of people snapping pics, it’s easy to understand why, Koosah Falls is stunning. From there we headed up toward Sahalie Falls, less than a mile away. Both of the waterfalls were gushing, yay springtime, and the McKenzie River is so clear, it is magical.
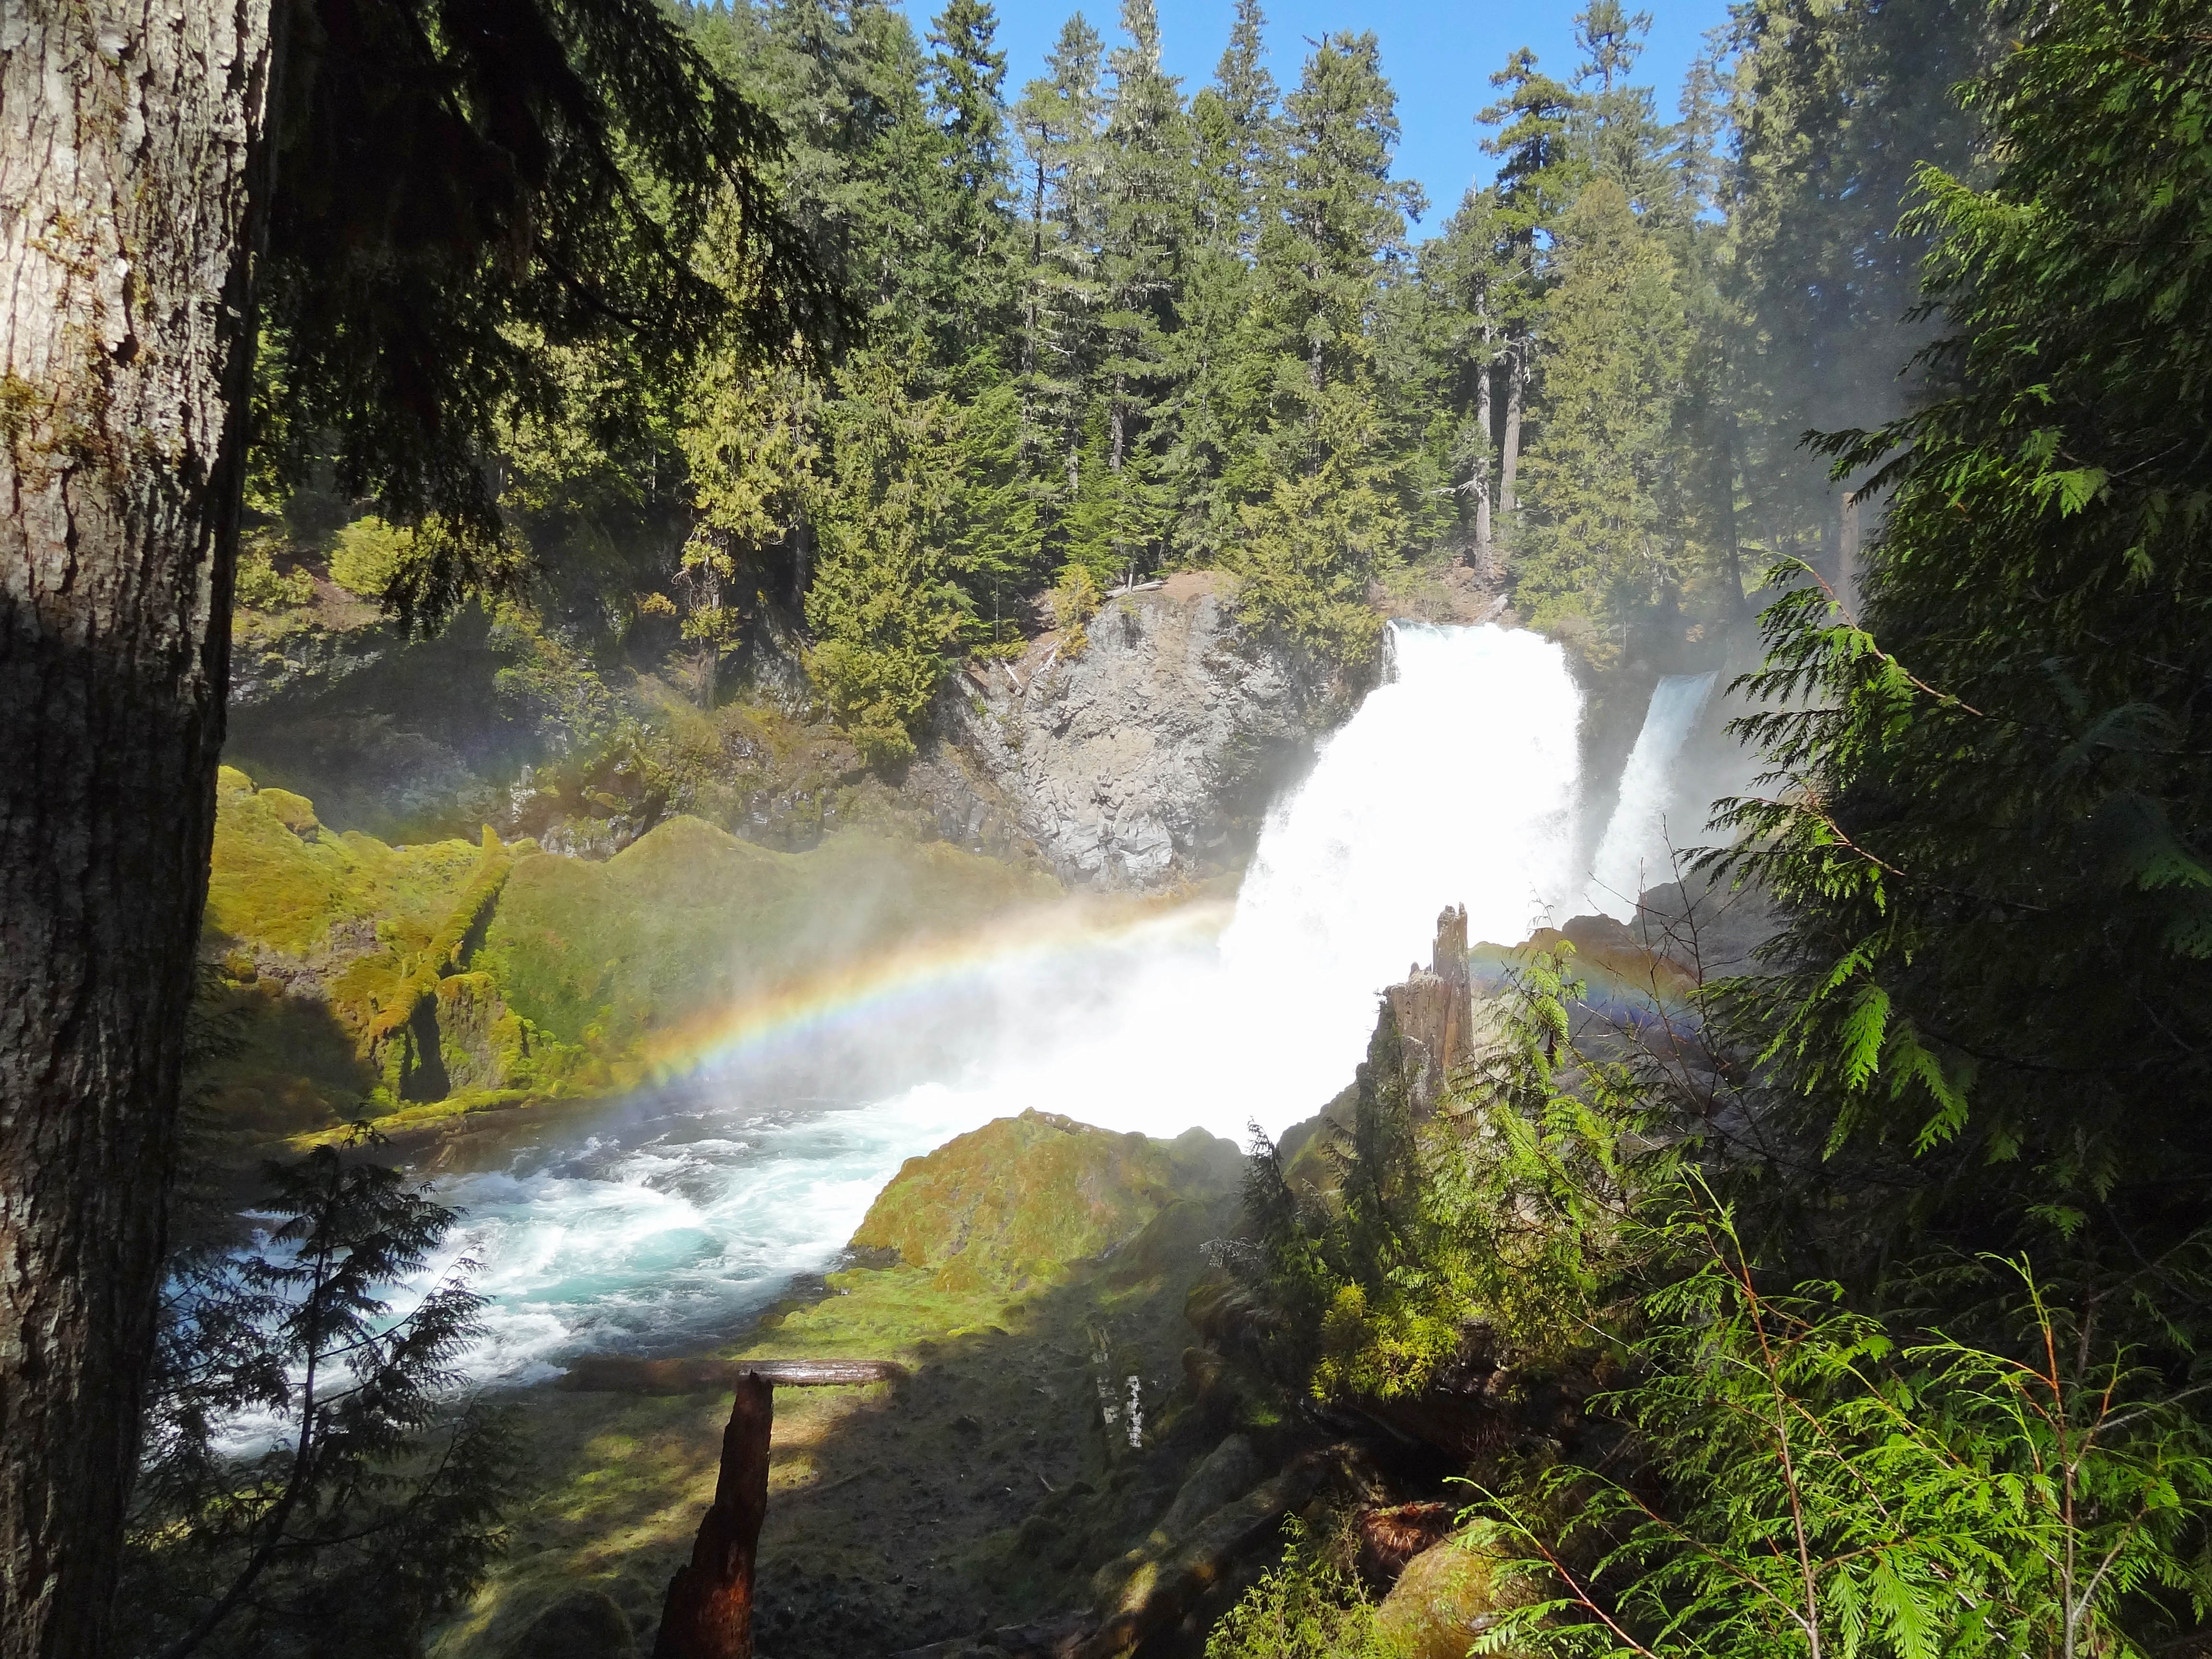
McKenzie_river_trail_sahalie_waterfall

Sahalie Falls

From the waterfalls the trail follows along the McKenzie river a bit further and then crosses highway 126 for Clear Lake, which is supposed to have the best diving in Oregon. There is a forest, that has been preserved by the cold waters, and you can dive through it/around it. The water in Clear Lake really was crystal clear and it looked deceptively like Caribbean water. So no misnomer here.

McKenzie_river_trail_clear_lake

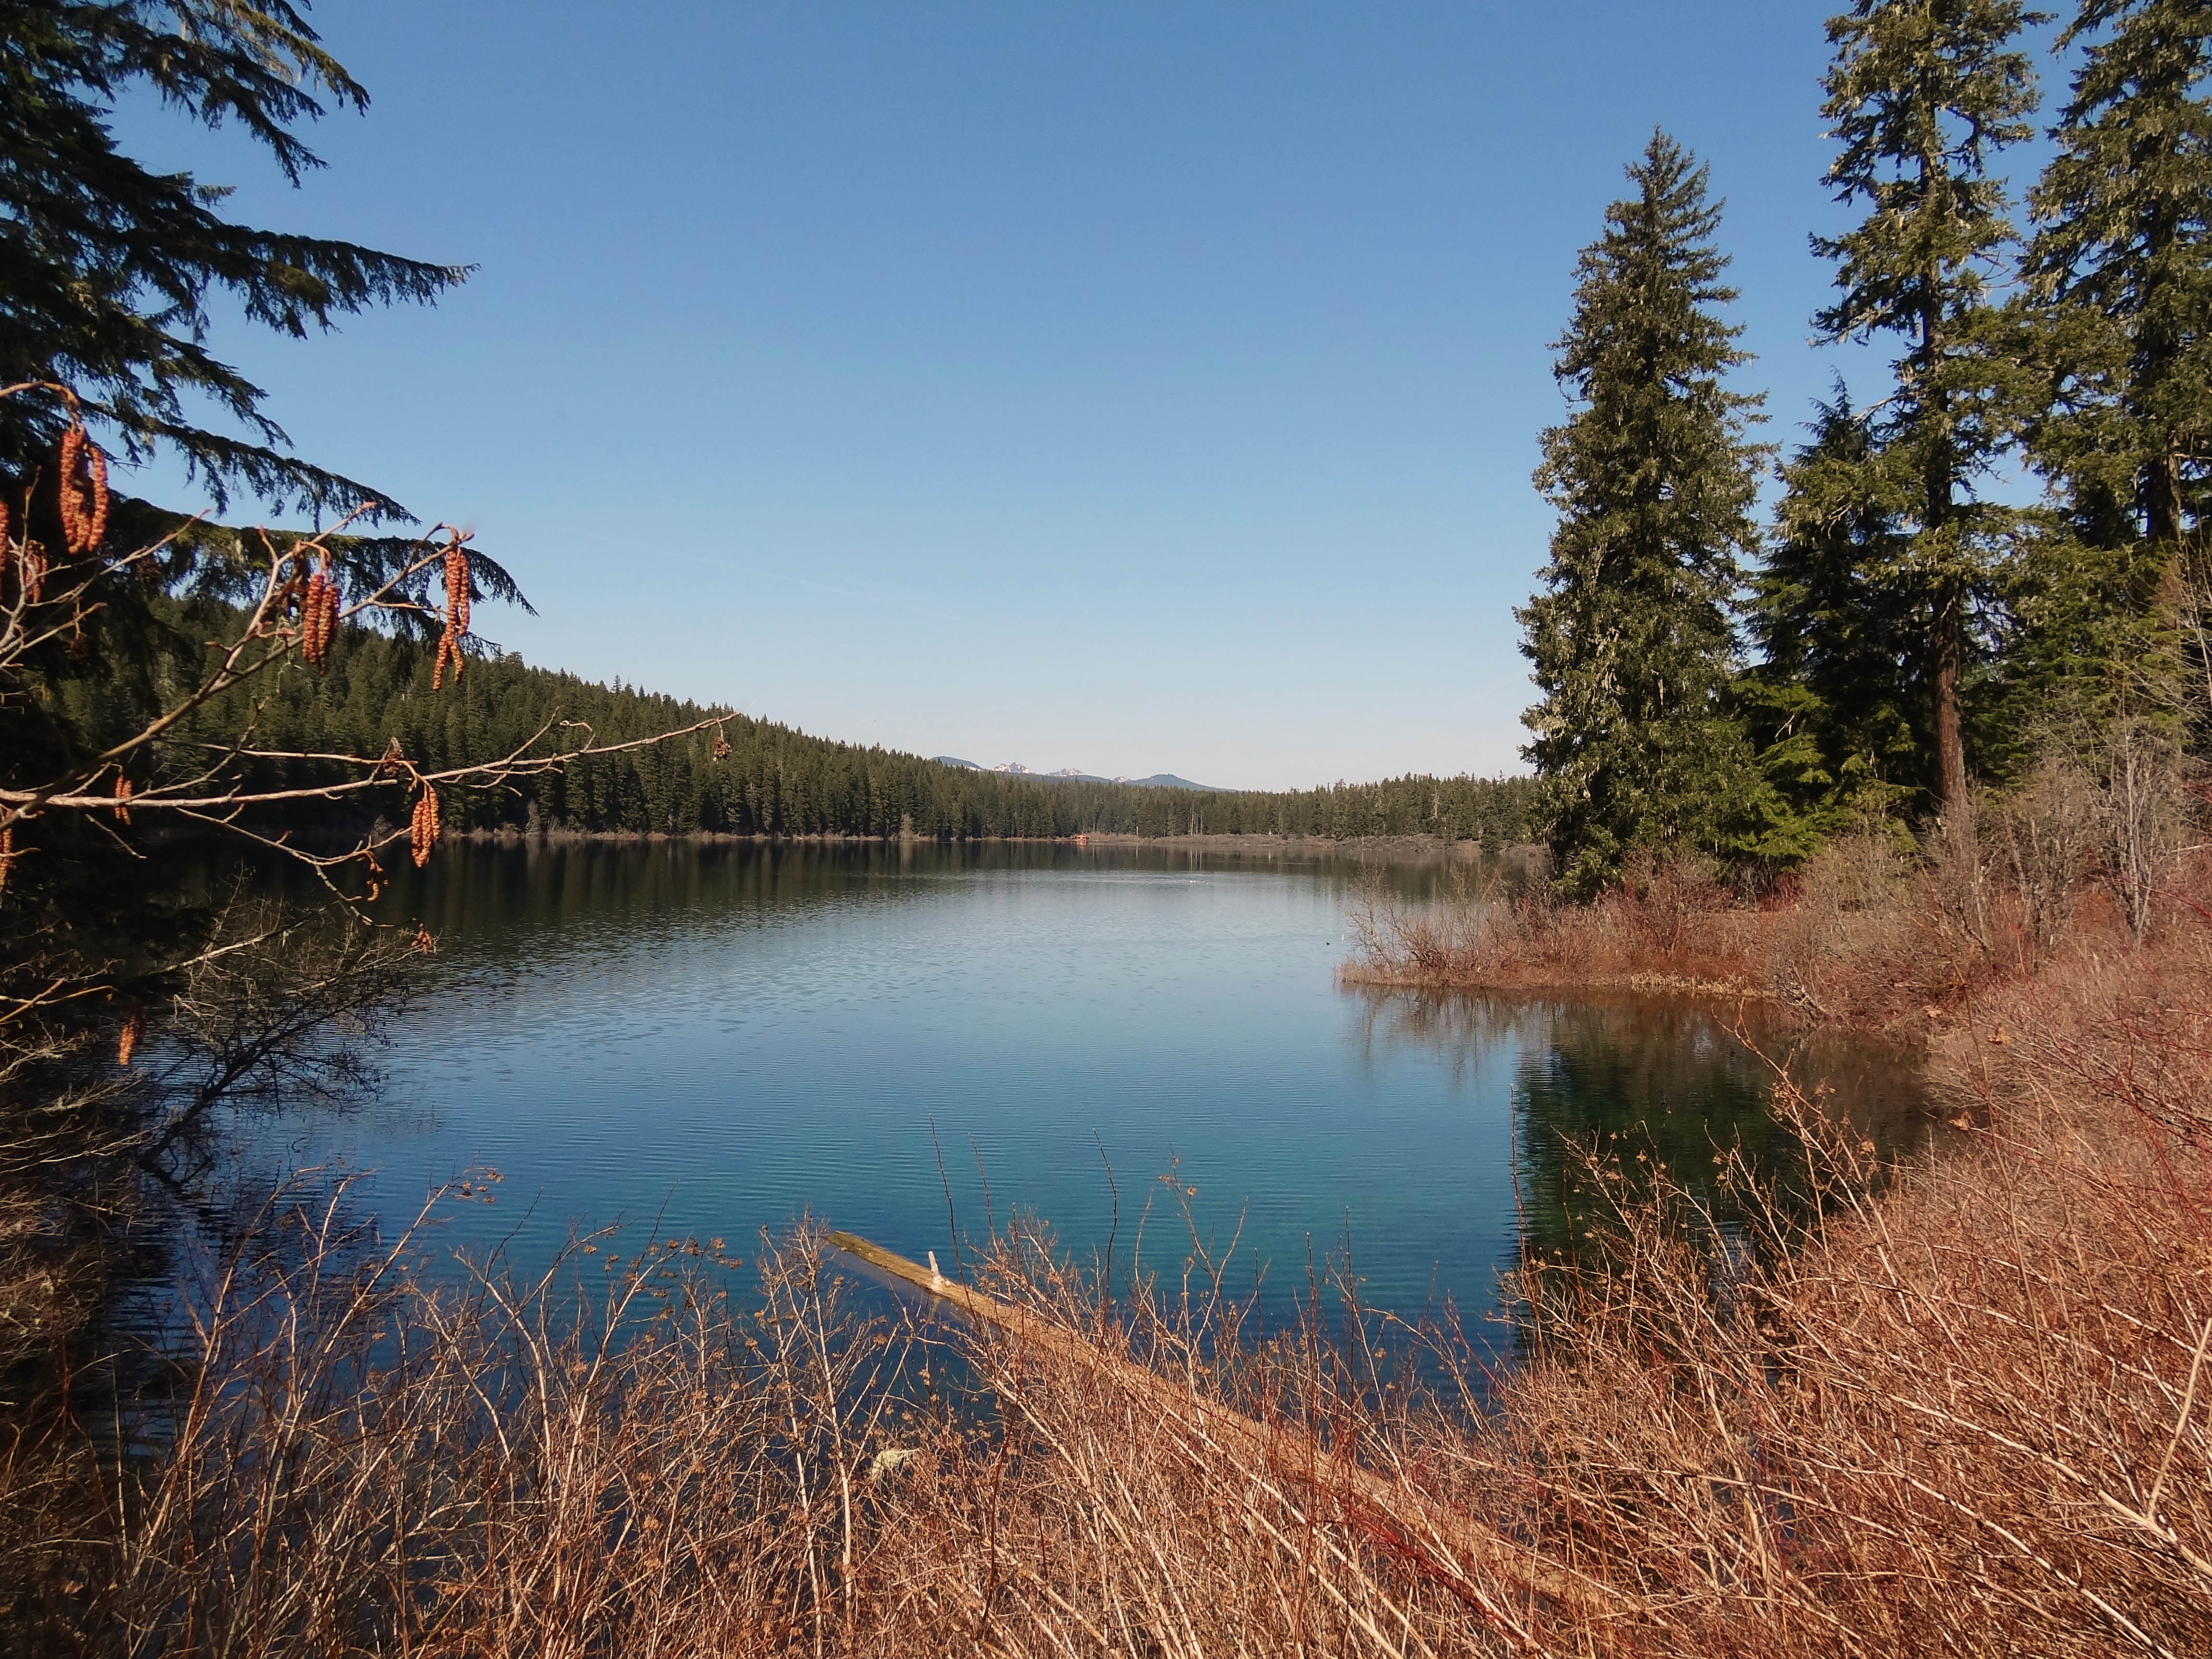
Our first glimpse of Clear Lake

Sal and Jedi went for a dip in the chilly water and incidentally Steve and I ended up nearly  soaked after all of their frantic shaking (My prAna Halle Pants saved me). There were a handful of boats out on Clear Lake, just people out fishing, paddling around and enjoying the beautiful weather. I couldn’t help, but think how awesome it would be to take a standup paddleboard out on the lake. This summer for sure!

McKenzie_river_trail_clear_lake_sal

Typical…Sal playing catch with whatever stick he can find…no matter how cold the water is

We followed the trail around to the opposite side of Clear Lake, where we found a beautiful pool where water enters the lake through the lava rock. Amazing. I love nature. It’s so beautiful and I love how accessible it is in Oregon. We knew that we wanted to hike atleast 10 miles, but were up for more, so we just followed the trail passed the lake. It eventually crossed another road, followed the river for a bit more, and ended at the trailhead.

McKenzie_river_trail_clear_lake

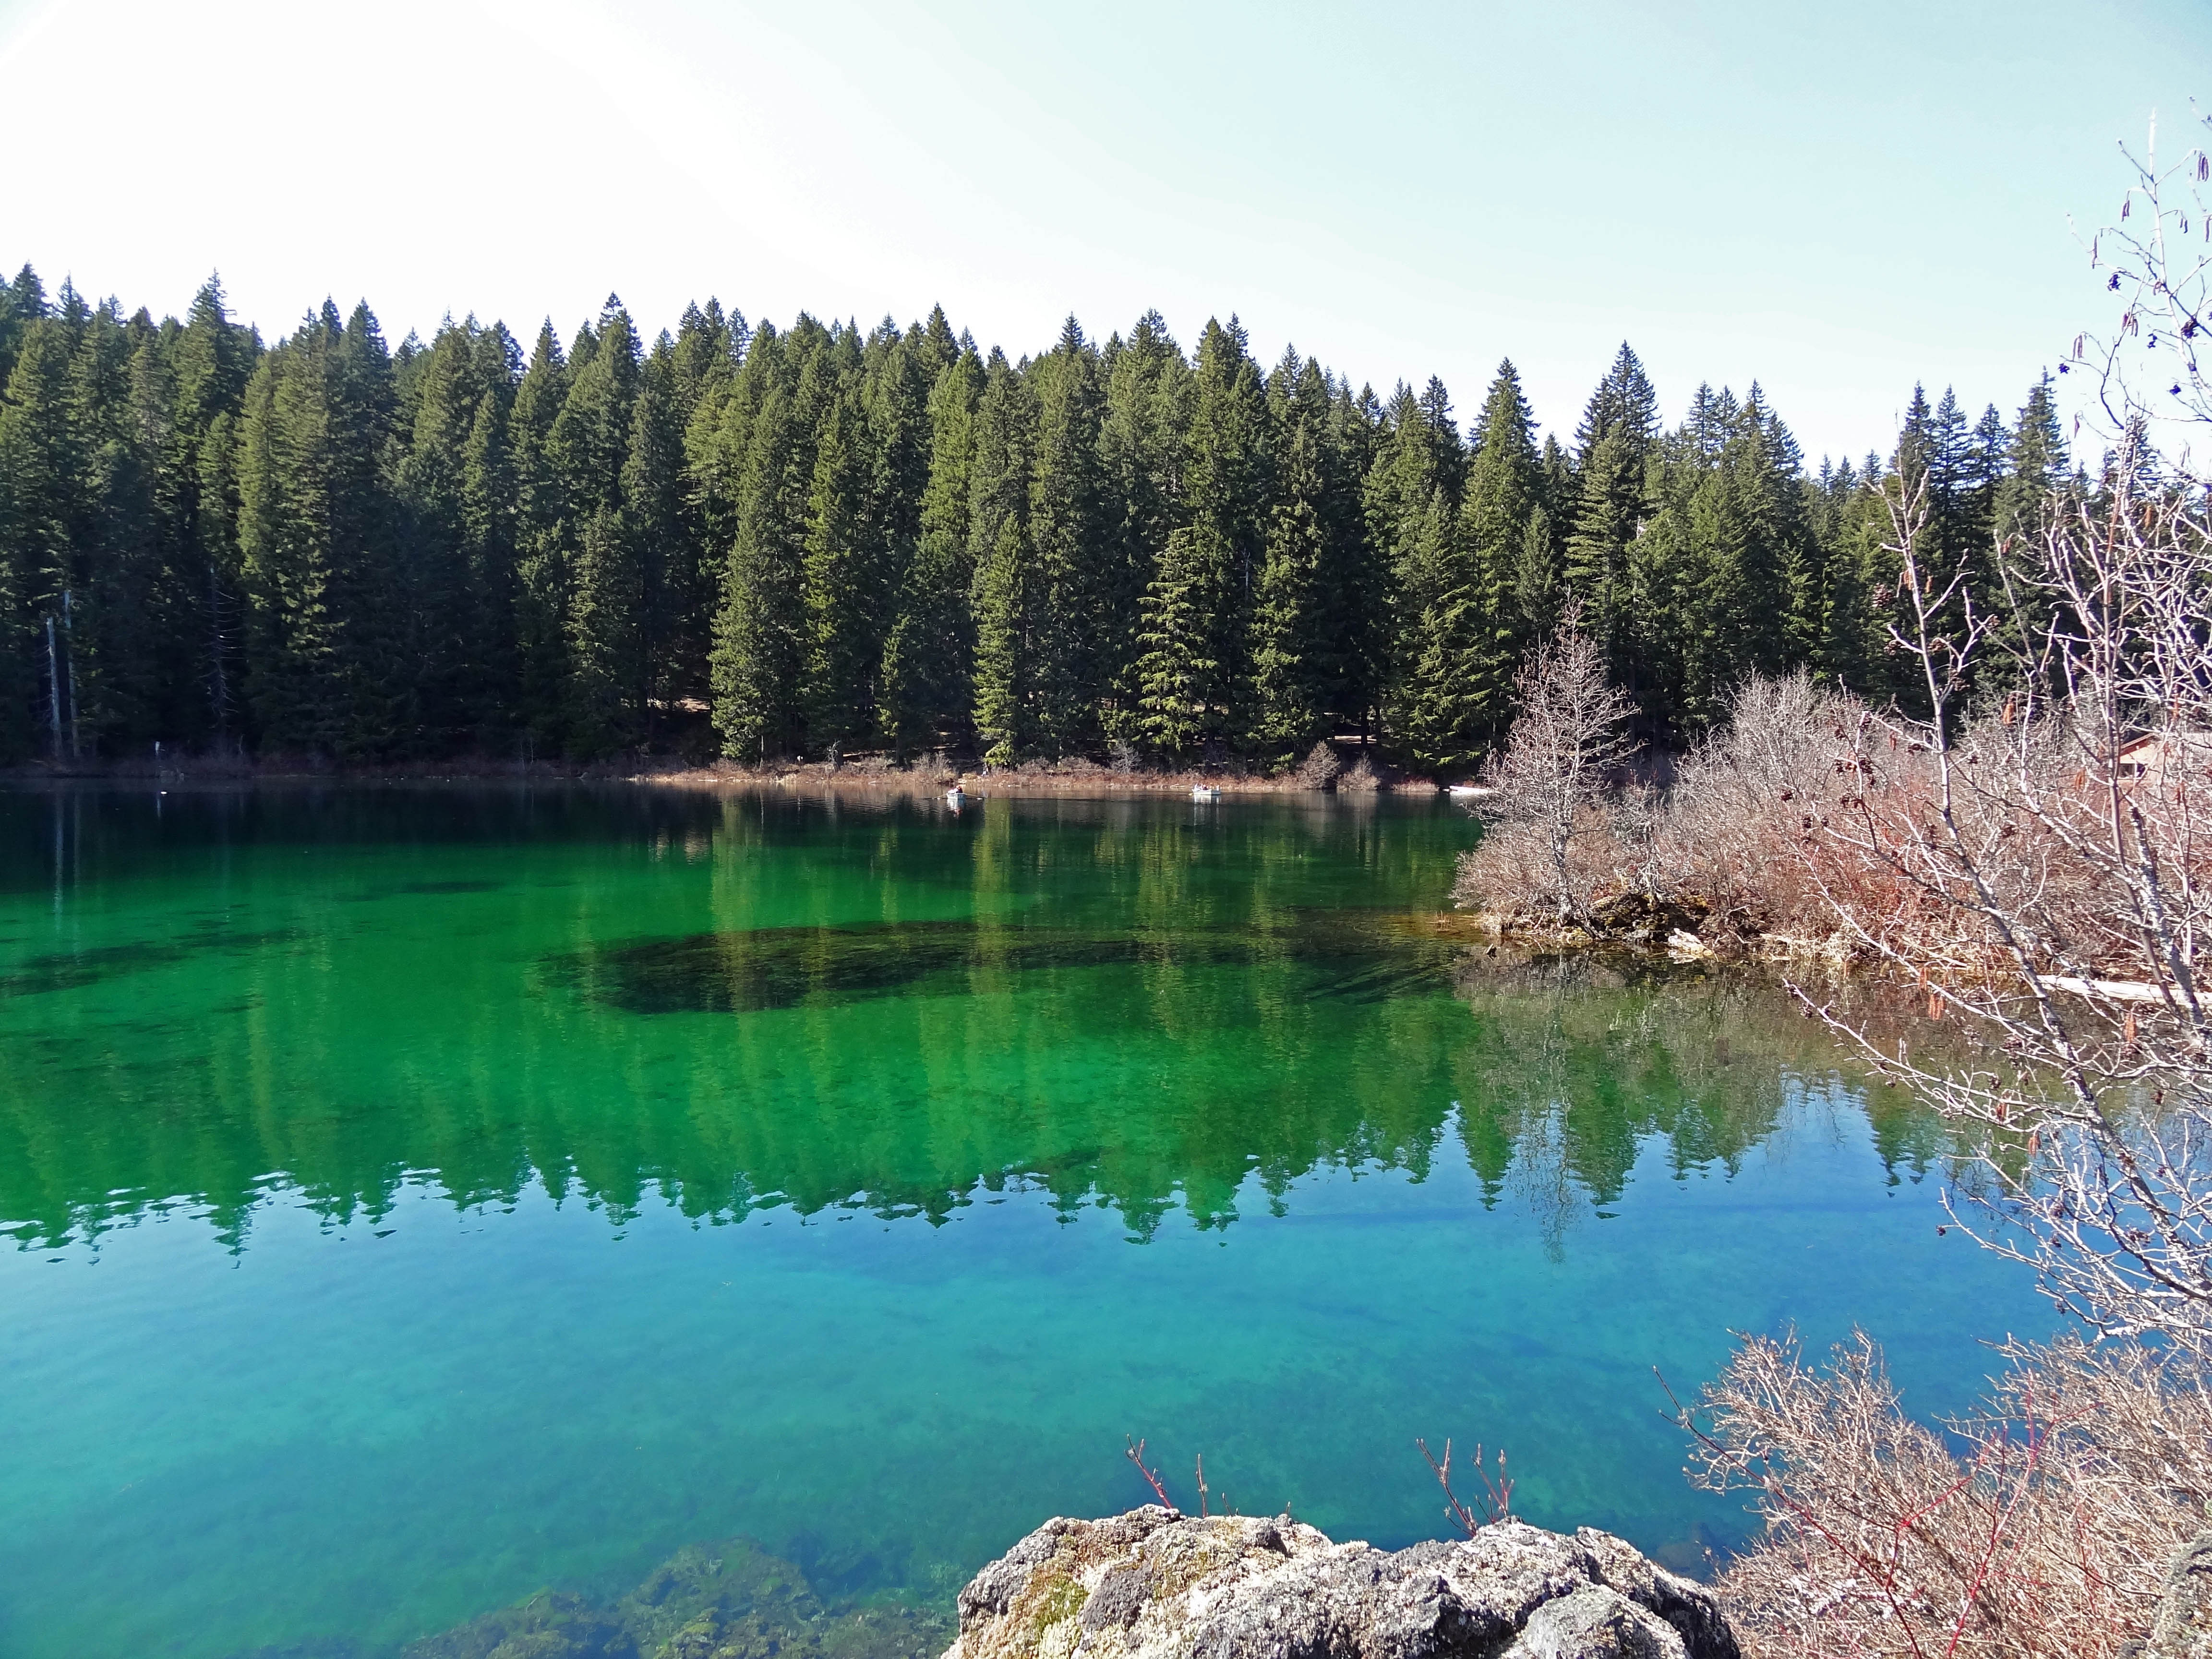
A little further around the lake….you can really see how clear the water is!!!

McKenzie_river_trail_clear_lake_pool

Pool where water pours through the lava rock at Clear Lake

For our return hike we followed the path back to Clear Lake, then took the other path that lads around the opposite side, goes around a cove and through the Clear Lake Resort. We were pretty hungry, so we stopped for a snack, almonds, Gin-Gins, dried apricots, carrots, and cherry tomatoes for us and carrots and cherry tomatoes for the pups. They’re suckers for veggies. We continued on the path until it met up with the path that brought us to Clear Lake. We continued back the way we came, across the highway, until we came to a bridge that crosses over the McKenzie River. At this point we were on the Waterfall Loop portion of the Mckenzie River Trail, from here we had the opportunity to see the waterfalls (Sahalie and Koosah) from a different angle.

Bridge-mckenzie-river-waterfall-loop-trail

Crossing the bridge for the Mckenzie River Trail Waterfall Loop

The path follows along the river for a bit further. It then enters a parking area, where if you turn left and cross the bridge you can pick up the trail again just on the other side of the river. From here the rest is easy. Enjoy the views of the river for a bit more and then one last glimpse of Koosah Falls before heading up to the parking area.

Koosah-falls-mckenzie-river-trail

Koosah Falls, near the end of our hike.

Note: Portions of the trail are multi-use, which means mountain bikers will be on the trail too. This would be an epic day of mountain biking. There is a shuttle service here too, so you would just have to ride end-to-end. If you’re in the Bend area and don’t want to drive out to the trail, Cog Wild runs a shuttle a couple of days a week.

Deschutes River Trail: Lava Island Falls to Aspen

Deschutes River trail lava island falls to Aspen

Steve and I couldn’t believe how beautiful it was….we did this hike in January and it was gorgeous!!!

Quick Stats

Distance: approx. 4 miles

Time: 2 hours (at a leisurely pace)

Difficulty: Easy

Dog Friendly: Yes, Off-leash in the wintertime

Permits: Yes, Northwest Forest Pass

Pros: Beautiful, easy trail minutes from town, option to make hike as easy or short as you like

Cons: Can be busy on weekends.

I love heading out to the Deschutes when I only have a couple of hours to kill. It’s so peaceful and the dogs can run and swim and act like maniacs. The trail is popular with dog-walkers because it’s off-leash part of the year and in some sections I think it’s off-leash all year. The trail doesn’t really gain any elevation in this section, just tiny amounts here and there. It follows right along the river and Lava Island is a bird sanctuary, so there are always birds to be seen….. and other “critters.”

Deschutes River Wildlife

Wildlife of the Deshutes River…. ROARRRR!!!

Also, you can’t actually see Lava Island Falls from the trail…if you want to see waterfalls head to Dillon Falls or Benham Falls, both along the Deschutes River trail.

Deschutes River Trail Lava Island Falls to Aspen

Sunny January day!!!

Even in winter the trail is accessible and used by bikers and hikers. And it’s easy enough that you’re friend who NEVER hikes would probably enjoy it. I never need much of a reason to get out here…it’s just so beautiful. In fact, I will probably head out here today….I need to break in my new Brooks Cascadia 9 Trail Runners anyway.

Deschutes River Trail Lava Island to Aspen

I love the old vintage-y look to this photo

Seriously we have seen lots of birds out here: hawks, owls, a bald eagle…. and tons of the usual suspects too.

Deschutes River wildlife

Look out for the T-Rex downriver!!!

To get to the Deschutes River Trail from Bend you just head west on Hwy. 46 for about 7 miles and then turn left (South) onto Forest Road 41, and then east on 4120. Super easy and less than 15 minutes from town!!!

Resources

Best Hikes with Dogs Oregonby Ellen Morris Bishop is indispensable. It’s one of our go to guides for Oregon.


Vista Butte Snowshoe

Vista Butte Autumn and Steve

We made it to the top!!! What a view!!!

This winter season hasn’t necessarily been the best for outdoor pursuits, but Steve and I have managed to go snowshoeing at Vista Butte Sno-Park twice this season. It’s literally a twenty minute drive, at most, from our house, it’s relatively easy and it has pretty decent views of Mt. Bachelor, South Sister and Broken Top. Honestly we like this trail because it is little used, so we can let the dogs run around and play in the snow without having to worry about them getting in the way of other snowshoers/skiers.

Quick Stats

Distance: 4 miles roundtrip

Time: 3 hours or less

Difficulty: moderate

Season: mid-December through March

Dog Friendly: Well…if you go to the Deschutes Forest Service site they say dogs are restricted, but the trail is little used, so I don’t think there is a big deal…just don’t leave doggy landmines around for unsuspecting snowshoers/skiers.

Pros: Close to Bend, not much trail traffic, terrific views with little work

Cons: Shares a busy parking space on the side of the highway with snowmobilers, crosses two snowmobile tracks

Permit: Sno-Park Pass required Nov.1 to May 1

Vista Butte view of Mt. Bachelor

Mt. Bachelor

To get to the trailhead head west on Highway 46 for about 18 miles. The Vista Butte Sno-Park is on the right side of Hwy. 46 and is literally just a wide space in the highway directly before the turnoff for Sunriver (Hwy. 45). The parking area for Vista Butte will probably have a handful of snowmobile trailers, but don’t worry you only see/hear them in a couple of places on the trail.

Vista Butte Sal and Jedi

Sal and Jedi in action!!!

For Steve and I this is a pretty easy snowshoe and I think most people in moderate shape will have an okay time with it. The trail gains around 700 ft over about 2 miles with the first quarter mile essentially completely flat. The trail gradually begins to gain elevation.

Vista Butte trail Steve

Loving the fresh air!!! And don’t forget the blue diamonds mark the way.

At about a half-mile in you will get a glimpse of your destination through the trees. And you’ll come to a junction with the lower loop trail. I’ve heard that the lower loop trail is more gradual, but we took the upper loop both times and it was beautiful, so I can’t tell you from experience. The trail does cross two snowmobile tracks, so be mindful and put your pups on leash, so no one gets hurt.

Vista Butte Ice 1

It was super icy when we went up the first time…pellets of ice everywhere.

Vista Butte Bachelor BW

Bring on the snow!!!

Cross the snowmobile tracks and stay on the Butte Trail. You’ll come to an area labeled Bruce’s Ballpark…I’m not sure what the story is behind that, but continue past it and head up the hill along the main trail. There are occasionally boot paths that take a short cut up to the top, but protect the plant life and stay as the trail….trust me it’s not much further. You will be stoked when you get to the top!!! You’ll be blessed with views of Bachelor, Broken Top and South Sister.

Vista Butte view of South Sister and Broken Top

South Sister on the left and Broken Top on the right.

Vista Butte Broken Top View

Broken Top peeking through the trees

Vista Butte View

Looking northeast… I think…

Return the way you came, or maybe check out the lower loop trail.

Vista Butte Ice

One more pic of the crazy ice!!!

Resources

Snowshoe Routes: Oregon by Shea Andersen
Deschutes Forest Service website


You Want Me To Write What????

A research paper!!! My jaw immediately drops to the floor and my head spins just thinking about it. For my yoga teacher training we’re required to write a 5-8 page research paper on yoga (and give a 30 minute presentation)….any aspect of yoga, it can really be about anything we want. It took me 3 1/2 months just to pick a topic and now it’s due in three weeks!!!! Eeek!!!

Yes, I’ve begun the research, but it’s so easy to get distracted. Do I really want to read medical studies or do I want to look at pictures of beautiful women doing amazing asanas?(have you seen my pinterest?)…and then try to recreate them…albeit not so beautifully or gracefully or even at all. It’s been tough to stay focused. My goal tomorrow is to atleast get it outlined and maybe one or two sections done.

Oh yeah, my paper’s on yoga and the immune system, which really just boils down to yoga, stress management and it’s impact on the immune system.

If my paper turns out “okay” I’ll post it here, but no promises.

So here’s to having no life!!!

South Sister Summit

South Sister summit Autumn and Steve

We made it!!!

Alright, I’m not gonna lie, I haven’t been on a serious hike since May when Steve, Angie, and I did the Pinnacles trek at Gunung Mulu National Park in Borneo. So naturally, summiting a 10,358 foot mountain would sound like a good idea. Why, oh why, do I do this to myself…

Steve and I usually hike alot, but we just got back from our 6 month trip to Asia, so the last month has been spent looking for a new home, a new car, and a new job (for yours truly). And we moved to the other side of the Cascades…hello sunshine!!!

Quick Stats

Distance: 12.23 miles roundtrip

Time: 7-10 hours

Difficulty: Very challenging, but nontechnical (ie. you don’t need climbing gear)

Season: All year (mid-summer to mid fall for hiking; the rest of the year it’s wise to carry crampons, snowshoes, ice axe, etc.)

Permit: Northwest Forest Pass required; Wilderness permit required, fill out your party’s details at the trailhead

Dog Friendly: Hell NO!!!! The volcanic rock would eat their little paws up; the trail to Moraine Lake would be fine though.

Pros: Views of the Cascades, summiting the third tallest mountain in Oregon, bragging rights, you could camp at Moraine Lake

Cons: SCREE, it’s exhausting, trail can be crowded

South Sister Sunrise1

Just above the clouds.

We were hoping to make the summit for sunrise, but quickly realized that there was no way we were going to be up there in time. We arrived at the trailhead around 3/3:30 am on Labor Day weekend….silly kids. Luckily, most people don’t want to hike in the dark, so we hit the trail and only saw two other groups ahead of us…..on the way down it was a different story; we probably saw close to 100 people on their way up. I’m so happy we started early.

South Sister Sunrise

Morning light on the glacier.

The hike itself is just over 12 miles roundtrip from the Devil’s Lake Trailhead and gains approximately 4,900 feet in about 6 miles. It’s a doozy. The hike from the Devil’s Lake trailhead up to Moraine Lake (about 1.5 miles up the hill) is easy enough and the trail is well packed, which you will definitely appreciate after hiking to the summit and back. If the trail up to Moraine Lake is tough for you, you might just want to call it a day and enjoy the lake. It looked beautiful from up above and it would be way more relaxing than a summit attempt.

South Sister Sunrise above the clouds

Steve waiting for me to catch up.

South Sister lakes

You can see a few of the lakes in this pic and the ridge we hiked up.

I love scree!!! Oh wait, no I don’t. I hate it. It freaks me out! And the summit trail is mostly scree…loads and loads of loose volcanic rock. I definitely had to suck it up and resist the urge to turn around. My fear of falling was overpowering…I’m not truly afraid of heights; I’m afraid of tumbling down a hill. Anyway, I eventually made it to the top, probably 20 minutes after Angie and Steve. They patiently waited for me while there fingers, hands, limbs, and faces froze. The view was beautiful from the top, but it was bitterly cold and even operating the camera was a challenge.

South Sister Summit Autumn and Angie

Angie and I took a quick pic before hustling down the mountain to get warm.

Anyway I’m happy to check the South Sister off of the list, but I’m not exactly jumping at the chance to do it again. Will I do it again? Probably, but I need to forget about all of that scree before I even consider it…lol. Maybe they could build some stairs and a put little hot chocolate shop on the summit? Just kidding….it was beautiful, it just so happens that it was really challenging too.

South Sister Steve

Beautiful lake on the way down from the summit…maybe Tear Drop Lake?

South Sister

Check!!!


Notes: Pack your layers. I wore a tank, a Smartwool Midweight top, a vest, a lightweight jacket, leggings, thin gloves and a fleece headband. Honestly, I wish I had brought my Patagonia Down Sweater too. I was fine in boots with no gaiters, but I went fairly slowly. My trekking poles also came in handy, but like I said I was going slow. I saw some people running down in tennis shoes. Pack your sunscreen and sunglasses too. You will definitely need them as there isn’t much shade on the trail until below Moraine Lake.

Resources

Everytrail.com provides a play by play trail guide


White River Snowshoe

white river west sno-park mt hood

Mt. Hood from the White River West Sno-Park

Instead of baking all Christmas Eve day, Steve, our friend Angie and I decided to head up to the mountain for some winter fun and I was only minimally harassed when I showed up to Christmas Eve dinner without pumpkin cheesecake. We were on a bit of a time crunch, so we decided on the White River trail because of it’s accessibility, shortness of the hike, and killer views of Mt. Hood. Apparently everyone else had the same idea because the Sno-Park was packed with families and their furry friends sledding, snowshoeing and cross country skiing. There was also a mountain rescue going on the same day because three people had gotten lost while snowshoeing to a cabin two days prior. The group was thankfully found before the day was over.

Quick Stats

Distance: 3 miles roundtrip to the power lines; longer options abound (we hiked about a 1/2 mile passed the power lines and had a beautiful view of Mt. Hood and the Meadows chair lift)

Time: 2 hours

Difficulty: Easy-moderate to the power lines (beginning elevation ~4200 feet) on ungroomed trails

Season: December-March

Dog Friendly: yes, in fact our dogs got spoiled with attention and were complimented for being so well behaved :)

Pros: great views of Mt. Hood; relatively easy; tons of sledding hills

Cons: busy, busy, busy

white river mt hood

The view from the parking lot was beautiful too

From the parking lot you follow the masses along a road/path along the river and passed several sledding hills, one of which you actually hike up…and would be a total pain on cross country skis. This sledding hill is really the most difficult part of the snowshoe and you probably won’t even notice yourself huffing and puffing as you watch all of the tubers flying by.

white river sledding

The sledding hill and most challenging part of the snowshoe.

Continue along, either on the trail or off, if you prefer, until you reach the power lines that power Mt. Hood Meadows Ski Resort. If you turn around at the power lines you will have completed about a 3 mile roundtrip. For more fun, continue further up the hill toward the mountain…you will be rewarded with amazing views of Mount Hood.

white river autumn and steve

Stopping for a break and a photo.

On the way down Angie decided to give Sal a great big hug…so we took another picture.

white river angie and sal

Hugs!!!

The parking lot was still very full with families out having Christmas Eve fun and with the volunteers, medical teams, and sheriffs department that were out looking for the lost snowshoers. Just makes you realize how important it is to be prepared and to pack the 10 Essentials.

white river rescue

Portland Mountain Rescue, new trucks and the “entire” Hood River Sheriffs department were all still on the mountain when we were heading out.

We really can’t wait till we get to go snowshoeing again…hopefully it will be sooner rather than later.

A note about snowshoes: Steve and I have both been using the MSR Evo Snow Shoes
and they rock. They get awesome traction and just the right amount of “float” and they even have “tails” that you can add on if you need some extra lift. Bottom line…they rock and they aren’t nearly as expensive as some of the others. We also added a couple extra strap bindings to ours, so now they are super secure and never come undone. If you just want to try out snowshoeing rentals are usually super cheap…usually about ten bucks a day.

Don’t forget your Sno-Park pass!!!

Resources

Directions and Sno Park info


The Cocktail That Changed My Mind About Whiskey

I hated whiskey until I tried Brown Derby, which is a horrible name for a cocktail, by the way. At least the Euros call it a de Rigeur…. which actually sounds just as lame, but it sure is tasty!!! My first encounter with the Brown Derby was at Oven and Shaker in Downtown Portland…they have awesome wood-fired pizzas and even better cocktails.

brown derby cocktail

Yep, here it is…the Brown Derby Cocktail.

Recipe

Serves 1.

2 oz. whiskey
1 oz. grapefruit juice
1 oz. honey simple syrup (ie. dilute your honey with some warm water…easy enough)

Instructions

1. In a cocktail shaker combine whiskey, grapefruit juice, and honey simple syrup. Give a quick shake and strain into a crystal champagne coupe.

2. Garnish with a grapefruit twist or peel.


Opal Creek

This is one of those quintessential Oregon hikes. It has tons of trees and a beautiful creek with crystal clear water. Opal Creek and the surrounding area has been important historically, as well. The area was an important area for trade when the Santiam Indians would set up their summer camp here, then the area became an important mining area. The old mining company eventually ended up donating approximately 4000 acres to The Friends of Opal Creek to help preserve Opal Creek, the Little North Santiam River and the surrounding forest. Relics of the old mining industry and the old saw mill dot the trail and are scattered about Jawbone Flats. This hike is also super easy.

Opal Creek Hike: Little North Santiam River and Sawmill Falls

Opal Creek Hike: Little North Santiam River and Sawmill Falls

Quick Stats

Distance: 7 miles roundtrip to Opal Pool and 10.5 miles roundtrip to Cedar Flats; you could do this as an easy late season backpacking trip if you camped at Cedar Flats.

Time: 2 1/2 hours roundtrip to Opal Pool and probably about 5 hours roundtrip to Cedar Flats

Difficulty: easy

Season: end of March to mid-November, depending on snowfall

Permit: Northwest Forest Pass $5/day or $30/year

Dog Friendly: Yes, the trail is wide enough that you don’t have to worry about them going over the edge, however the water is quick moving in places, so keep an eye on them.

Pros: Virgin forest and a beautifully clear stream, family friendly, lots of cool old buildings and random relics from long ago

Cons: Can be crowded on summer weekends, part of the trail is an old logging road…which makes for an easy, if slightly boring hike (thankfully there were pretty little streams and plenty of creepy crawlers to keep us occupied)

Note: We did this hike in June and there was still snow past the bridge that’s a mile beyond Opal Pool. The bridge was also taped off with caution tape. We crossed anyway, but didn’t get far as we were post-holing with every step.

Plan on getting an early start for this hike. It’s about an hour and a half from Portland.

The Hike

The trail begins at the end of potholed Little North Santiam Road. Park at the gate here and continue on the old logging road beyond the gate. There are some seriously old trees here, one they claim that is between 700 and 1000 years old and plenty with diameters larger than I am tall!!! Awesome!!!

opal creek sawmill

An old building on the Opal Creek trail to Jawbone Flats

At about two miles in you will come across the remnants of the old sawmill and if you follow the bootpath over to the river you will see Sawmill Falls. Continue on to Jawbone Flats where you’ll find historic cabins and some ancient rusted out vehicles.

opal creek jawbone flats company store

The “Company Store” at Jawbone Flats.

After Jawbone Flats, and the rusted out cars turn to the right toward the creek to visit Opal Pool, it’s about 1/10 of a mile past the cars.

opal creek above opal pool

Gorgeous deep Opal Creek

Cross the bridge above Opal Pool and continue left on a trail that follows along Opal Creek. About one mile up the trail crosses the creek on a bridge (that was taped off with caution tape) continue at your own risk. The bridge was stable “enough”, but the water moves pretty quickly down below. We crossed, but there was too much snow, so we ended up turning around and not making it to Cedar Flats. At Cedar Flats there are supposedly a few 1000 year old trees still hanging around, Maybe next time we’ll make it up there.

bridge over Opal Creek

Bridge over Opal Creek.

opal creek 1

Opal Creek

To return, continue back down the Opal Creek trail. Don’t cross back over to Jawbone Flats, but instead continue down the trail where it eventually crosses back over Little North Santiam River to meet up with the logging road that you came in on. Turn left on the logging road and continue  back to your car.

Opal Creek trees

Sunlit trees at Opal Creek

For more detailed hiking instructions check out these two books. They both have great trail info and history.

The Portland Hiker’s Field Guide is also a good resource.

Broken Top Loop

Broken Top from Park Meadow

Broken Top from Park Meadow; Day 1

Quick Stats

Distance: 23+ (our hike was approximately 26.5)

Time: 3 days

Difficulty: Difficult

Season: End of July to beginning of October

Dog Friendly: To Golden Lake, yes; to Green Lakes, yes; Green Lakes to end of the loop, NO!!!

Pros: Gorgeous meadows, views of Broken Top, all Three Sisters, Mt. Jefferson, Mt. Washington, and Mt. Bachelor

Cons: Busy trail that is pounded to dust, off-trail section is over steep, sometimes loose rock, no water source on third day after leaving the glacier, no fire allowed at golden or green lakes

Day 1

The trail begins at a parking lot just before the Driftwood Creek Campground at Three Creeks Lake. For the loop follow the signs to Park Meadow. The dusty trail will switchback up to the ridge where you might get a glimpse or two of the surrounding mountains before descending to the Snow Creek irrigation ditch and a four way junction, turn left here and continue onward to Park Meadow. Y

ou will be greeted with wildflowers, a view of Broken Top, and pretty Park Creek. This is a great place to take a break and refill water. You’ve made it about 6.4 miles at this point. Cross the creek and continue gradually uphill.

Park Meadow Broken Top

View of wildflowers and Broken Top from Park Meadow.

At about 7.2 miles there is a dusty unsigned trail that leads to Golden Lake, your camp for the night, once you reach the lake cross the outlet creek on the left and continue a bit further to the inlet creek, here follow a boot path up along the creek to some amazing campsites.

Golden Lake Camp

Our camp above Golden Lake with Broken Top in the background.

We camped near the creek about a mile or so up the hill, but it’s rumored there are a couple of tarns just a bit further that have even better views. We, however, were exhausted and decided that our unofficial campsite with views of Broken Top and South Sister was perfect.

Golden Lake, Middle and North Sister

The view on our hike back down the hill from our campsite shows Middle and North Sister reflected in Golden Lake.


Day 2

Make sure to wake up early to watch the morning sun dance across the mountains and light them up with a red glow. Today, hike back down to the main trail and take a left. The trail will ascend to about 7000 feet at a pass between Broken Top and South Sister and then descends again into the Green Lakes Basin. The basin is super crowded, has designated campsites, and fires are prohibited so I recommend continuing on to camp closer to the day 3 push up Broken Top.

Green Lakes Basin

The parting view of Green Lakes Basin looking toward the pass you just came from.

Meadow, Green Lakes, Broken Top

Meadow with a great creek for refilling water bottles with Broken Top in the background.

Once you leave the basin the trail continues through meadow and open forest, so make sure your water supplies are good. You will come to a Y in the trail, keep to the left toward Broken Top. Once you reach Camp Creek and the Drainage start looking for a place to camp. The better camps are uphill, but there is one nice camp about a ¼ mile down the drainage, that has a nice sheltered meadow, that was perfect for an afternoon nap.

Day 3

Today is going to be long, hot and exposed, so start early and put on some sunscreen!!! Make sure ALL of your water bottles/platypus bags are full, and I recommend filling up before you leave Camp Creek behind and at any other decent source of water before you reach the Tam McArthur Rim Trail because there is NO water once you reach the rim, it’s 7+ miles without water.  To reach the Bend Glacier and the iceberg filled lake that it fills, follow Camp Creek till it starts to level off and then head east toward a rock outcropping, we hiked just to the right of this and were able to pick up a trail that we followed nearly all the way to the lake.

View of Mt. Bachelor from Broken Top boot path

View of Mt. Bachelor from the boot path leading up to the lake in front of Bend Glacier. At this point you’re almost to the lake.

Frozen Lake on top of Broken Top Mountain

Hey look, there are wildflowers even up here near this partially frozen lake on Broken Top.

After you leave the lake, begin the long hot push to the rim trail. Take care crossing the snowfields and remember that big rocks move too. Once you reach the rim “trail” you will have amazing views of all the surrounding mountains. The path here is sketchy and kinda comes and goes as you climb over and around rocks; I promise that the trail gets better the further east you go. Just continue on the trail, through the dust, and dry forest.

Broken Top Views to the North

So, I finally dragged my ass up the hill to the rim and it was totally worth it. You know it’s been a hard hike if Sal is resting in the shade. From up top you can see the Three Sisters, Mt. Washington, and Mt. Jefferson to the North and Mt. Bachelor….and maybe Mt. Thielson to the South. Beautiful!!!

Tam McArthur Rim

This pic makes the trail look “not so bad” don’t be fooled; day three is a pretty crappy hike and you’ll be wondering how you got sucked into it.

Our poor dog Jedi, would race to each shady spot and lie down. I would NOT recommend any part of day 3 for your pup, if you must take your dog invest in booties, joint supplements and take some baby aspirin with you as well. I wish someone had warned us. Steve and the dogs finished their water less than halfway through the day’s hike, so we were left to ration out the remaining 1 ½ Liters that I still had. We were very relieved to get back to the car, blast the AC and get rehydrated.

GPX File of Our Hike

I’ve included a link to a GPX file of my hike around Broken Top as recorded by my Delorme Earthmate PN-60. You can load this file into Google Earth or any GPX-compatible GPS device to follow my path.

Download the Broken Top GPX file here

Photo Aug 23, 16 50 36 Photo Aug 23, 16 51 17 Photo Aug 23, 16 53 02 Photo Aug 23, 16 53 36 Photo Aug 23, 16 55 13 Photo Aug 23, 16 55 27 Photo Aug 23, 16 55 53 Photo Aug 23, 16 56 47

Planning Resources

US Forest Service Central Oregon Website great for general info and trail conditions

Portland Hikers Field Guide a great resource for trip reports, tips, and insider info