Finding the Beauty…

If you follow my blog regularly you’d think that I’m always going on perfect hikes with perfect weather and going on amazing trips with perfectly planned itineraries, but that is not the case. Often times we will head out for a hike/snowshoe etc. and are not able to get to the trailhead because of snow (or downed trees) or are not be able to find the trailhead at all… we’ll get lost or maybe even find that the trail is burnt or that the valley is so full of smoke you can’t see the nearby mountains. Our tent has been stolen, we’ve had large animals in camp, we’ve ran out of water with multiple miles still left and we’ve spent entire days walking in the rain. Traveling provides a whole different set of uncomfortable situations: not knowing the language or what you’re eating, getting sick, or perhaps spending hours or even days waiting for that bus or plane.

Kinabatangan Rain Storm

It can and will rain on your birthday…especially if you’re in the Bornean Rainforest…get ready to be soaked… I was happy to be wearing shorts for this boat ride.

These “not so fun,” surely uncomfortable, possibly disappointing, occasionally dangerous experiences are what we learn the most from. We can’t be afraid of the challenge….the only solution is to embrace it. Sometimes embracing the uncomfortable is nearly impossible, especially when you’re frustrated, exhausted and feel like screaming, but if you can do it, if you can stay in the moment, you might find something beautiful, something enjoyable.

Pole Creek Fire B/W2

A burnt forest means tons of wildflowers… well, after awhile anyway.

Pole Creek flower

Hello beautiful… I’m happy you’re here.

Some of my best experiences were born in uncomfortable moments….finding the lone flower in a burned out forest, sharing a meal of horse intestines with new friends, or rerouting a pre-planned itinerary. By embracing the uncomfortable, the disappointing, the challenging I have found freedom. SO let go of your expectations and find the beauty.

Sapa friends

Our friends treated us to a dinner of horse intestine and apricot wine followed by a trip to the love market.

Sapa friends love market

Helped the guys decide on new shirts at the Sapa Love Market.


Vista Butte Snowshoe

Vista Butte Autumn and Steve

We made it to the top!!! What a view!!!

This winter season hasn’t necessarily been the best for outdoor pursuits, but Steve and I have managed to go snowshoeing at Vista Butte Sno-Park twice this season. It’s literally a twenty minute drive, at most, from our house, it’s relatively easy and it has pretty decent views of Mt. Bachelor, South Sister and Broken Top. Honestly we like this trail because it is little used, so we can let the dogs run around and play in the snow without having to worry about them getting in the way of other snowshoers/skiers.

Quick Stats

Distance: 4 miles roundtrip

Time: 3 hours or less

Difficulty: moderate

Season: mid-December through March

Dog Friendly: Well…if you go to the Deschutes Forest Service site they say dogs are restricted, but the trail is little used, so I don’t think there is a big deal…just don’t leave doggy landmines around for unsuspecting snowshoers/skiers.

Pros: Close to Bend, not much trail traffic, terrific views with little work

Cons: Shares a busy parking space on the side of the highway with snowmobilers, crosses two snowmobile tracks

Permit: Sno-Park Pass required Nov.1 to May 1

Vista Butte view of Mt. Bachelor

Mt. Bachelor

To get to the trailhead head west on Highway 46 for about 18 miles. The Vista Butte Sno-Park is on the right side of Hwy. 46 and is literally just a wide space in the highway directly before the turnoff for Sunriver (Hwy. 45). The parking area for Vista Butte will probably have a handful of snowmobile trailers, but don’t worry you only see/hear them in a couple of places on the trail.

Vista Butte Sal and Jedi

Sal and Jedi in action!!!

For Steve and I this is a pretty easy snowshoe and I think most people in moderate shape will have an okay time with it. The trail gains around 700 ft over about 2 miles with the first quarter mile essentially completely flat. The trail gradually begins to gain elevation.

Vista Butte trail Steve

Loving the fresh air!!! And don’t forget the blue diamonds mark the way.

At about a half-mile in you will get a glimpse of your destination through the trees. And you’ll come to a junction with the lower loop trail. I’ve heard that the lower loop trail is more gradual, but we took the upper loop both times and it was beautiful, so I can’t tell you from experience. The trail does cross two snowmobile tracks, so be mindful and put your pups on leash, so no one gets hurt.

Vista Butte Ice 1

It was super icy when we went up the first time…pellets of ice everywhere.

Vista Butte Bachelor BW

Bring on the snow!!!

Cross the snowmobile tracks and stay on the Butte Trail. You’ll come to an area labeled Bruce’s Ballpark…I’m not sure what the story is behind that, but continue past it and head up the hill along the main trail. There are occasionally boot paths that take a short cut up to the top, but protect the plant life and stay as the trail….trust me it’s not much further. You will be stoked when you get to the top!!! You’ll be blessed with views of Bachelor, Broken Top and South Sister.

Vista Butte view of South Sister and Broken Top

South Sister on the left and Broken Top on the right.

Vista Butte Broken Top View

Broken Top peeking through the trees

Vista Butte View

Looking northeast… I think…

Return the way you came, or maybe check out the lower loop trail.

Vista Butte Ice

One more pic of the crazy ice!!!

Resources

Snowshoe Routes: Oregon by Shea Andersen
Deschutes Forest Service website


Buddha Disneyland

After the long bus journey from Ayuthaya to Chiang Mai Steve was itching to rent a scooter, so I obliged and we decided on a route up to Doi Suthep and beyond. We were surprised by the presence of so many hawkers selling trinkets, scarves, snacks and drinks and children demanding baht for photos. Lines, lines and more lines….it’s slow going and you’re constantly being bumped and jostled. Tourists pay a fee (I don’t remember how much) and if you’d like you can buy an offering from one of the vendors.

Doi Suthep...just a few kilometers outside is sheer madness...yes, it's a holy place, but it's a profitable racket too....Hurry up and line up!!!

Doi Suthep…just a few kilometers outside is sheer madness…yes, it’s a holy place, but it’s a profitable racket too….Hurry up and line up!!!

Even though the hawkers tainted our first impression of the temple the architecture was beautiful and it was interesting to see people practicing their religion, but it was also disturbing to see all of the camera wielding tourists taking their pictures.

Just as guilty as the others I also snapped a few pictures.


doi_suthep_architectural_detail

Architectural detail at Doi Suthep.

doi_suthep_1

Just a few of the many Buddha statues at Doi Suthep.

doi_suthep

Remember that reference to Buddha Disneyland I made earlier….you better get in line to say your prayers and make offerings…and don’t forget to walk in the correct direction!!!

doi-suthep_buddha

I was trying to get a picture of the interior of the temple, but it’s quite difficult to take pictures when a monk is blessing you with holy water by flinging it in your general direction and this monk (out of the picture) must have thought I needed a lot of blessing because it kept coming my direction.

You can only take my picture if you give me candy....or Baht...naughty little girl!!!

You can only take my picture if you give me candy or Baht…naughty little girl!!!

After spending the morning at Chiang Mai’s equivalent of a Buddhist Disneyland, complete with child hawkers and the occasional hustler, we were tired of the tourist trap and decided to make for the hills.

Wat Do You Want Me To Do?

Buddha sculptures at Ayuthaya

Buddha sculptures at one of Ayuthaya’s many ruins.

You want me to do Wat? Oh yes, here’s a good idea lets cycle to EVERY one of Ayuthaya’s Wats… I’m sure it will only take a couple of hours. NOT!!! It’ll take more like 9 very hot and very sore hours of riding in the tropical sun….mind you, we did take a few detours and got a little lost (as in…on the road to Bangkok..oops!). I’m a white girl and the Southeast Asian sun made me feel like I was being fried in a vat of vegetable oil. In hind sight it was still pretty fun….but it’s now three weeks later and today was the first day that I’d even considered putting a bike between my legs.

Ayuthaya ruins

Lovely ruins in Ayuthaya

Wat Ayuthaya

One of the many wats scattered around Ayuthaya.

I liked sweaty Ayuthaya….which when pronounced correctly sounds more like “UTI” but more lilting and not quite as painful (barely). Ayuthaya lacked the throngs of creepy old men, coked out 20 somethings, and the painfully stereotypical tourists that plague Bangkok’s Khao San Road and Royal Palace.

We saw tons of ancient ruins,beautiful wats, and even human remains. And we ate the best Pad Thai we’ve ever had. Our guesthouse was decent enough….our bed was huge, the sheets were pretty clean, the shower was cool and the price was right. And Grandma gave me hug when I wished her a “good morning.”

ayuthaya ruin detail

Details, details, details.

Ruins in Ayuthaya

Ruins in Ayuthaya

Ayuthaya Ruins

More ruins in Ayuthaya


The details and architecture of the wats was truly impressive and seemed to defy gravity, but obviously time and the asian sun had taken their toll. With well over a hundred pics of wats and ruins it was hard to get the motivation to sift through the pics to pick out the best.

Cycling around turned out to be a great way to see the wats, the Portuguese settlement, and the countryside….We even saw a rice farmer hack up a snake that was slithering across the road….we tried to figure out why, but he didn’t speak any English and we don’t exactly speak Thai.

Didn't I mention human remains earlier??? Here they are...loads of remains buried at the Portuguese settlement in Ayuthaya.

Didn’t I mention human remains earlier??? Here they are…loads of remains buried at the Portuguese settlement in Ayuthaya.

country road ayuthaya

Off of the island you can find these beautiful (and flat) roads that will take you through rice paddy after rice paddy.

After too many close calls on our kamakazi bike ride  I was ready to toss the bike into the back of a Tuk Tuk and say “F%&k it!!” but I didn’t….and I survived.

The light at the end of the tunnel

The light at the end of the tunnel.

Quick Stats

BJ’s Guesthouse (200 Baht) was right off of Soi 2 on the island. Upstairs rooms were more atmospheric, but we took the downstairs room for the gigantic bed and the cooler temps.

The train to Ayuthaya from Bangkok was probably 80 Baht, more or less, for second class seats, but it’s even cheaper if you go with the locals.

Bike rentals were 30-40 Baht for the day.

We were given a printed map (free) from one of the TAT offices that showed where all the wats and other sights were located.

Travel Pic of the Week

Mount Roraima, Venezuela, Guyana, Brazil

After watching Out of the Wild I can’t help, but want to go to Mount Roraima

After watching Out of the Wild I realized that if I want to explore this part of the world, I must do it before babies!!! I guess South America will be one of our next big trips.

Mount Roraima borders Venezuela, Guyana, and Brazil. The area is protected as a UNESCO World Heritage Site and is located in Venezuela’s Canaima National Park and Angel Falls, at 3287 feet, is the tallest waterfall in the world!

Here is a NY Times article about Mr. Im Thurn’s climb to the top of Roraima from the 1800s.

Goat Lake Loop

Mt. Adams from the Goat Lake trail

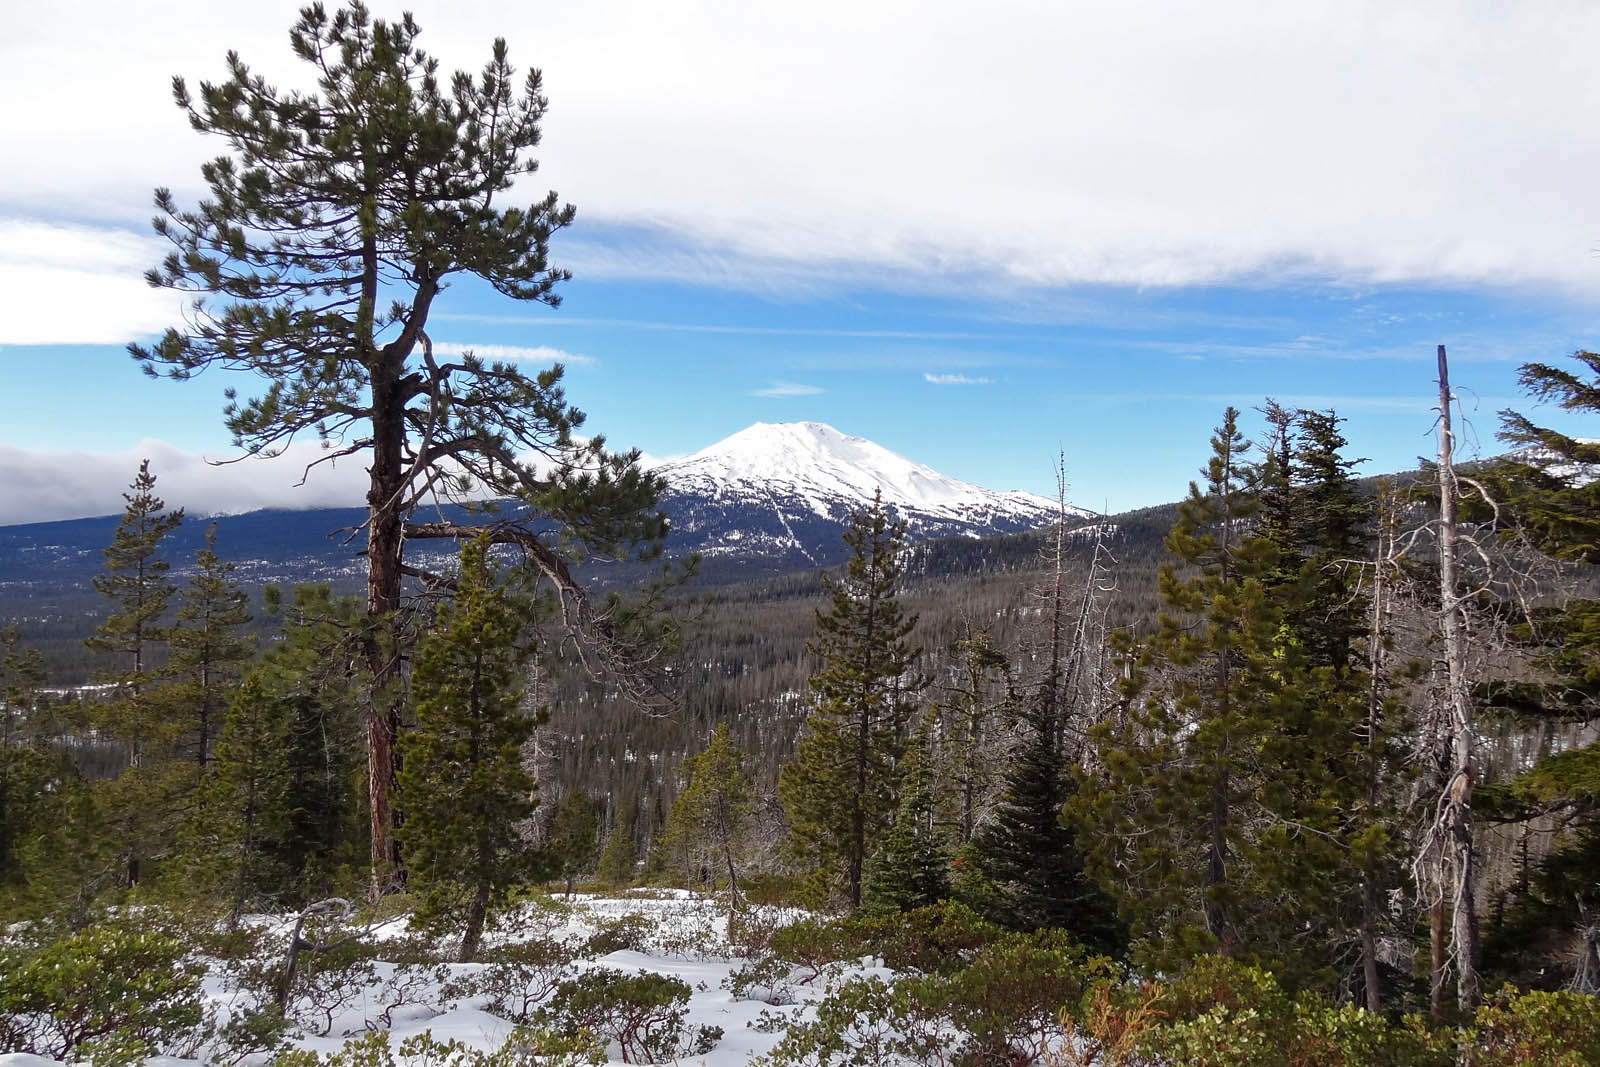
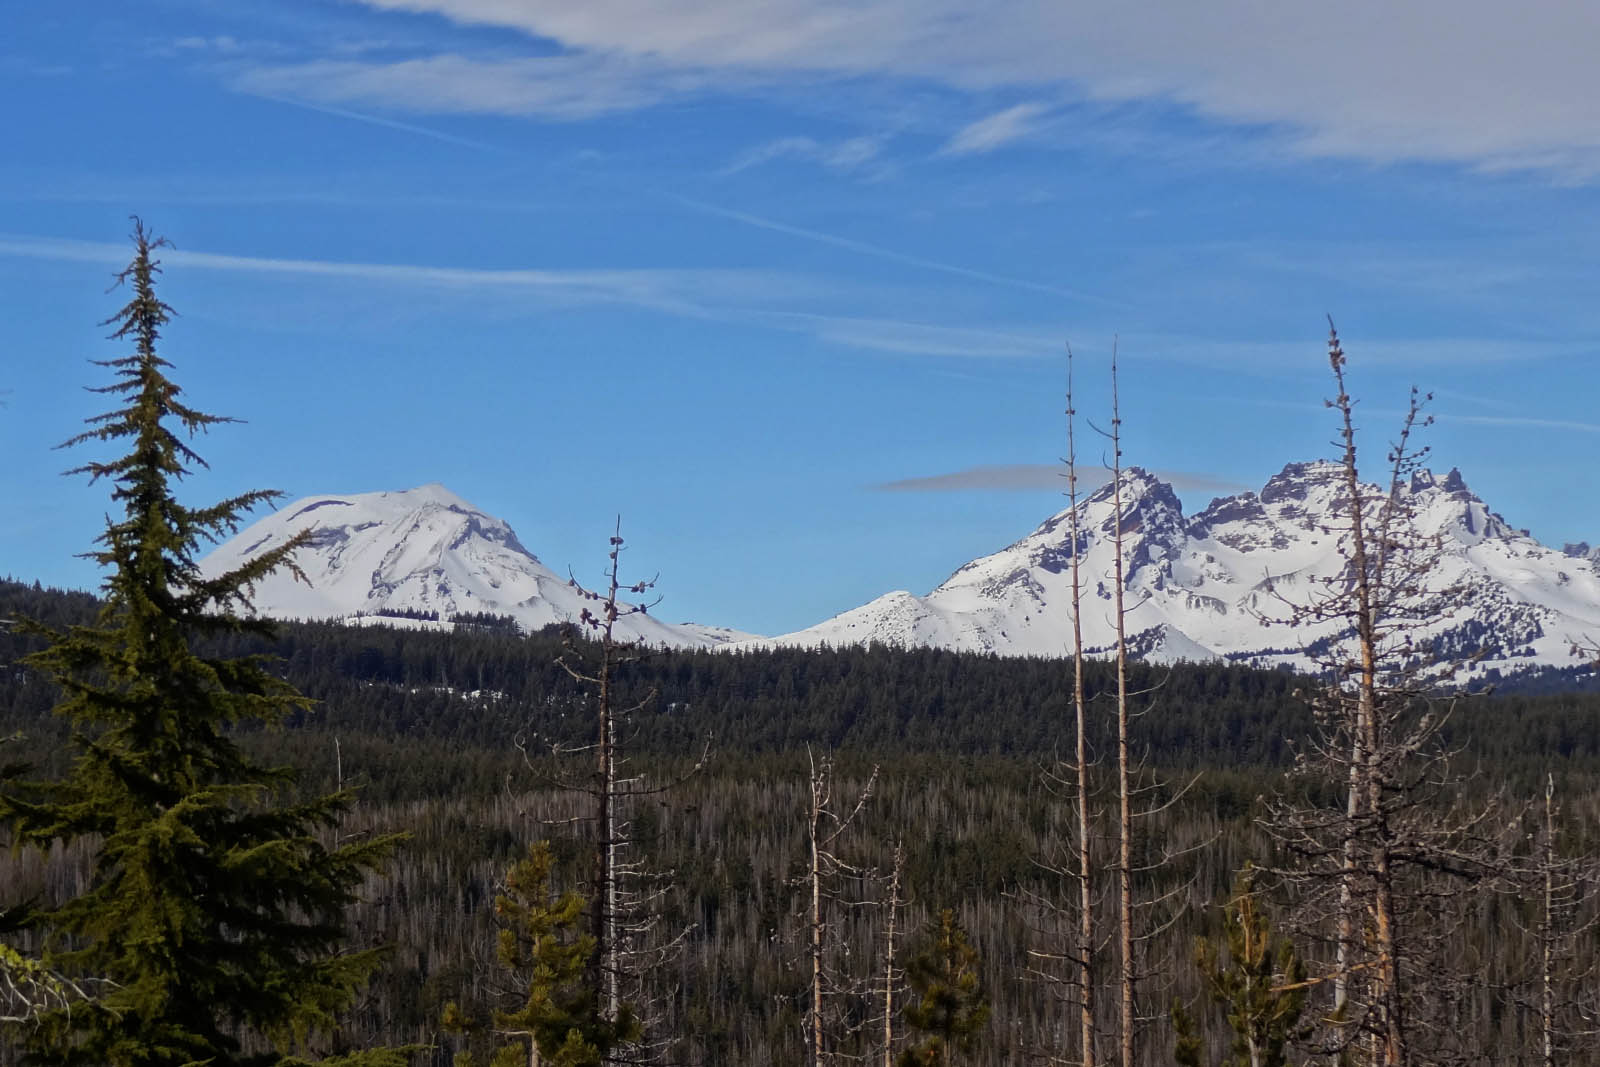
View of Mt. Adams from the Goat Lake trail

During September’s cold snap Steve and I decided it would be a good idea to hit the trails for a quick overnighter in the Goat Rocks Wilderness. Braving sleet and below freezing temperatures we hiked up to Snowgrass Flat, then over to Goat Lake and down Jordan Basin to complete a loop hike starting at the Snowgrass Trailhead.

Quick Stats

Distance: 13 miles (with tons of options for side trips, ours ended up being around 16 miles)

Time: 2 days or more

Difficulty: Moderate (only because of the exposure and 3000 ft. elevation gain)

Season: End of July to October

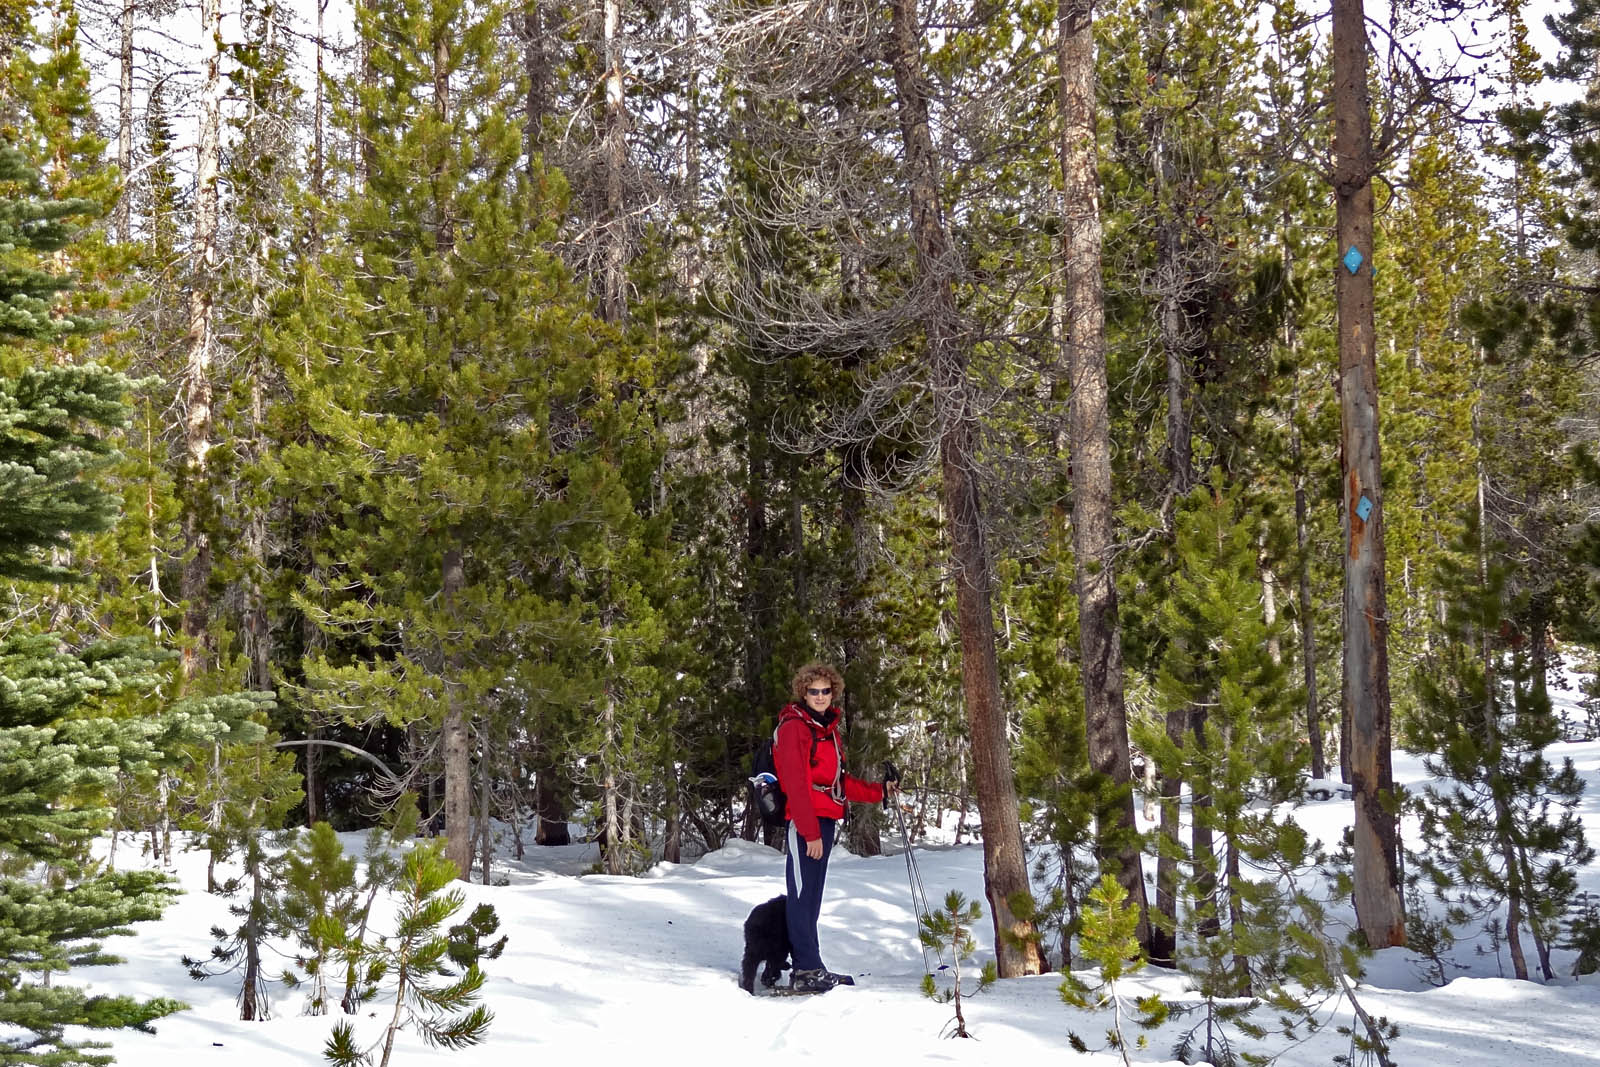
Dog Friendly: Yes, as long as they know to stay on the trail and are confident walking on narrow trails with steep drop offs

Pros: Stunning views of Mt. Adams, wildflowers, mountain goats, plenty of water

Cons: busy trail, horse use in places, weather can change quickly

Day 1

On the first day we hiked up to Snowgrass flat on trail #96, a pretty straightforward easy 4 mile hike. After continuing about a mile past the flat to find a site closer to day two’s destination, and finding the best sites already taken, we ended up backtracking to the flat and camping near a pretty little creek. Shortly after we set up camp a small storm blew in and brought with it sleet, hail and very cold temps. We were so happy we packed warmly and brought our waterproof gear.

Wildflowers at Snowgrass Flat

There were still tons of wildflowers in Snowgrass Flat

If we hadn’t been worried about the weather we could have done one of the great side trips on the PCT over to Cispus Basin or up to the summit of Old Snowy, both have been highly recommended by fellow hikers.

Wildflower filled meadow on Lily Basin trail between Snowgrass Flat and Goat Lake

Atleast our detour to find a suitable camp led us to this wildflower filled meadow on the Lily Basin trail between Snowgrass Flat and Goat Lake.

Day 2

As I was laying in the tent debating whether to leave my positively toasty Marmot sleeping bag or not, I looked up and thought “Wow, there’s no condensation we must have vented the tent really well.” NOT, all that condensation was FROZEN. The whole meadow had a frozen layer of frost/ice over it, but happily we woke up to a stunning view of Mt. Adams peeking through the trees on the other side of the flats. We were glad to see the skies had cleared and we would finally have some views. A hiker we passed on the trail said his thermometer read 22 degrees Fahrenheit….brr, no wonder everything was frozen.

Mt. Adams from Snowgrass Flat

Good morning and goodbye clouds. Our morning view of Mt. Adams.

Lily Basin Trail Sign

Continue on the Lily Basin trail to get to Goat Lake.

Wildflowers Goat Rocks Wilderness

Bring on the wildflowers; they’re never ending on the beautiful trail.

The hike over to Goat Lakes on the Lily Basin trail (#86) is pretty moderate, just a slow and steady uphill with spectacular views of the valley, wildflowers, and Mt. Adams. After about 3 miles you’ll reach Goat Lake, which was still partially frozen in September. If you’re lucky you might see some mountain goats up on the slope behind the lake; we saw at least 20 mountain goats above the lake.

Wildflowers with Mt. Adams in background

Didn’t I promise you views and wildflowers!!!

View of the valley from the Lily Basin trail before Goat Lake

View of the valley and Mt. Adams from the Lily Basin trail before you reach Goat Lake.


Goat Lake, Goat Rocks Wilderness

Goat Lake still partially frozen….maybe if you have really amazing eyes you can see the mountain goats on the slope behind the lake.

Hiking down from the lake the trail is fairly narrow and was even muddy in a couple places, so watch your step. If you turn around and look back the way you came you have a great view of Old Snowy.

Old Snowy, Goat Rocks WIlderness

Here’s your view of Old Snowy.

Less than a mile past the lake is a junction which takes you up to the top of Hawkeye Point and over to Lily Basin. To complete the loop continue straight and head down into gorgeous Jordan Basin,which looks like it just drops off at the base. There is a really pretty campsite near the bottom, although fairly exposed.

Jordan Basin, Goat Rocks Wilderness

The trail through steep Jordan Basin. The trail in this picture is characteristic of the trails on this loop hike.

Continue on trail 95 or to check out the Goat Ridge lookout detour to 95A which rejoins 95 as it heads back down to the start of your hike. To complete the loop either walk on the road back to your car or take the trail marked Snowgrass Flats that goes through Berry Patch and over to where your car is parked at the Snowgrass trailhead.

As you pack for this trip don’t forget the Ten Essentials and to pack your layers.

Planning Resources:

100 Classic Hikes in Washington
by Ira Spring and Harvey Manning

One Night Wilderness: Portland: Quick and Convenient Backcountry Getaways within Three Hours of the City
by Douglas Lorain

Washington Trail Association

The Ten Essentials

10 Essentials for Backpacking

Everything you need for safe backpacking: navigation, sun protection, insulation, illumination, first-aid, fire, repair kit, nutrition, hydration, and emergency shelter

If you’re headed in to the wilderness don’t be an idiot….be PREPARED! Shit can hit the fan….and it eventually will. Here are the 10 Essentials necessary for safe wilderness travel.

1. Navigation

Delorme PN-60 GPS
Topographic map and compass….and make sure you know how to use them. The time to learn is not when you’re lost in the wilderness. We always take a topo, compass, and GPS…you never know what could happen.

2. Sun Protection

Sunscreen and sunglasses….especially above treeline, or in the high desert.

3. Insulation

Layering is the easiest way to regulate your body temperature. Make sure to pack warm and waterproof clothing. Living in the Pacific Northwest I ALWAYS pack my Patagonia Torrentshell Jacket; it’s light enough and does an excellent job blocking wind and rain…and it didn’t cost an arm and a leg. Check the weather ahead of time and pack appropriately. It can get cold and windy especially at high elevations.

4. Illumination

A headlamp and/or a flashlight. Pack your headlamp for hands free light around camp and on the trail, but don’t forget to pack extra batteries.

5. First-aid supplies

And a couple Band-Aids don’t count. Make sure to pack a real first-aid kit with antiseptic wipes, neosporin, Band-Aids, tape, sterile gauze, pain-reliever, and butterfly bandages. If you’re taking your dogs make sure to pack for them too. Dove-Lewis Animal Hospital puts on a FREE clinic that discusses basic animal first-aid and gives great advice for trailside animal care. The next clinic is Nov. 3, 2012.

6. Fire

Bring multiple sources of firestarters. Lighter, waterproof matches, magnesium fire starters are all great and easy to use. We also take some strike-anywhere firestarters, which work great if you’re trying to get a fire started in wet conditions.

7. Repair kit

Knife, duct tape, needle and thread, multi-tool and whatever else you could see yourself needing to fix gear on the fly.

8. Nutrition

You need to eat. Make sure to pack extra and make it count, you never want to run out of food on the trail. Yes, you can pack chocolate…and I think you should, but don’t forget to pack some protein, fruit/veg and complex carbs. If you’re new to backpacking a great way to try a few different meals is with this Mountain House® Kit.

9. Hydration

You won’t last long without water…and getting giardia or some other waterborne parasite will put a damper on your trip, so pack a filter, SteriPEN, or purification tablets. You’re dog can get sick too, so be prepared to filter/treat their water too.

10. Emergency Shelter

If backpacking you’ll obviously have a tent or some other shelter device planned, but even on a daytrip accidents happen, so at the very least pack a reflective emergency blanket or bivy.