Big Slide Lake

Big-slide-lake-mt.jefferson-view

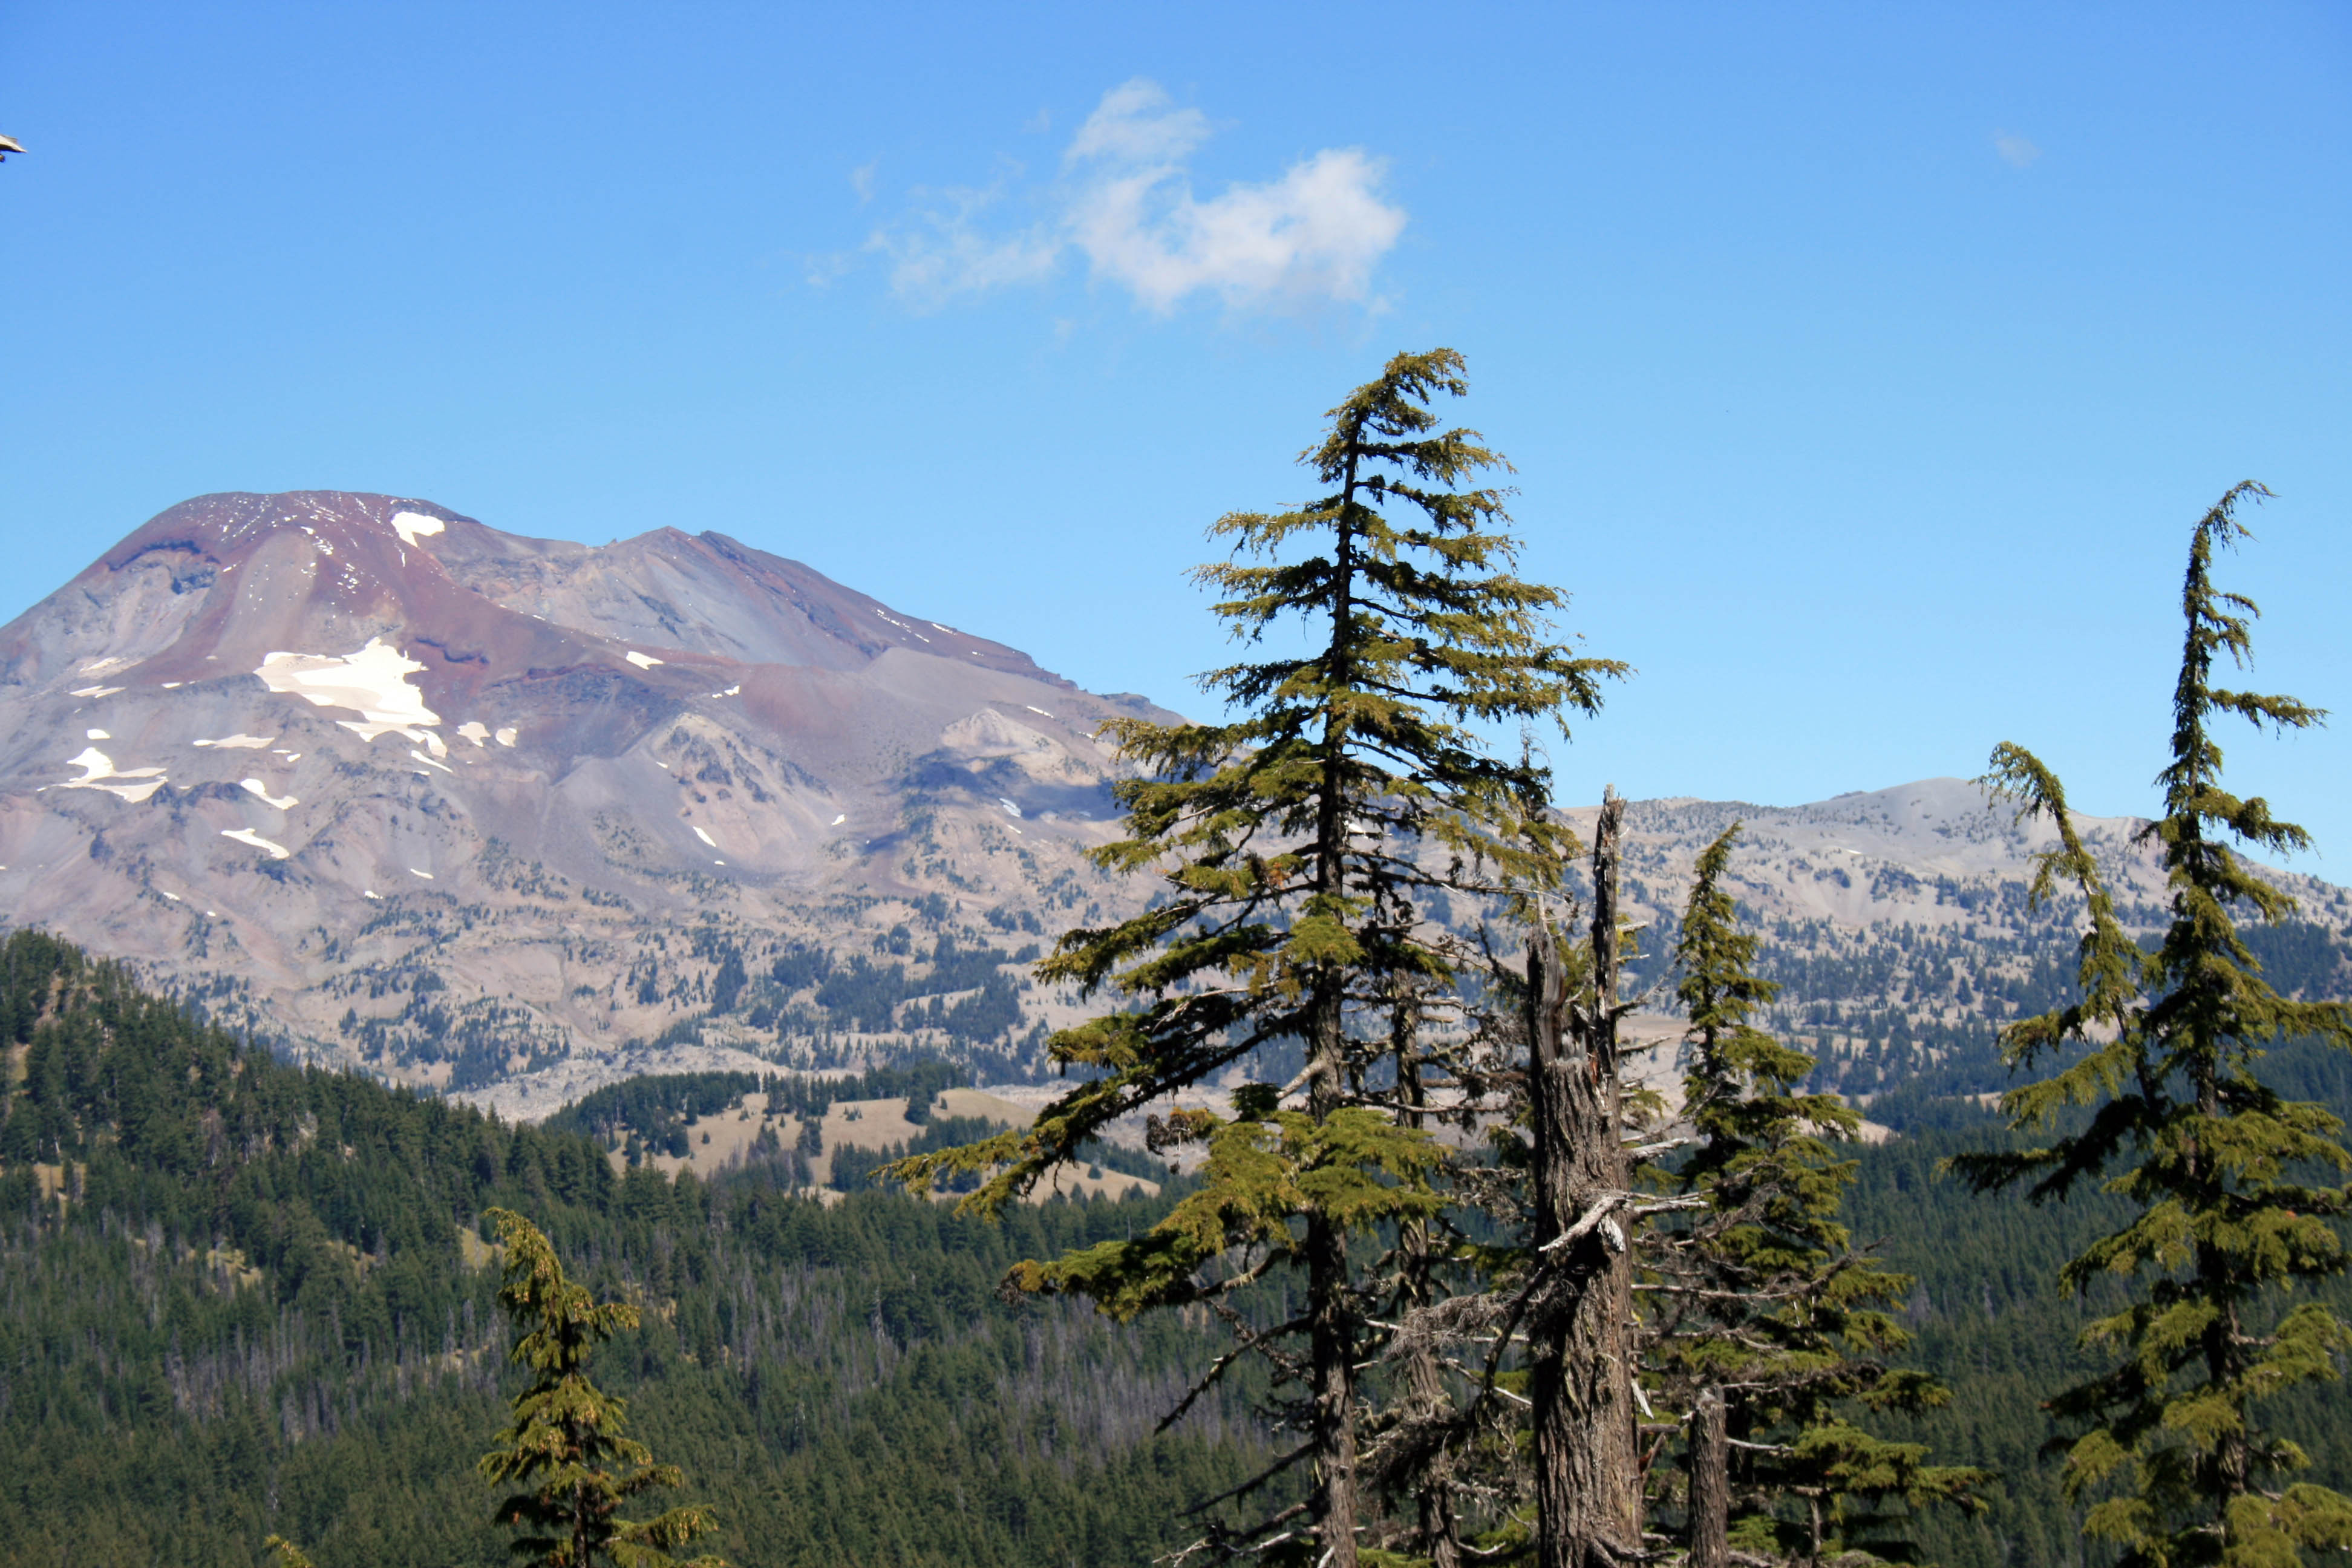
View from the forest service road…not too bad

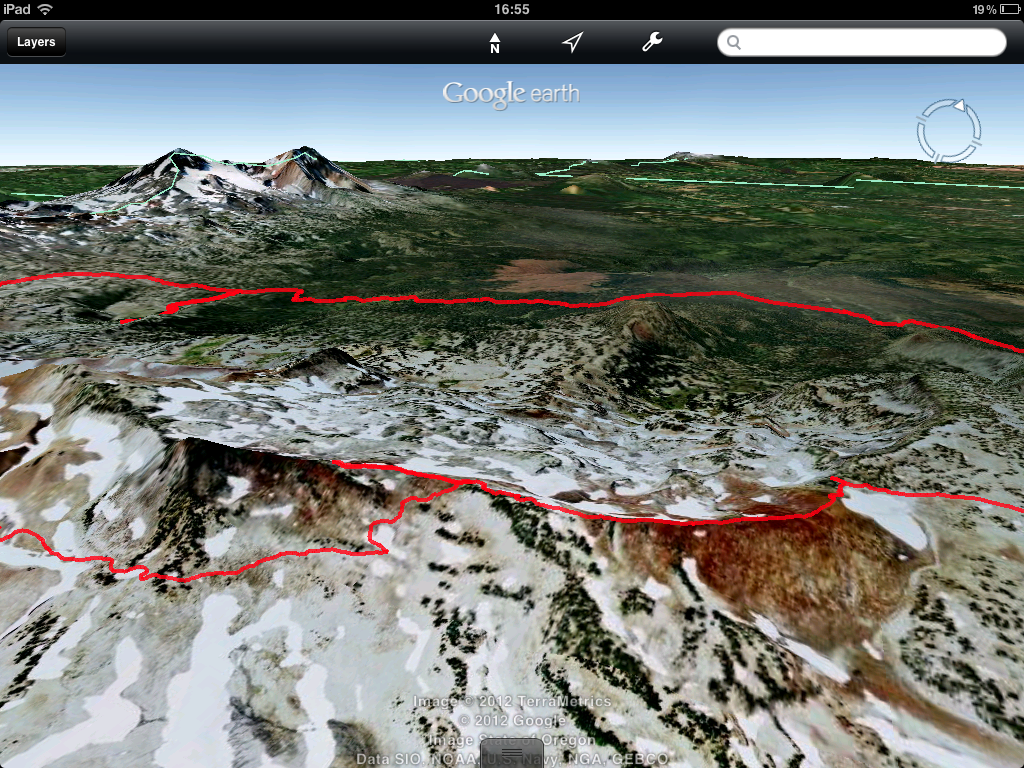
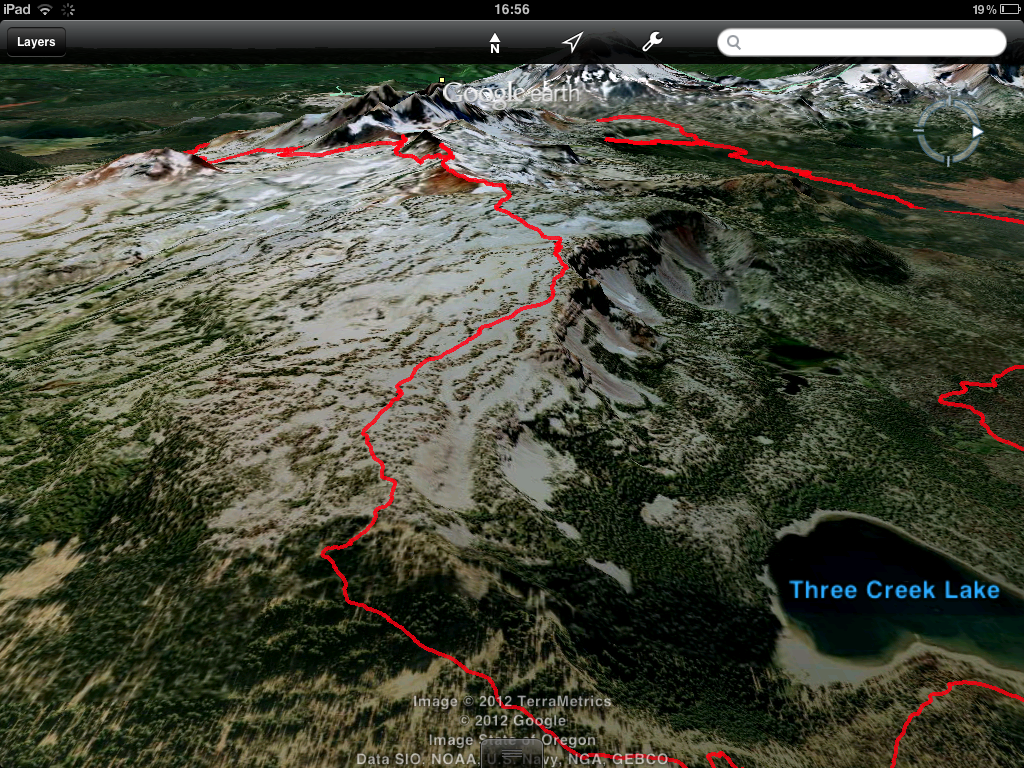
So this past weekend Steve, the pups and I went on our first backpacking trip of the season. We usually get started with our backpacking season earlier in the year, but this spring we went on a trip to Nicaragua and then we had the moms in town. Needless to say we were pretty pumped to be taking the weekend off to head up to the Bull of the Woods Wilderness. I think this is only the second hike I have ever done in Bull of the Woods, so it was nice to explore it a bit more. We took the Dickey Creek trail all the way up to Big Slide Lake where we camped for the night.

Quick Stats

Distance: 12 miles

Time: 4 hours each way

Difficulty: difficult, pretty steep in parts with loose rock, many logs to climb over, and a fun creek crossing

Permit: Yes, NW Wilderness Pass, get it ahead of time because there isn’t a pay station at the trailhead

Dog friendly: Yes, plenty of shade and creeks for cooling off in…and of course there is the lake too

Pros: Beautiful mossy forest, pretty lake and creek, trail wasn’t busy, wildflowers and rhododendrons,

Cons: steep and loose trail in spots, all uphill on day one and all downhill on day two, crowded weekend camping at the lake, people didn’t bury their poo

big-slide-lake-2

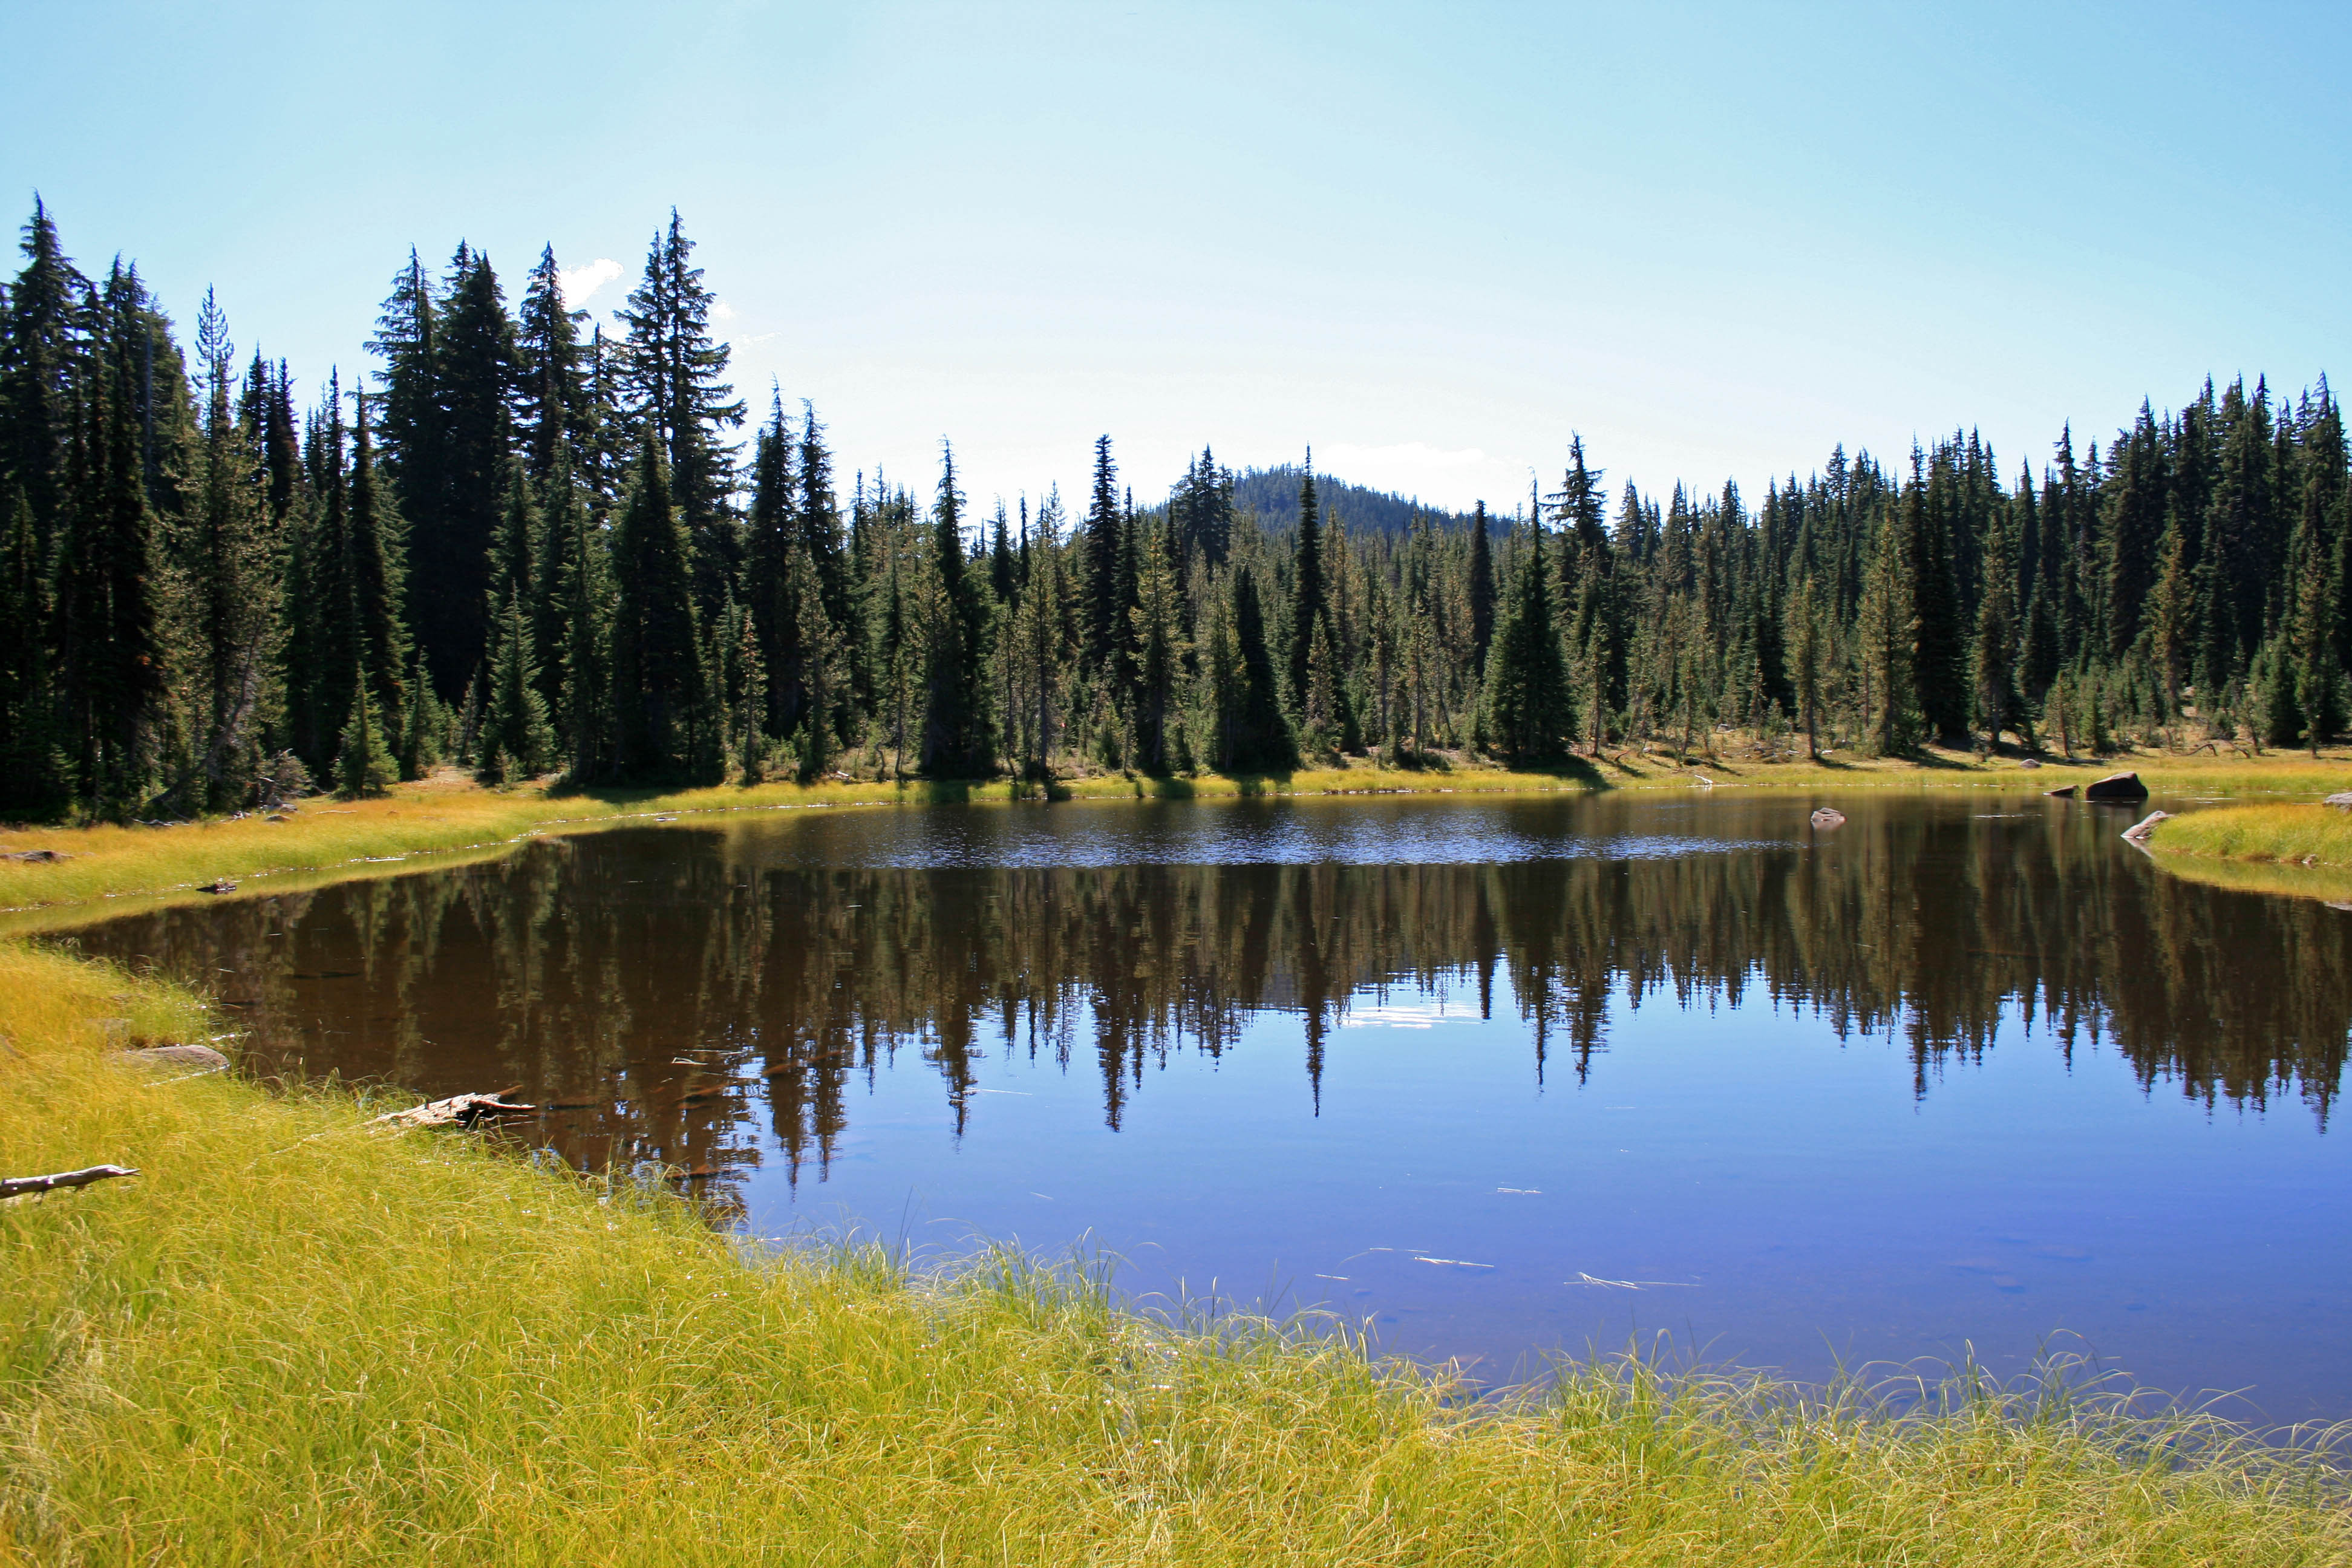
Our destination for the night…wasn’t quite warm enough for swimming.

It took us about three hours to drive to the Dickey Creek Trailhead from Bend. Our google directions had us take about an hours worth of gravel roads, which we didn’t really need to do, but it added to the sense of adventure, so why not? It took us the same amount of time to get home when we took mostly paved roads.

Big-Slide-lake-mossy-trail

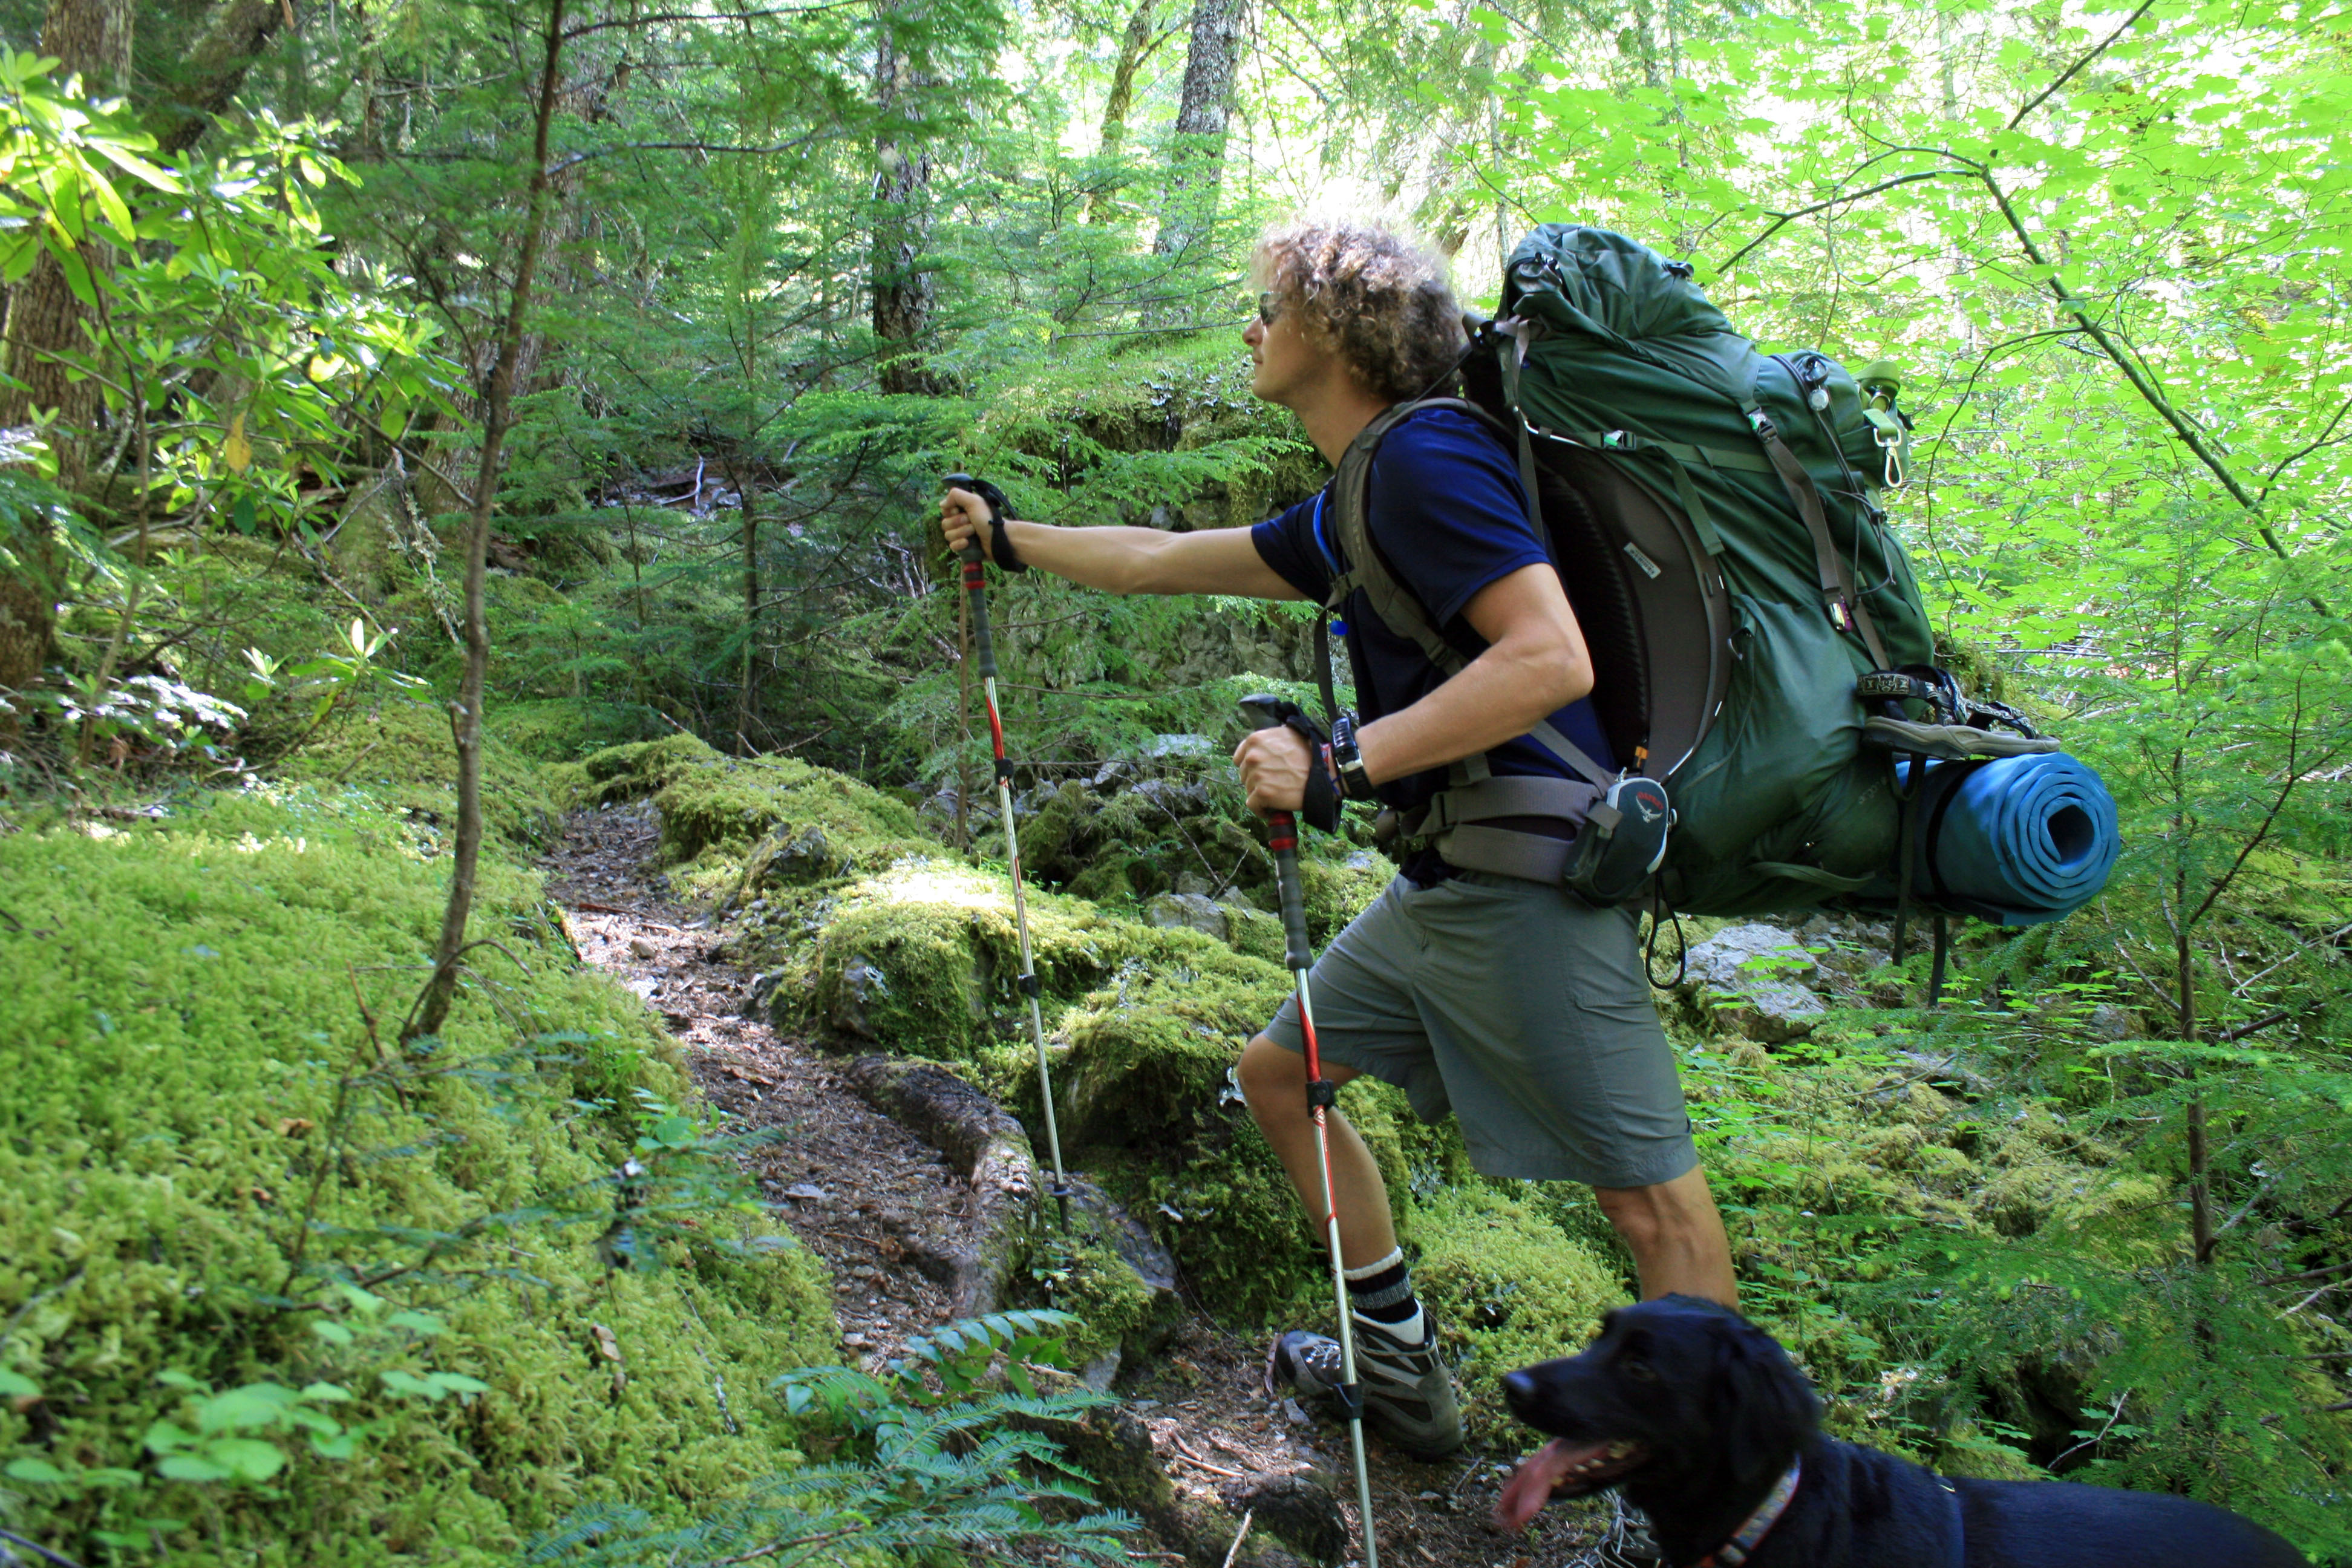
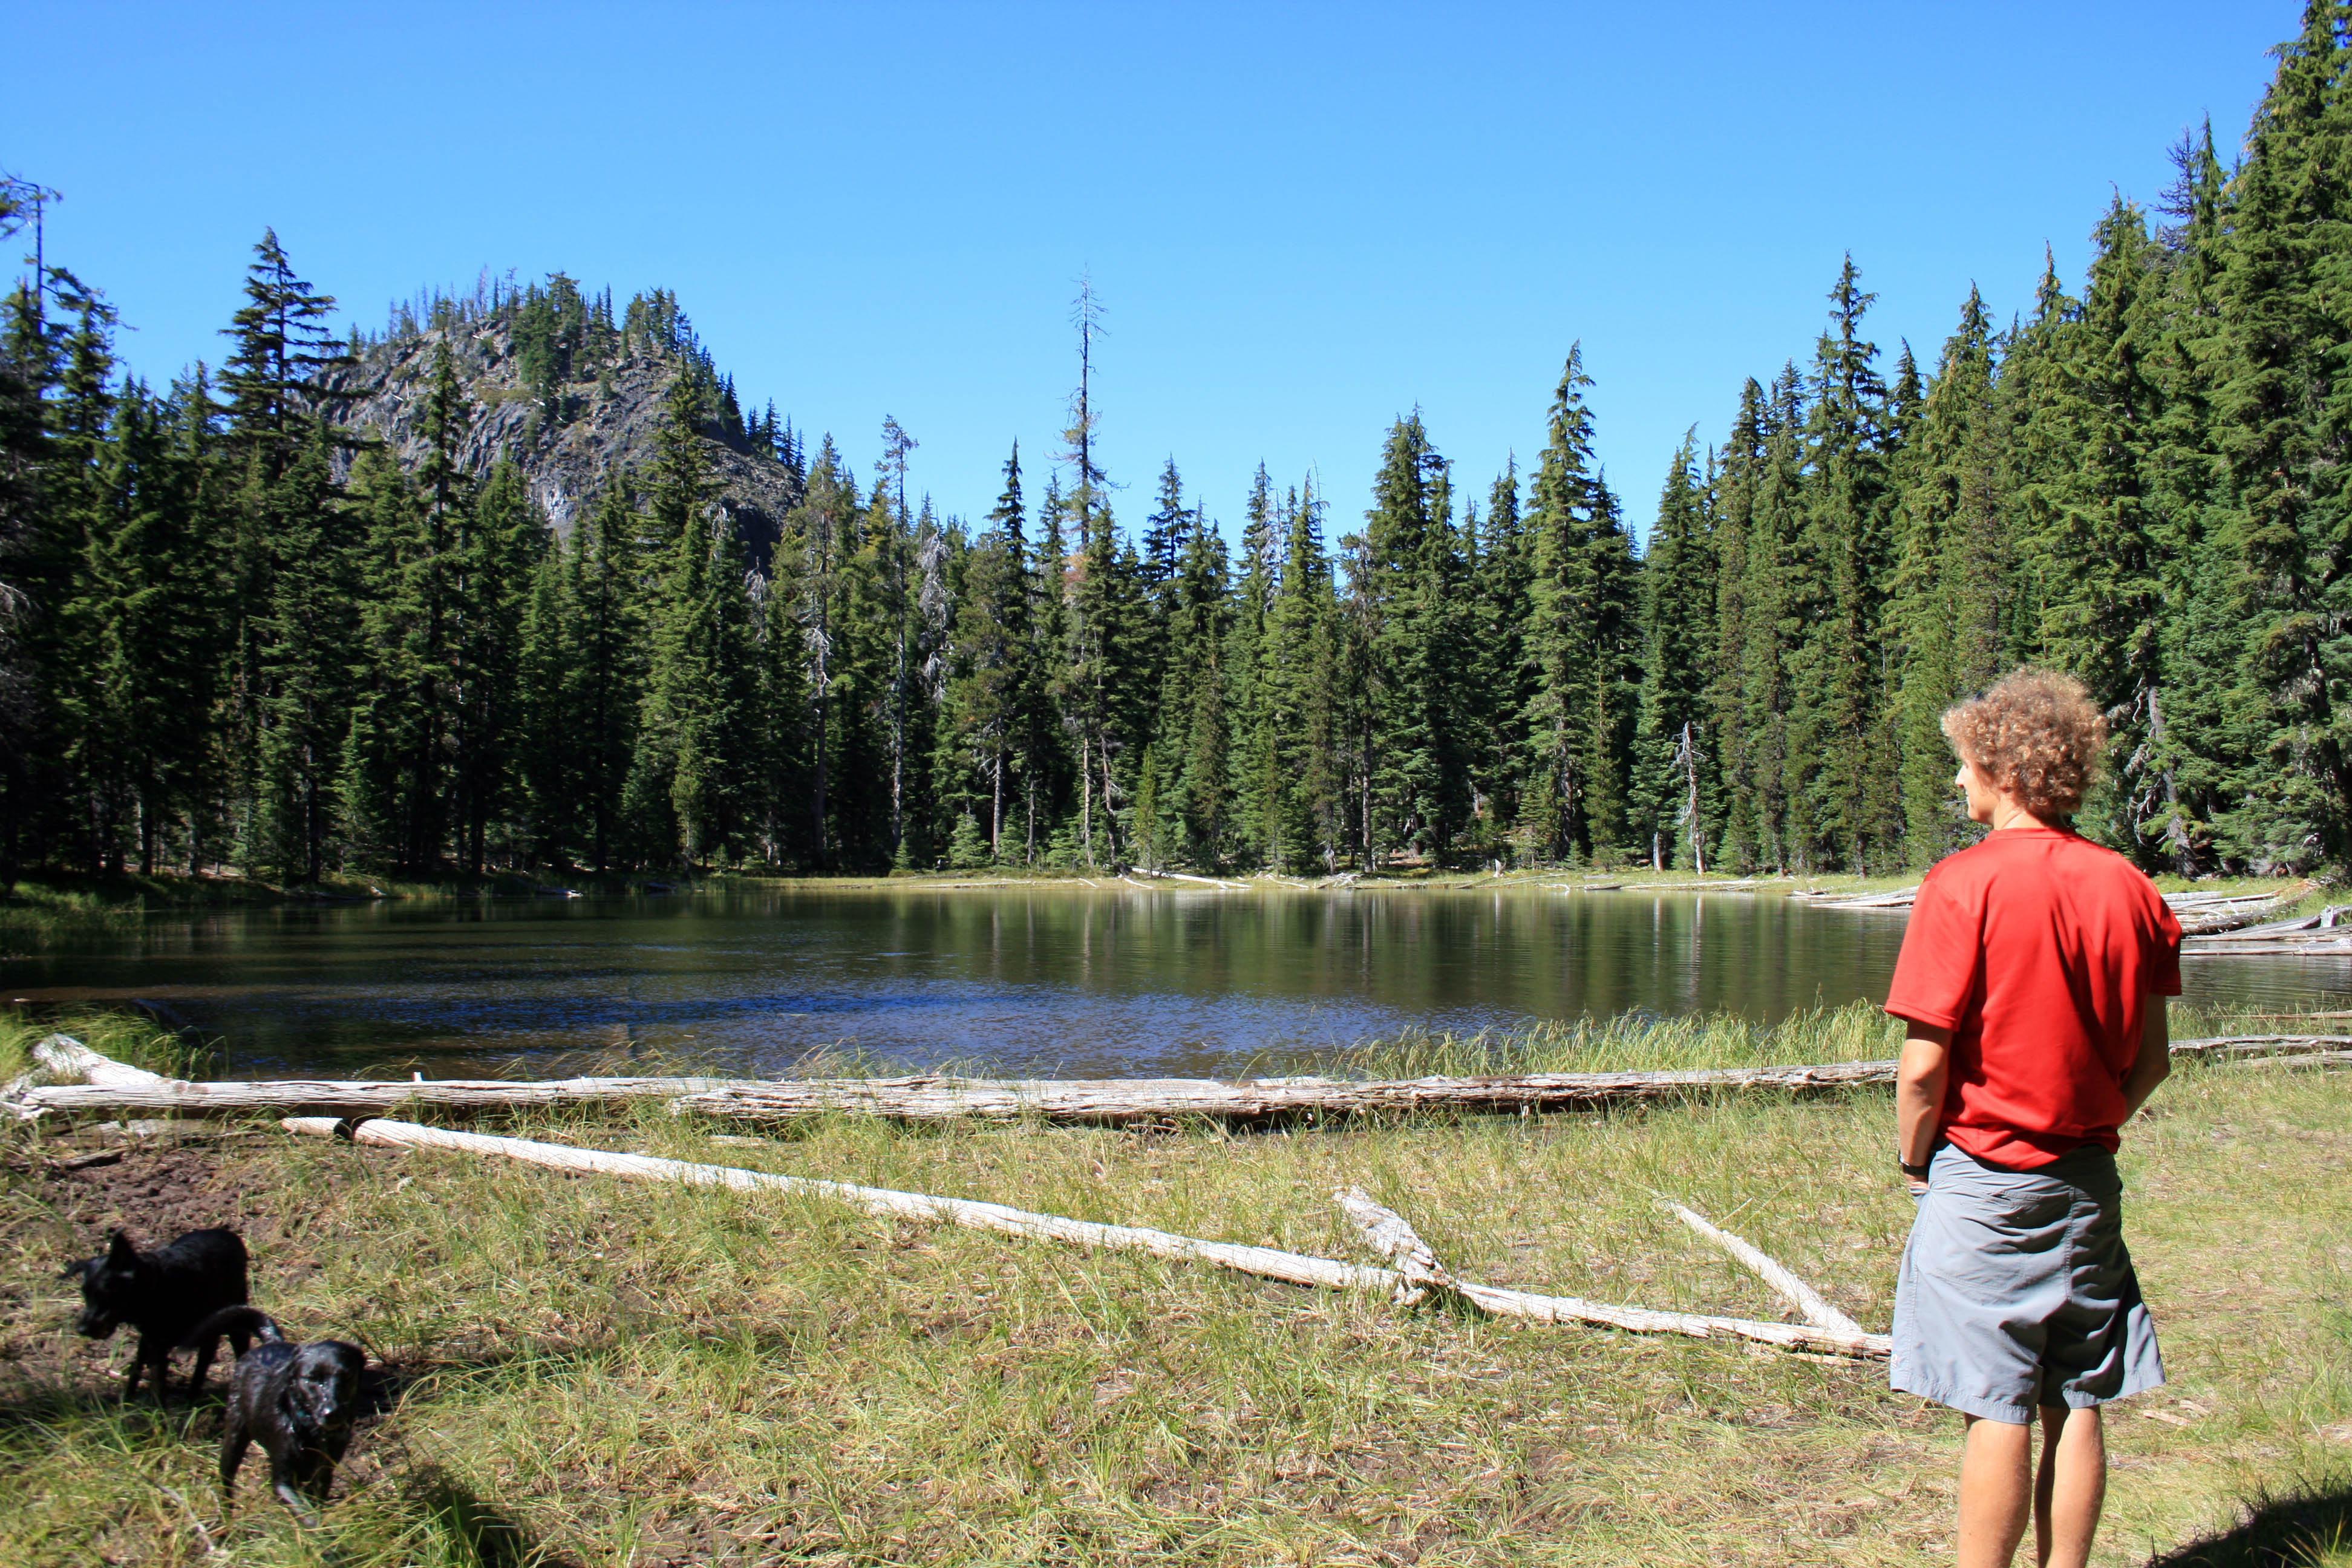
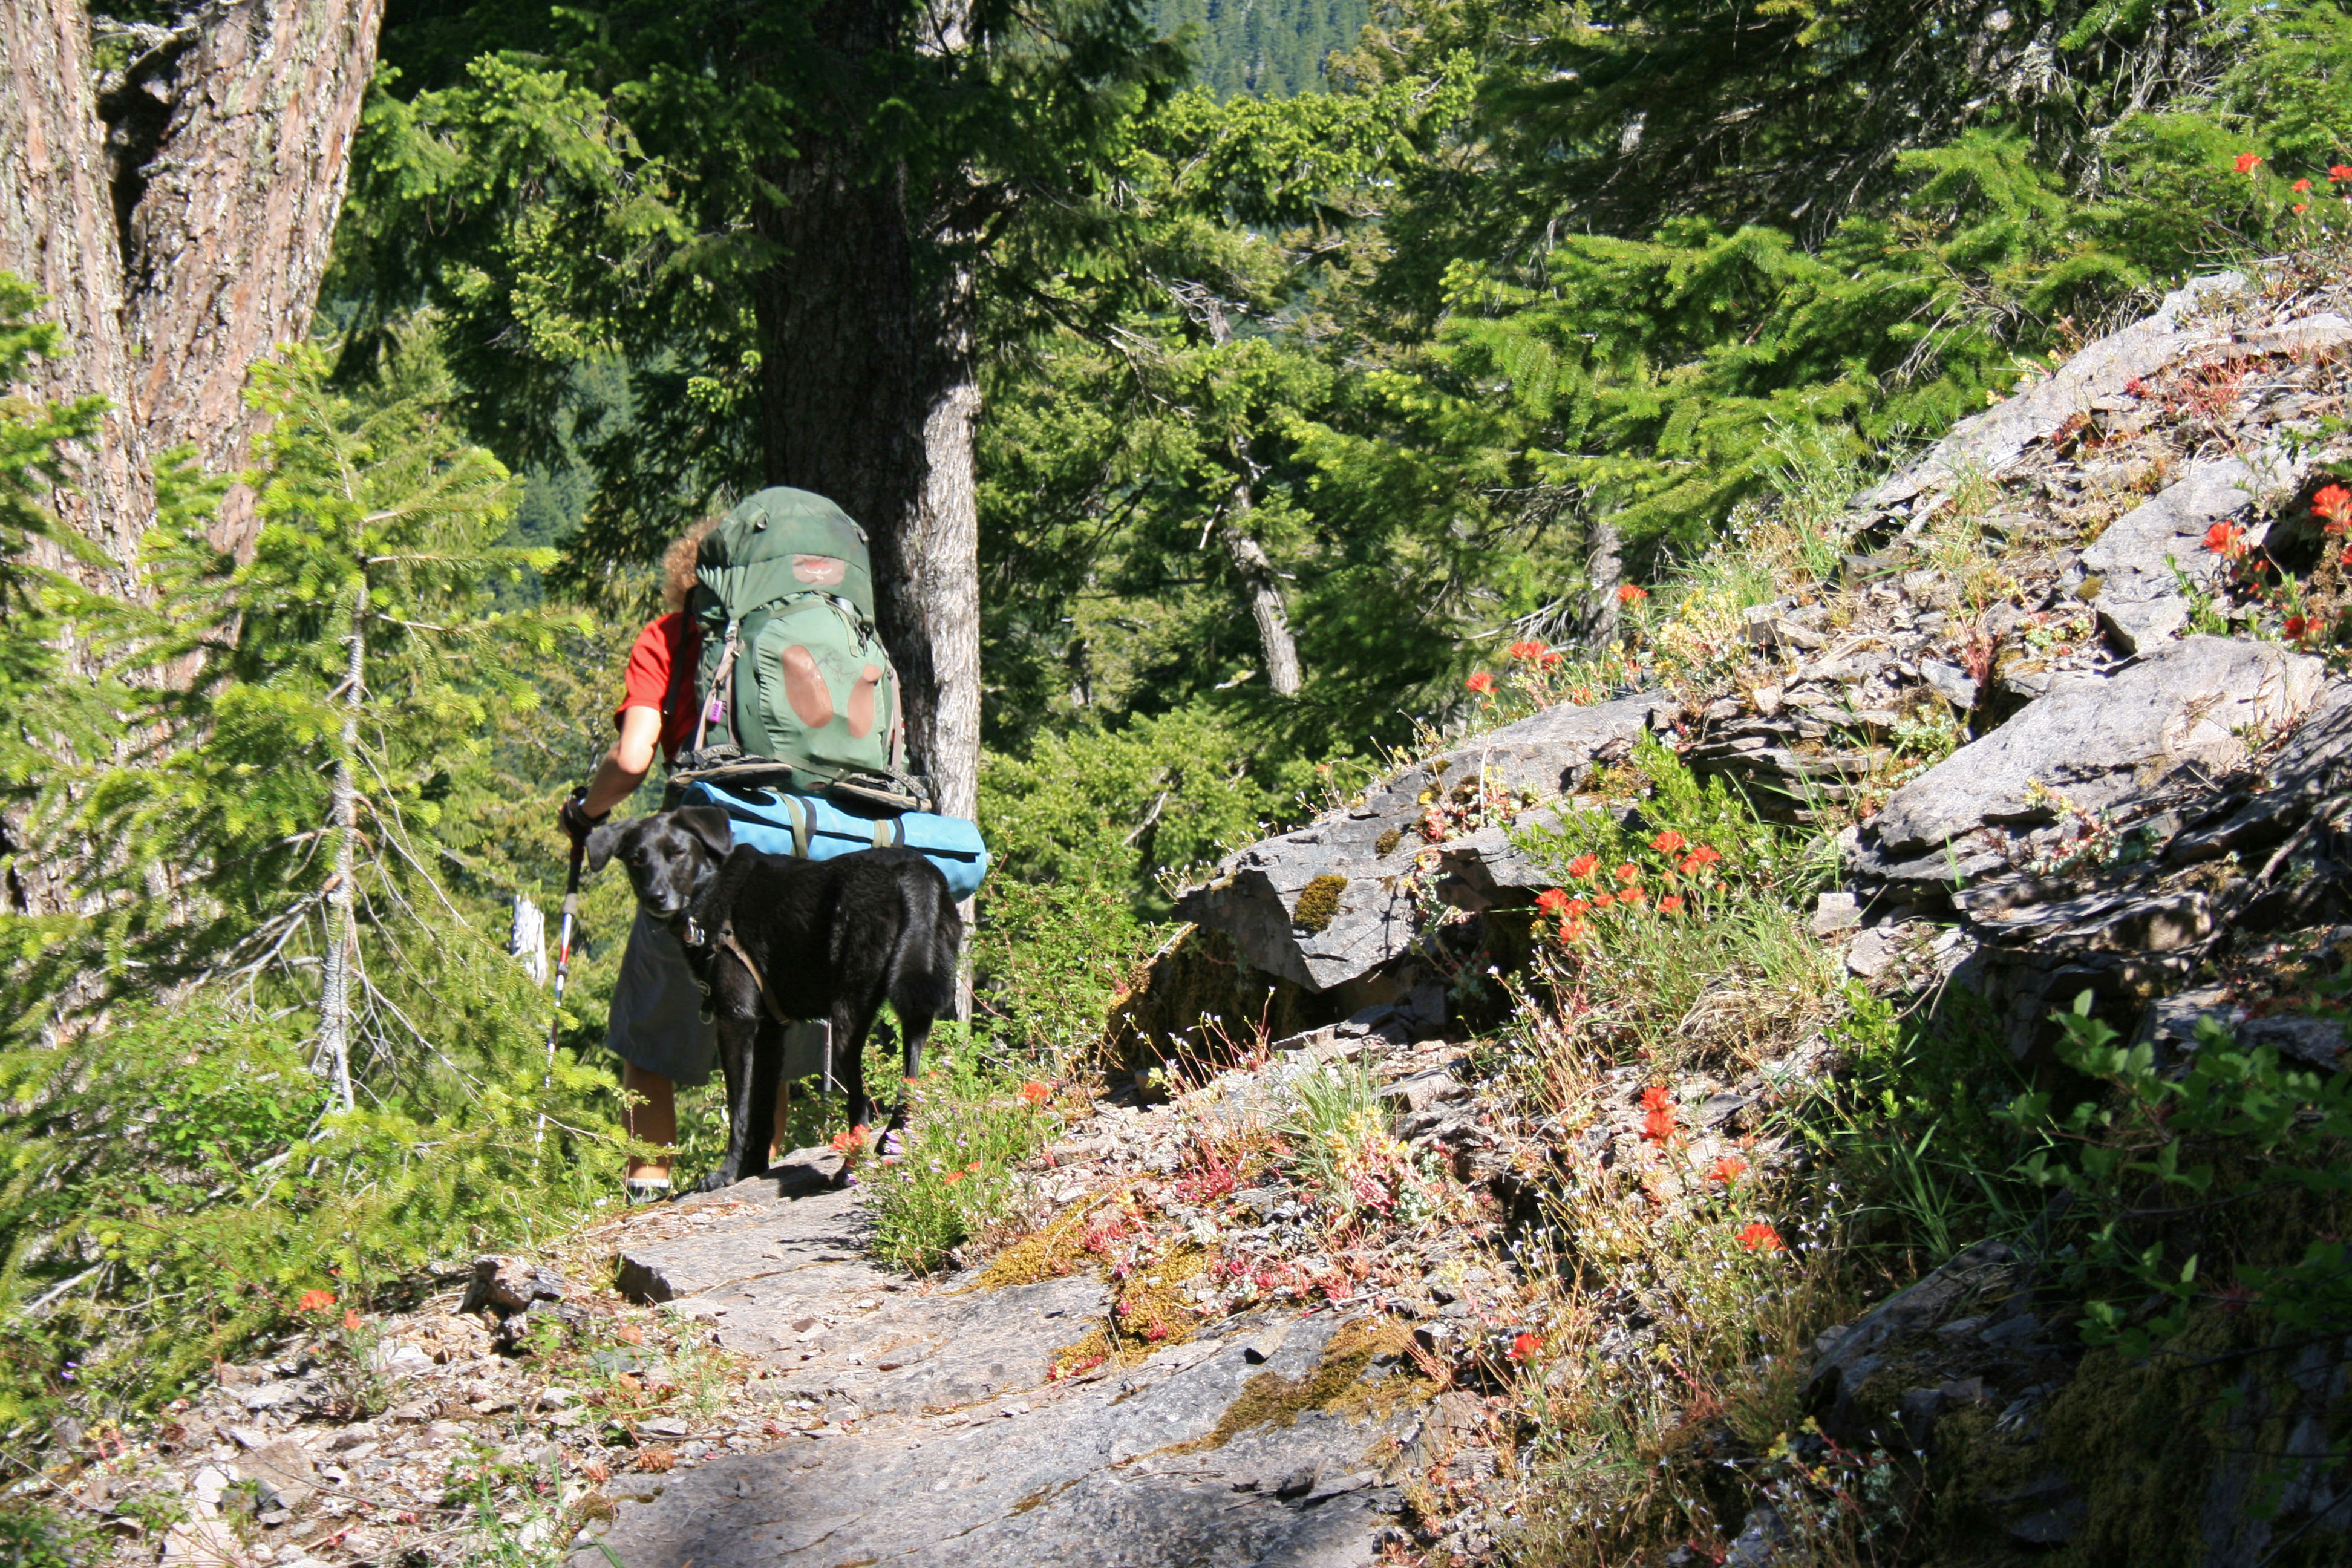
Steve…trying to look outdoorsy..or contemplative… I’m not sure

The Dickey Creek trail begins harmlessly enough as it follows an old forest road, but don’t be fooled. You will have multiple opportunities to fall on your ass as the trail steeply descends into the valley. Have fun with it! I didn’t! It took me 20 minutes to get down the first steep section because I was being stubborn and didn’t want to get out my trekking poles…. I ended up borrowing Steve’s for this section. Advice: Pack your poles and use them. Other people camping at the lake commented multiple times that they wish they had brought theirs.

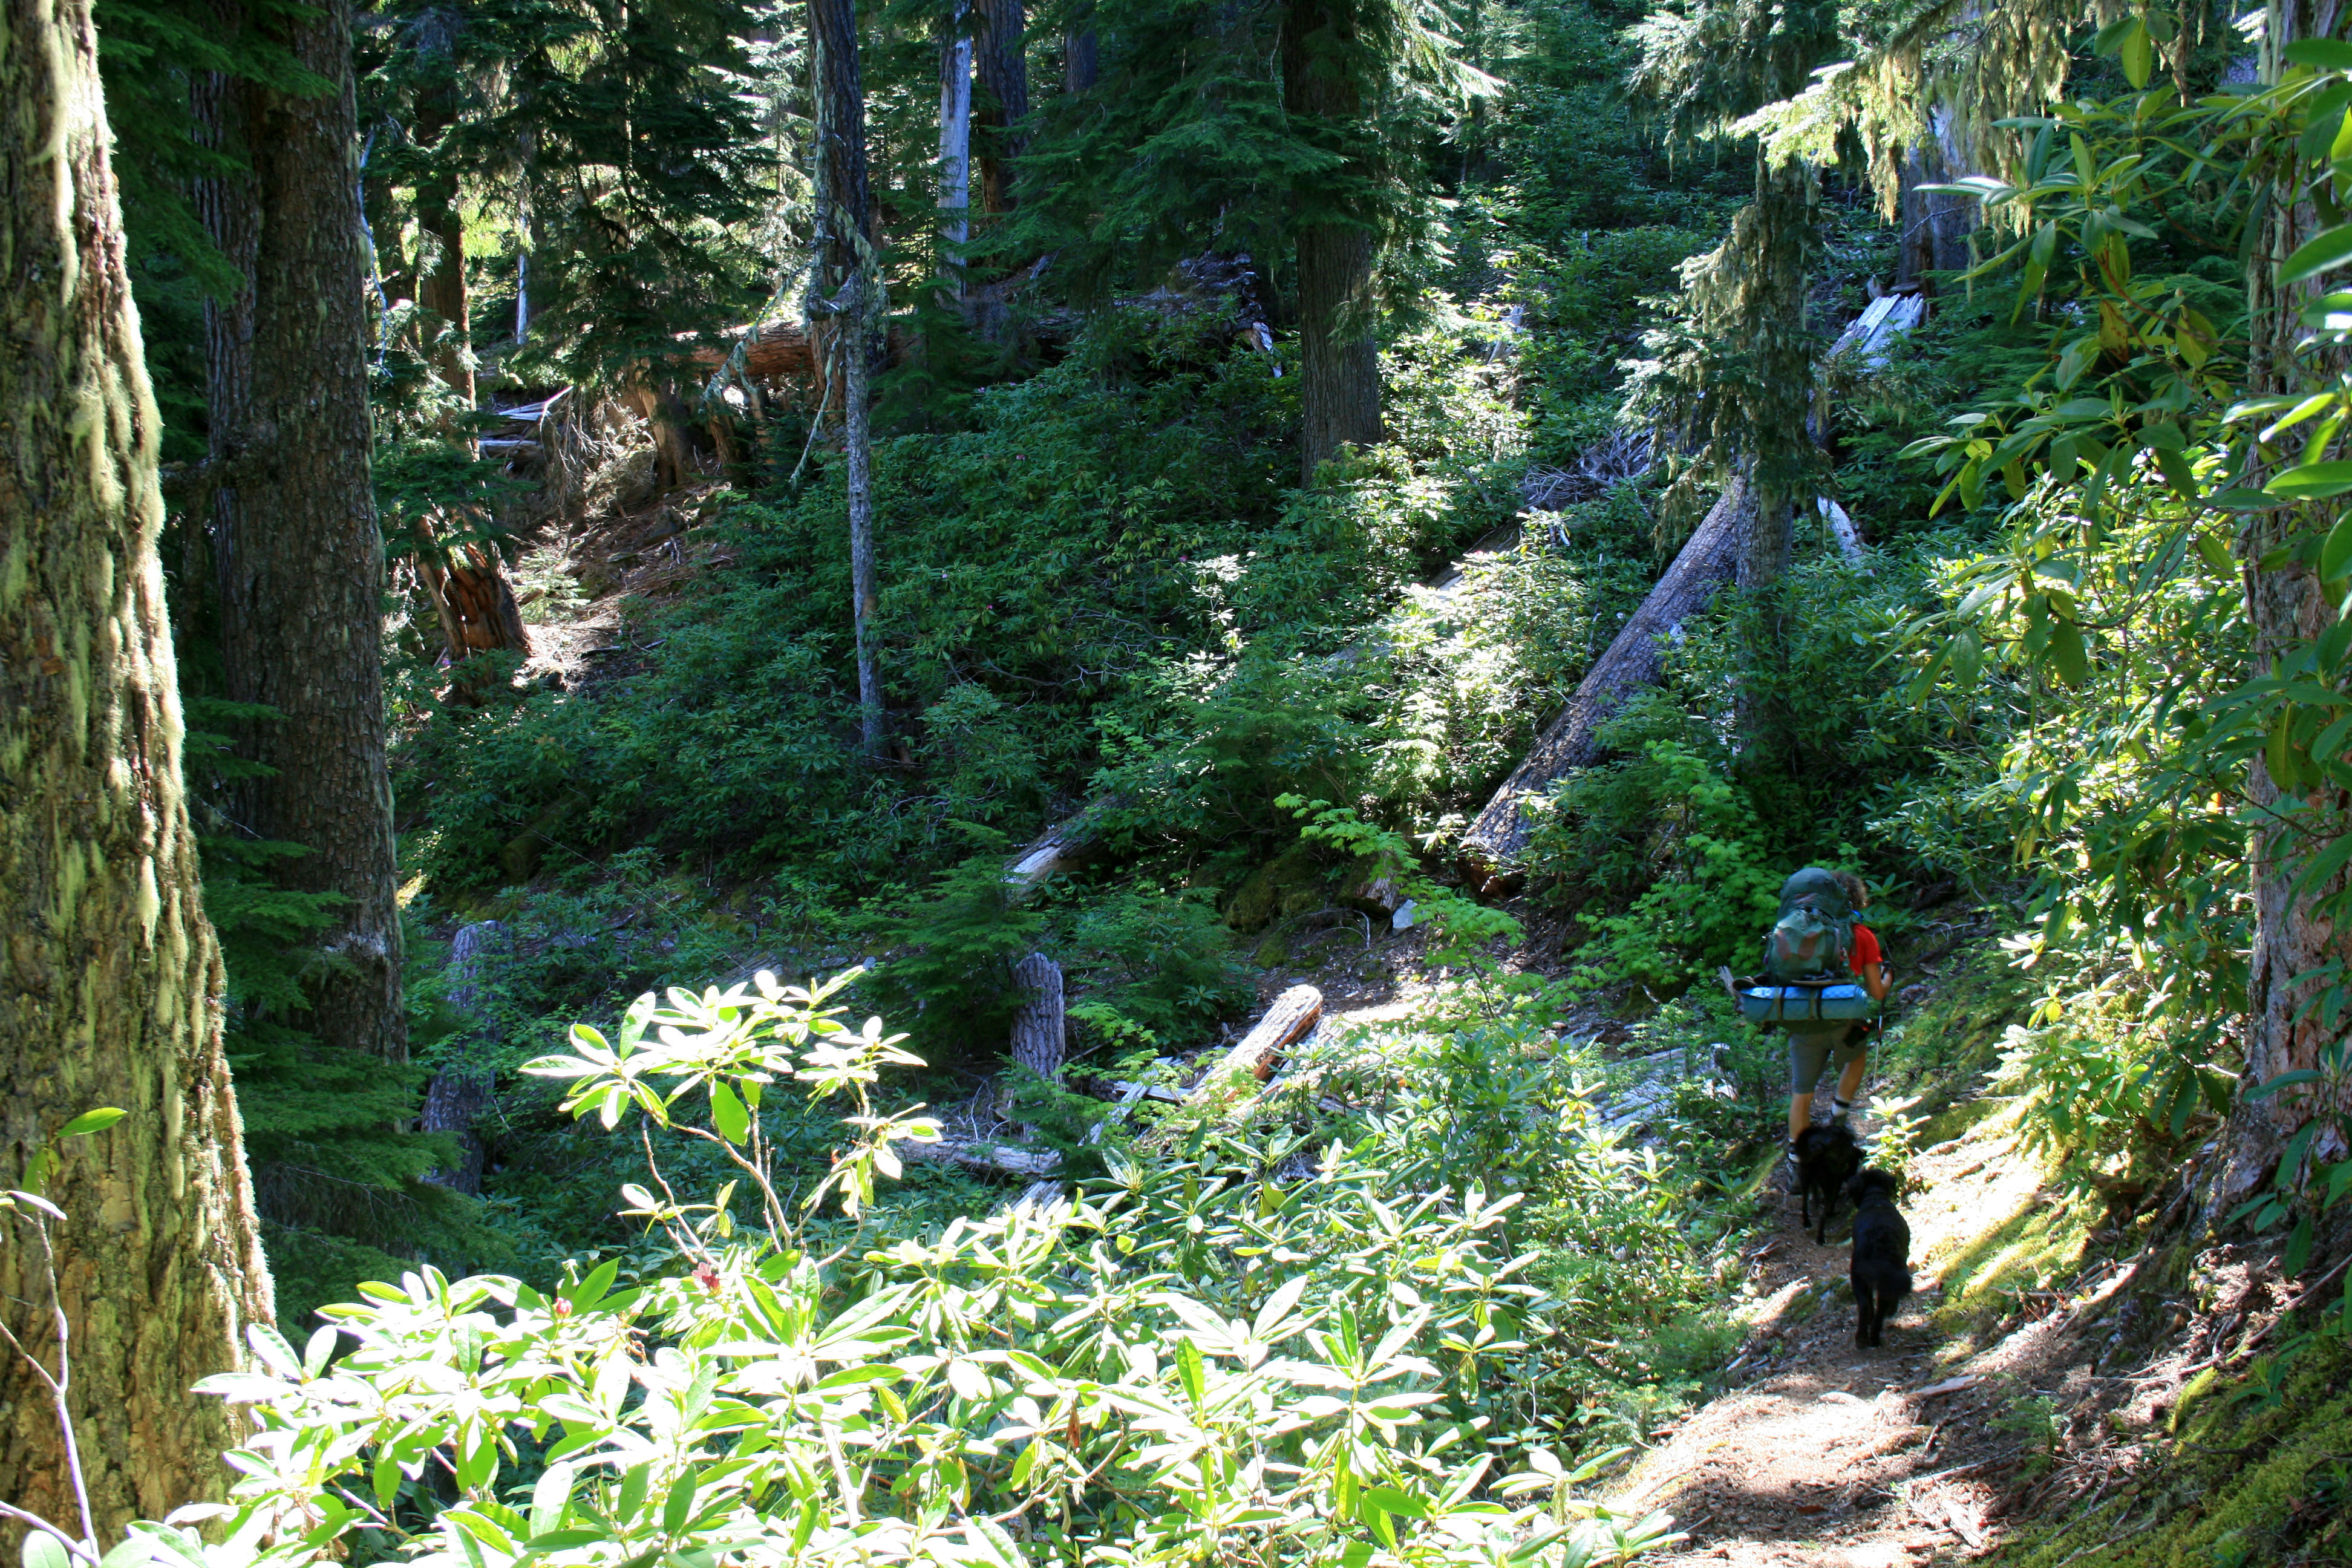
Thankfully, after the trail makes its initial descent into the valley via slippery slopes and some massive steps it becomes a beautiful hike through moss covered forest as it gently meanders by massive trees and over a few logs.

Big-slide-lake-forest

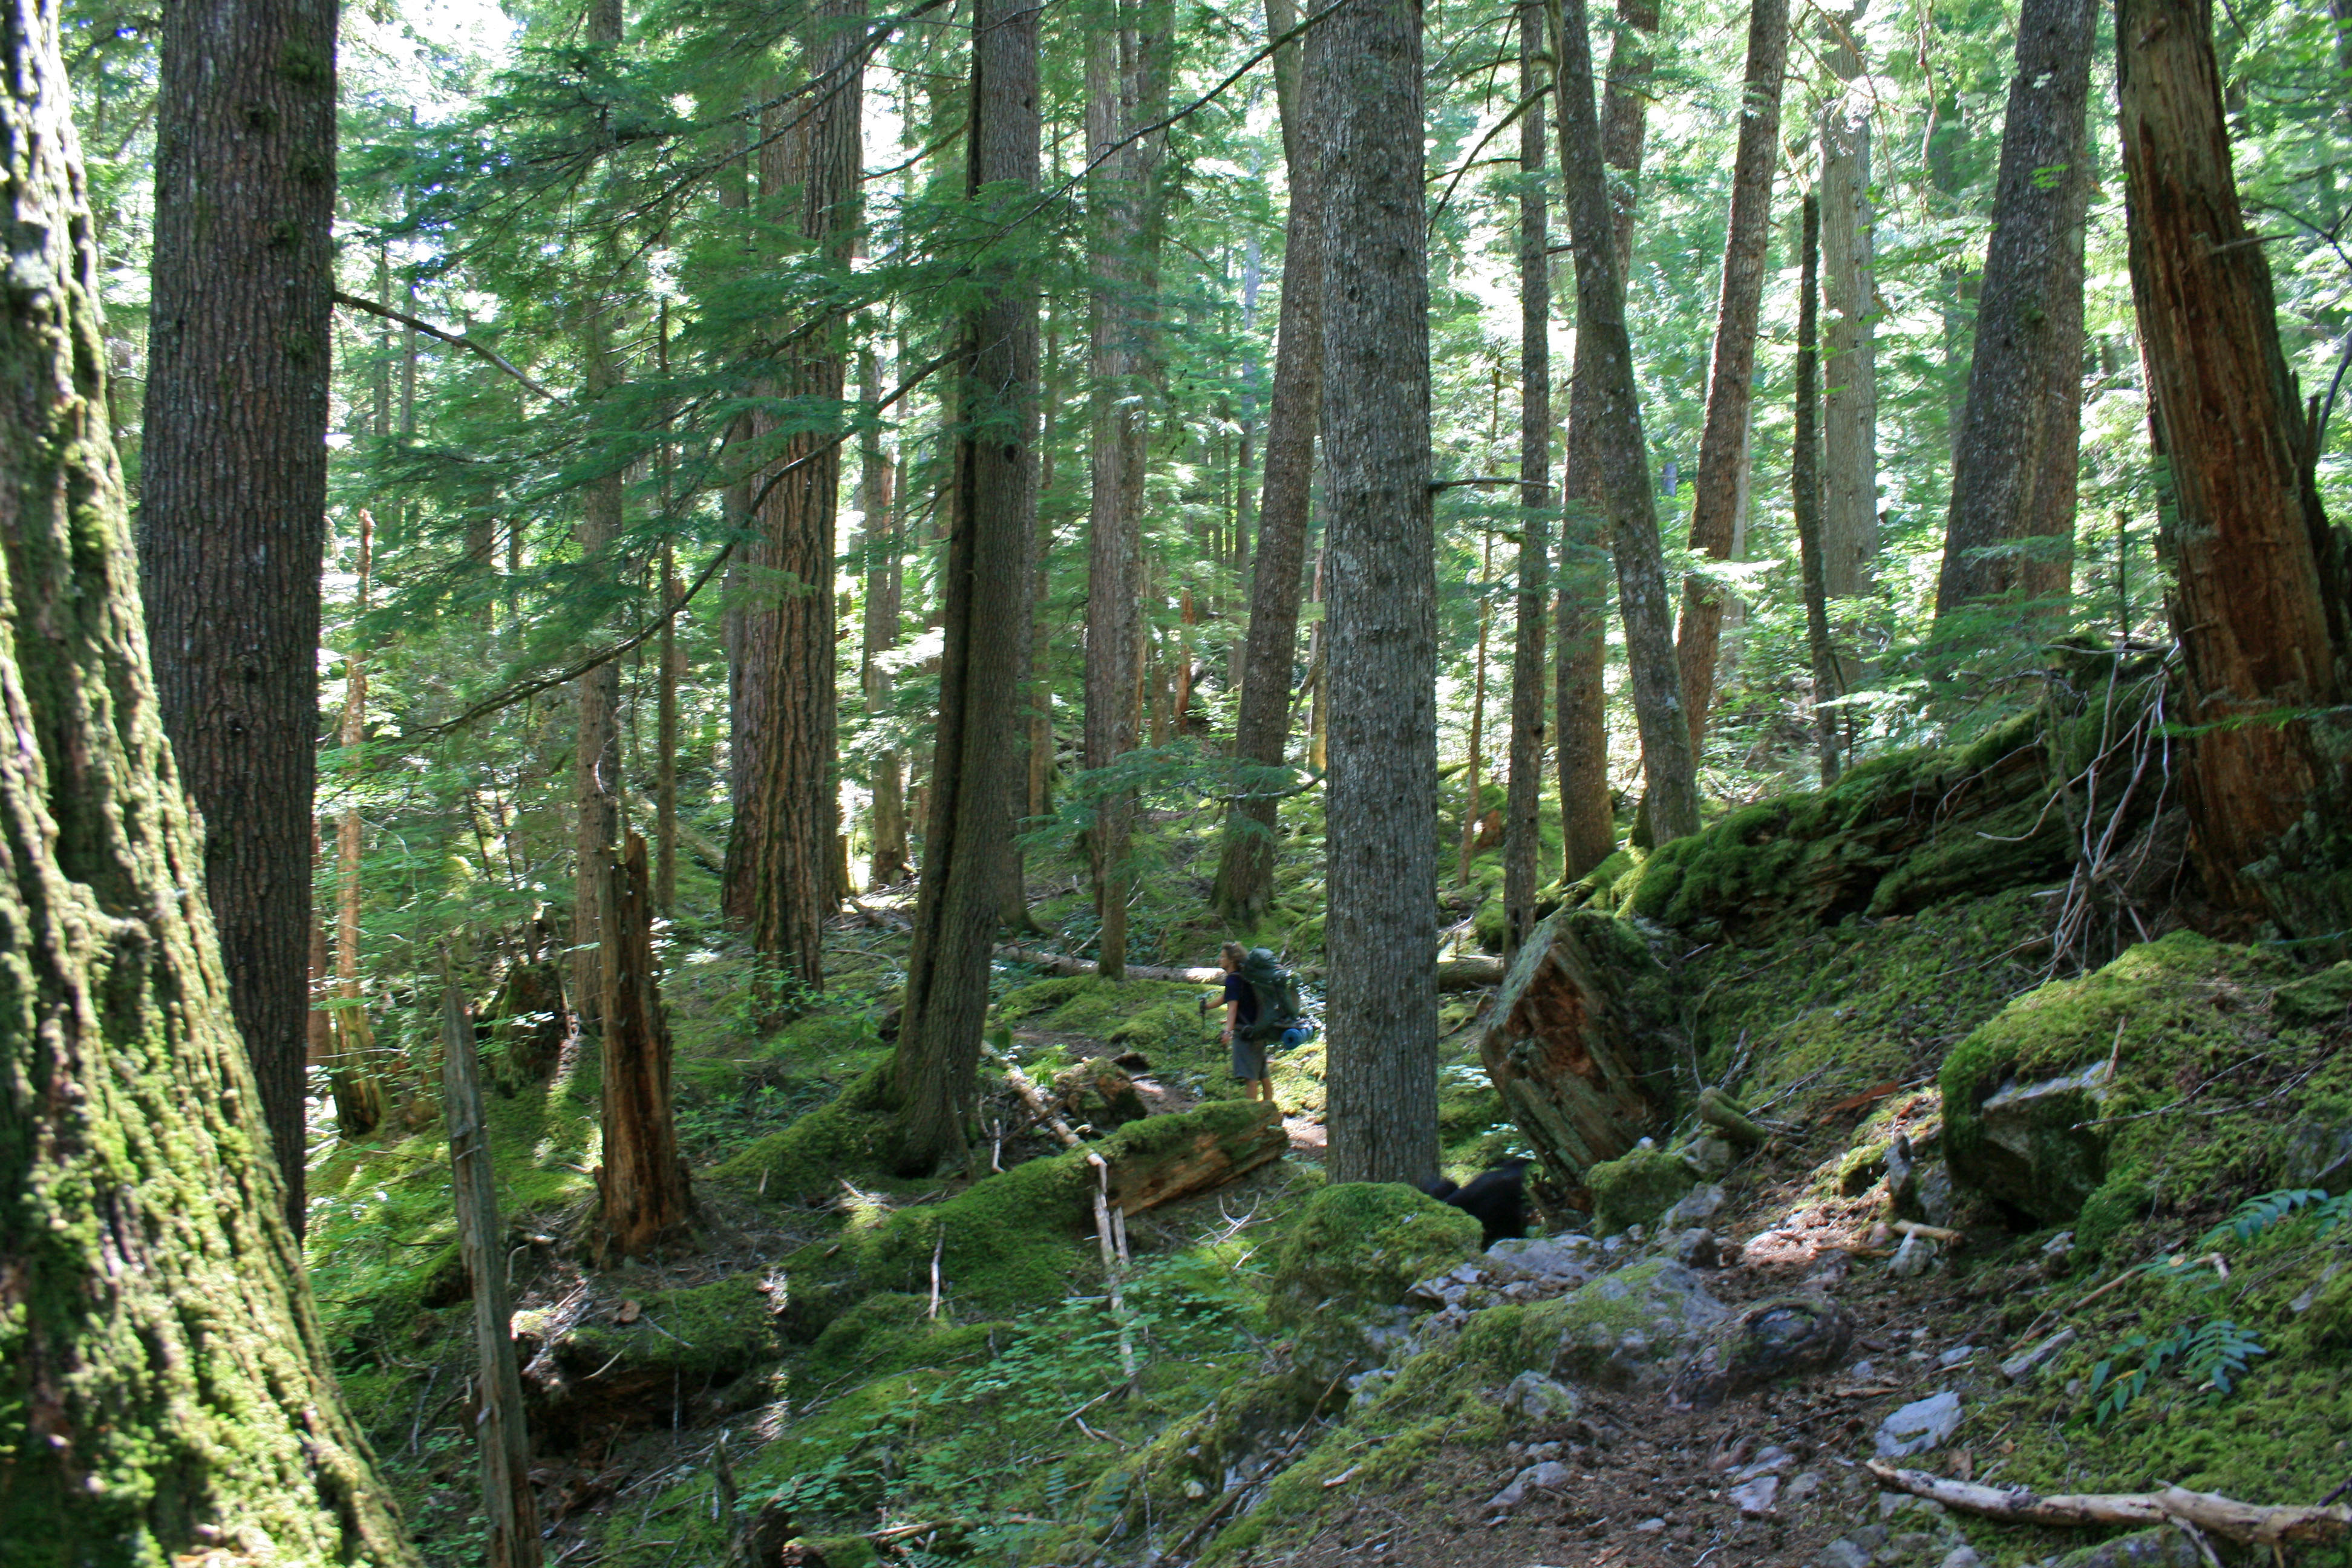
Where’s Waldo? I mean Steve?

Dickey Creek is absolutely gorgeous at the creek crossing. Make sure to cross on the logs, it’s way easier than crossing on the mostly slippery rocks. I tried both… because I’m a glutton for punishment. I had my Tevas with me so I kicked off my boots and slipped into my Tevas for the first creek crossing and just walked straight across. I thought the water felt amazing, Steve thought it was frigid.

Big-slide-lake-dickey-creek

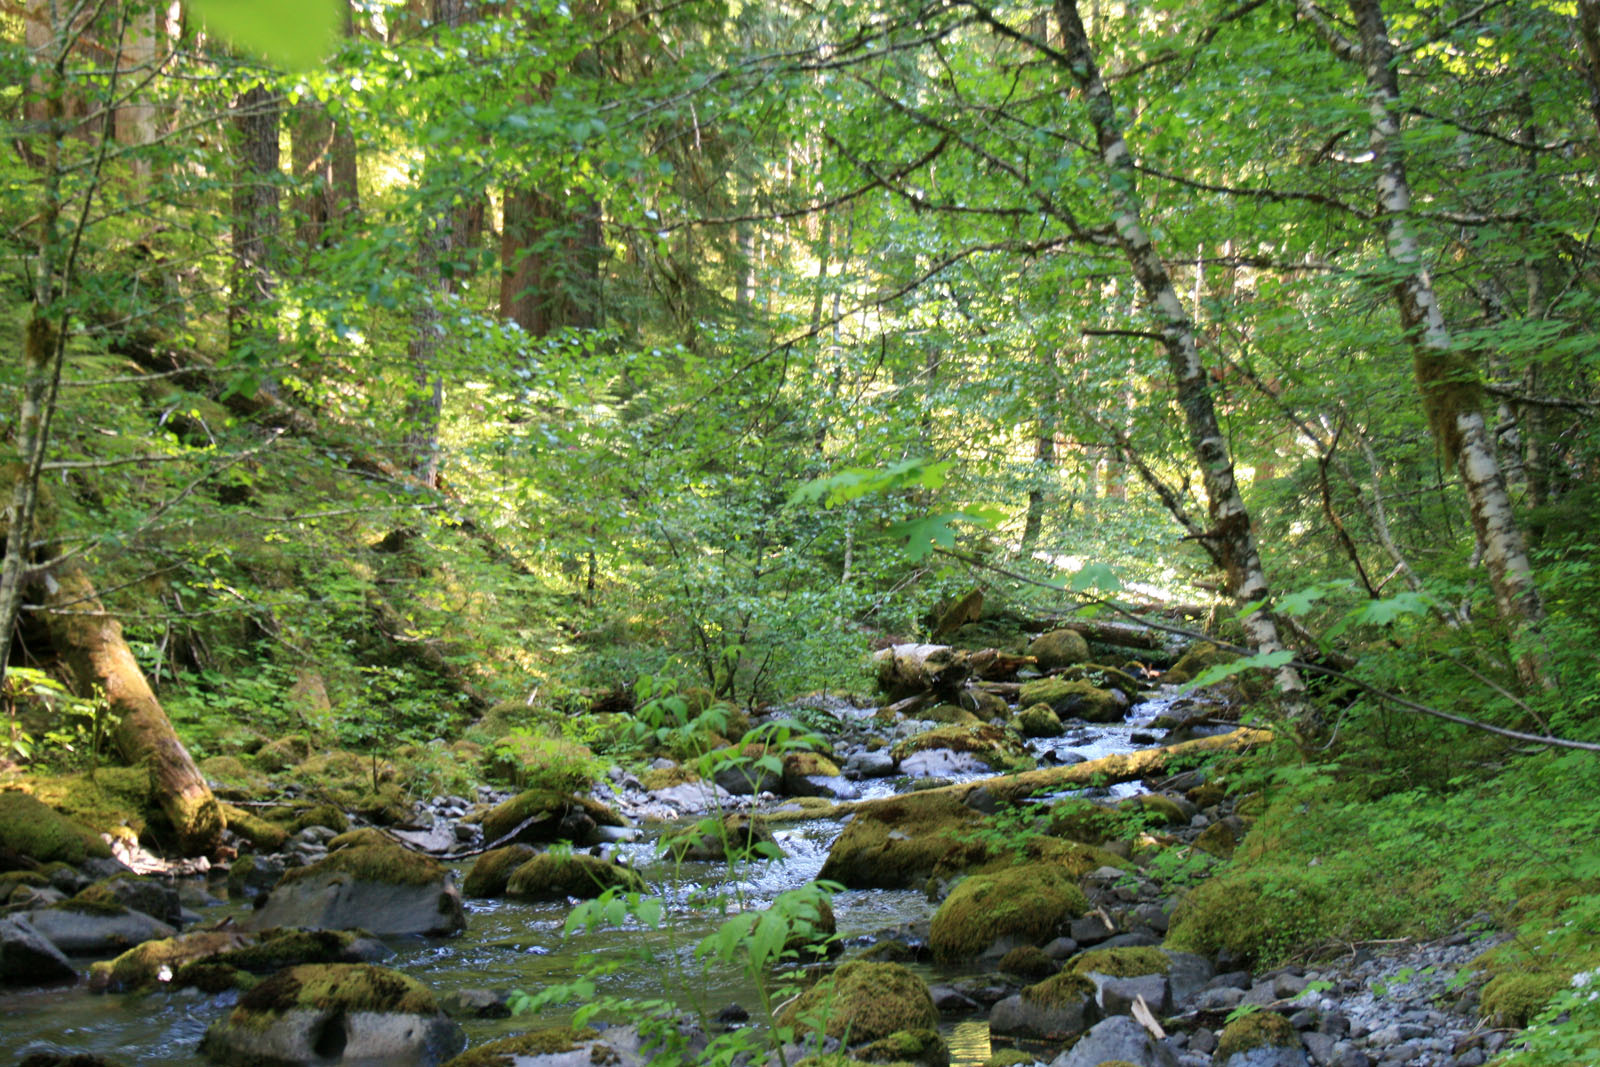
Dickey Creek at the Creek Crossing.

After the creek crossing the trail climbs up and up and up with no relief. I happen to enjoy uphill way more than the downhill slip and slide, but when you go up you must go down too. Eventually the trail splits (at a Y); veer right at the Y and head downhill to the lake and another easy creek crossing.
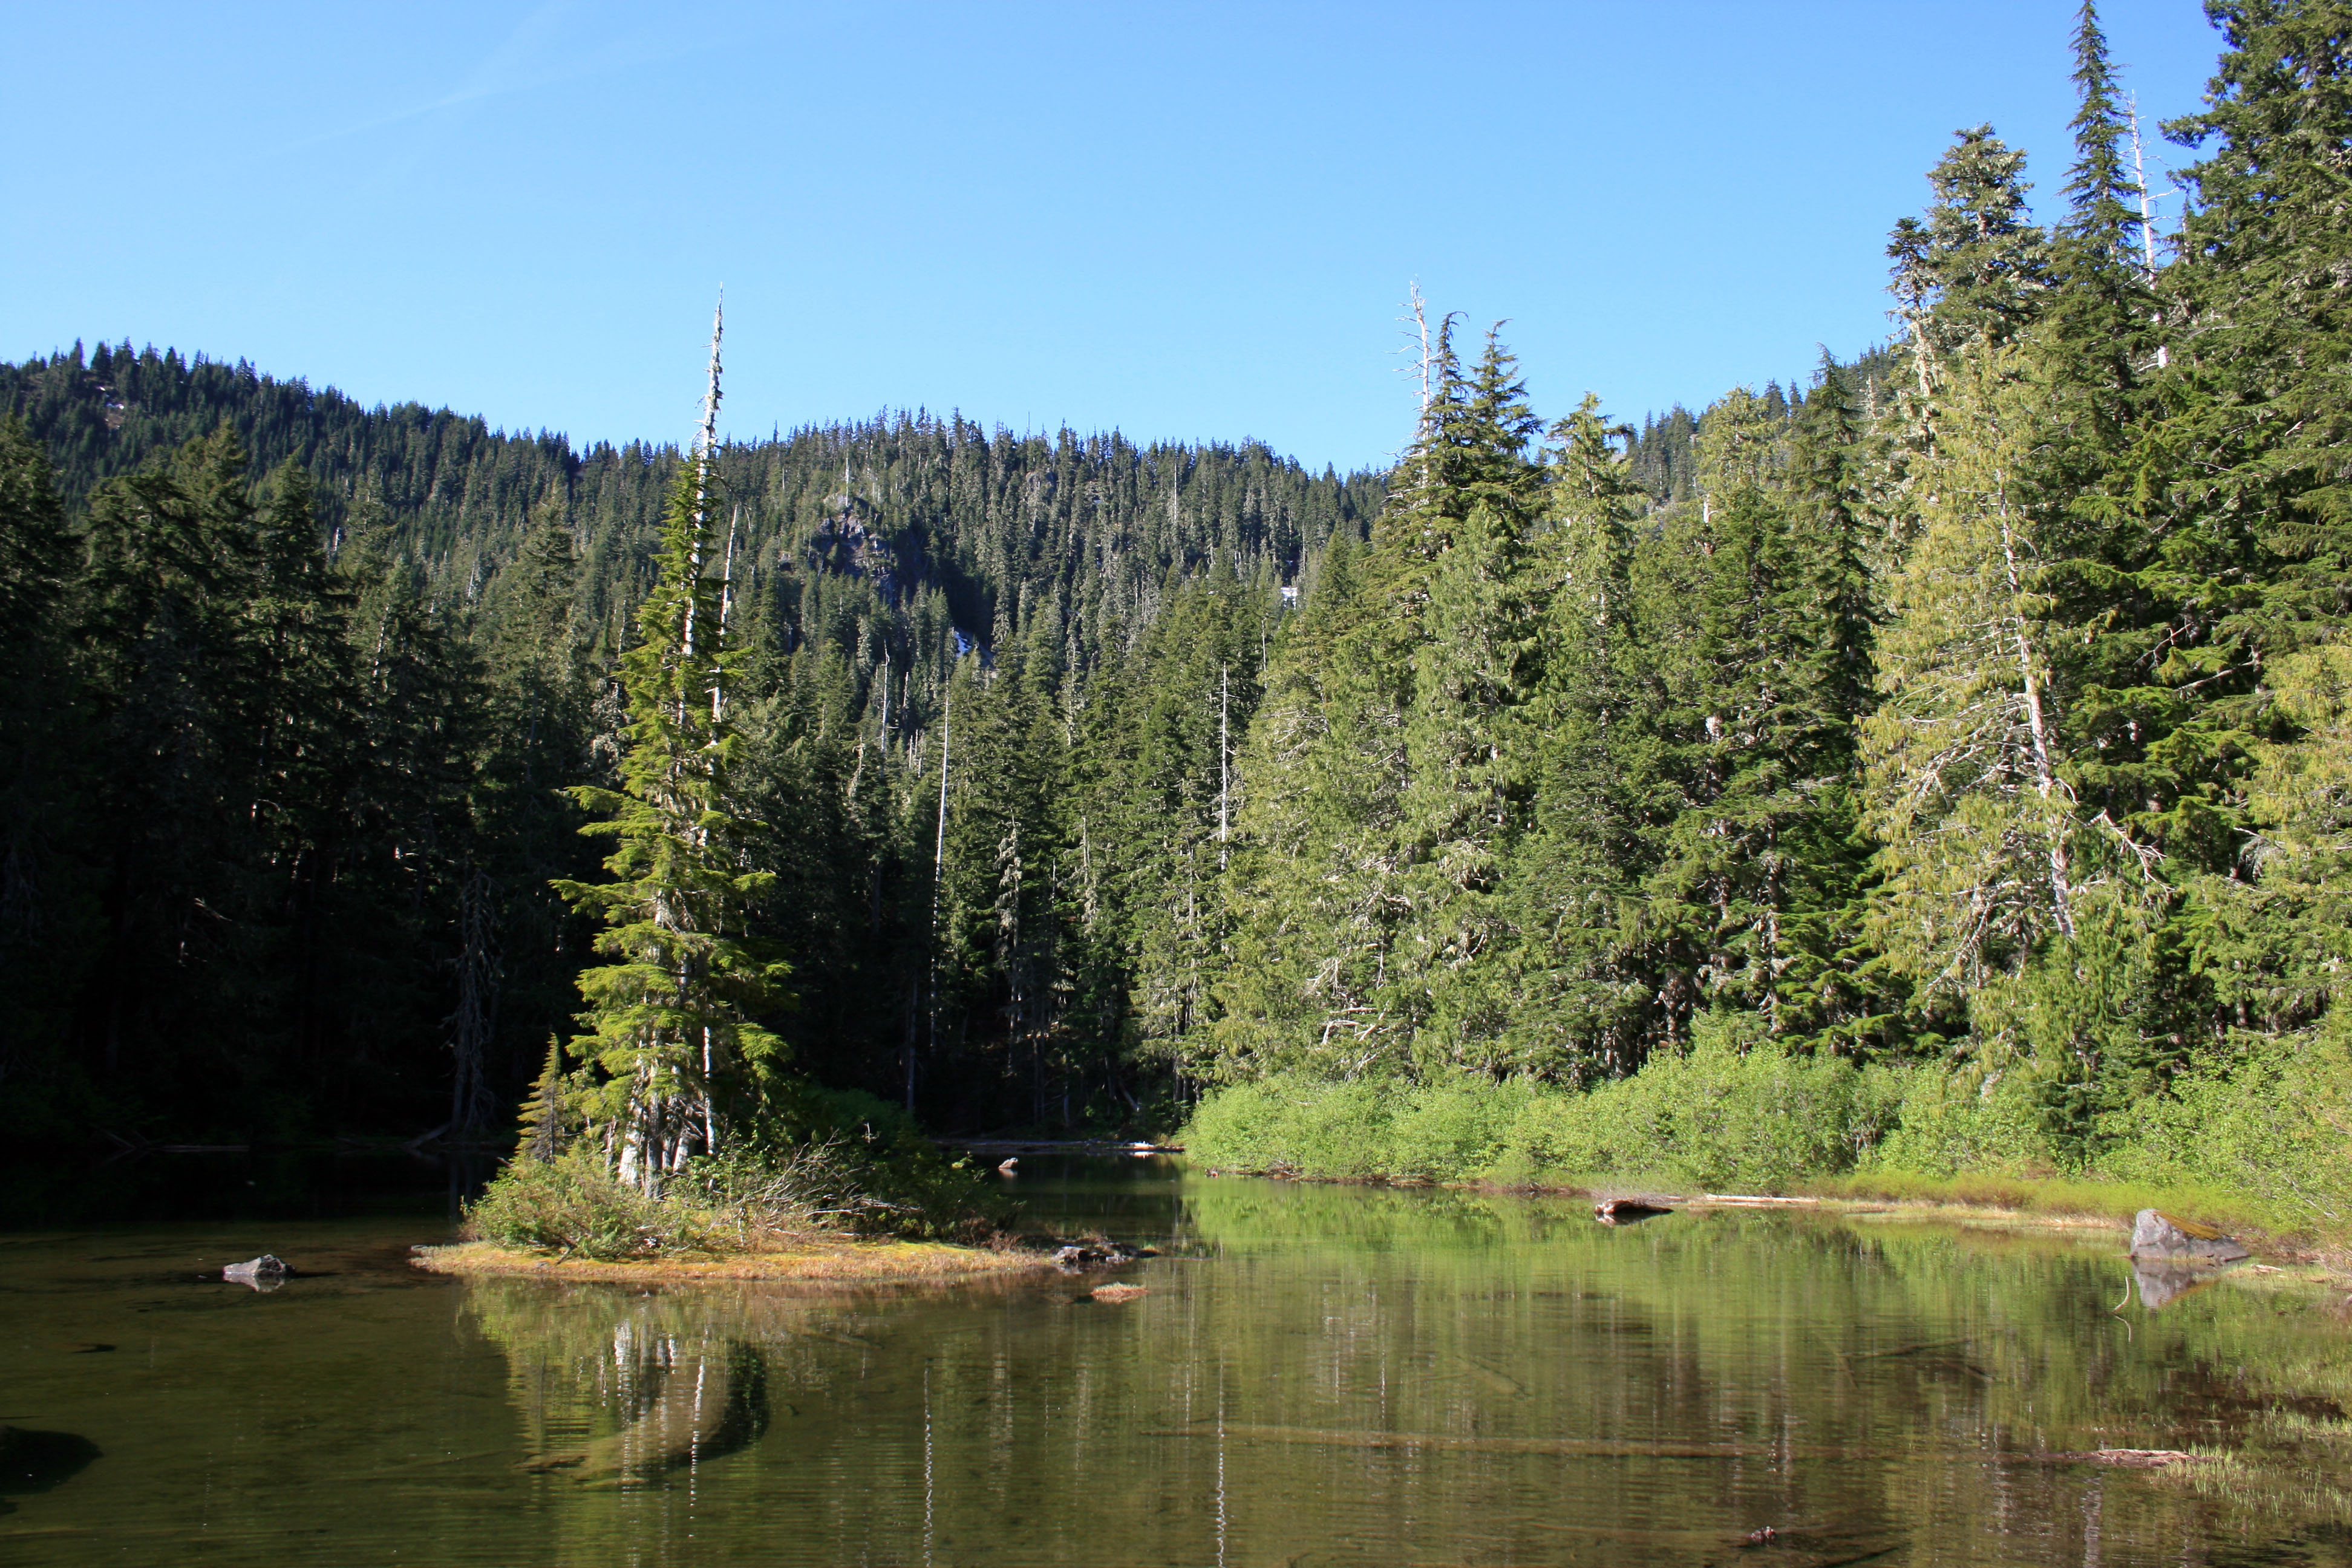
Blue skies

Blue skies

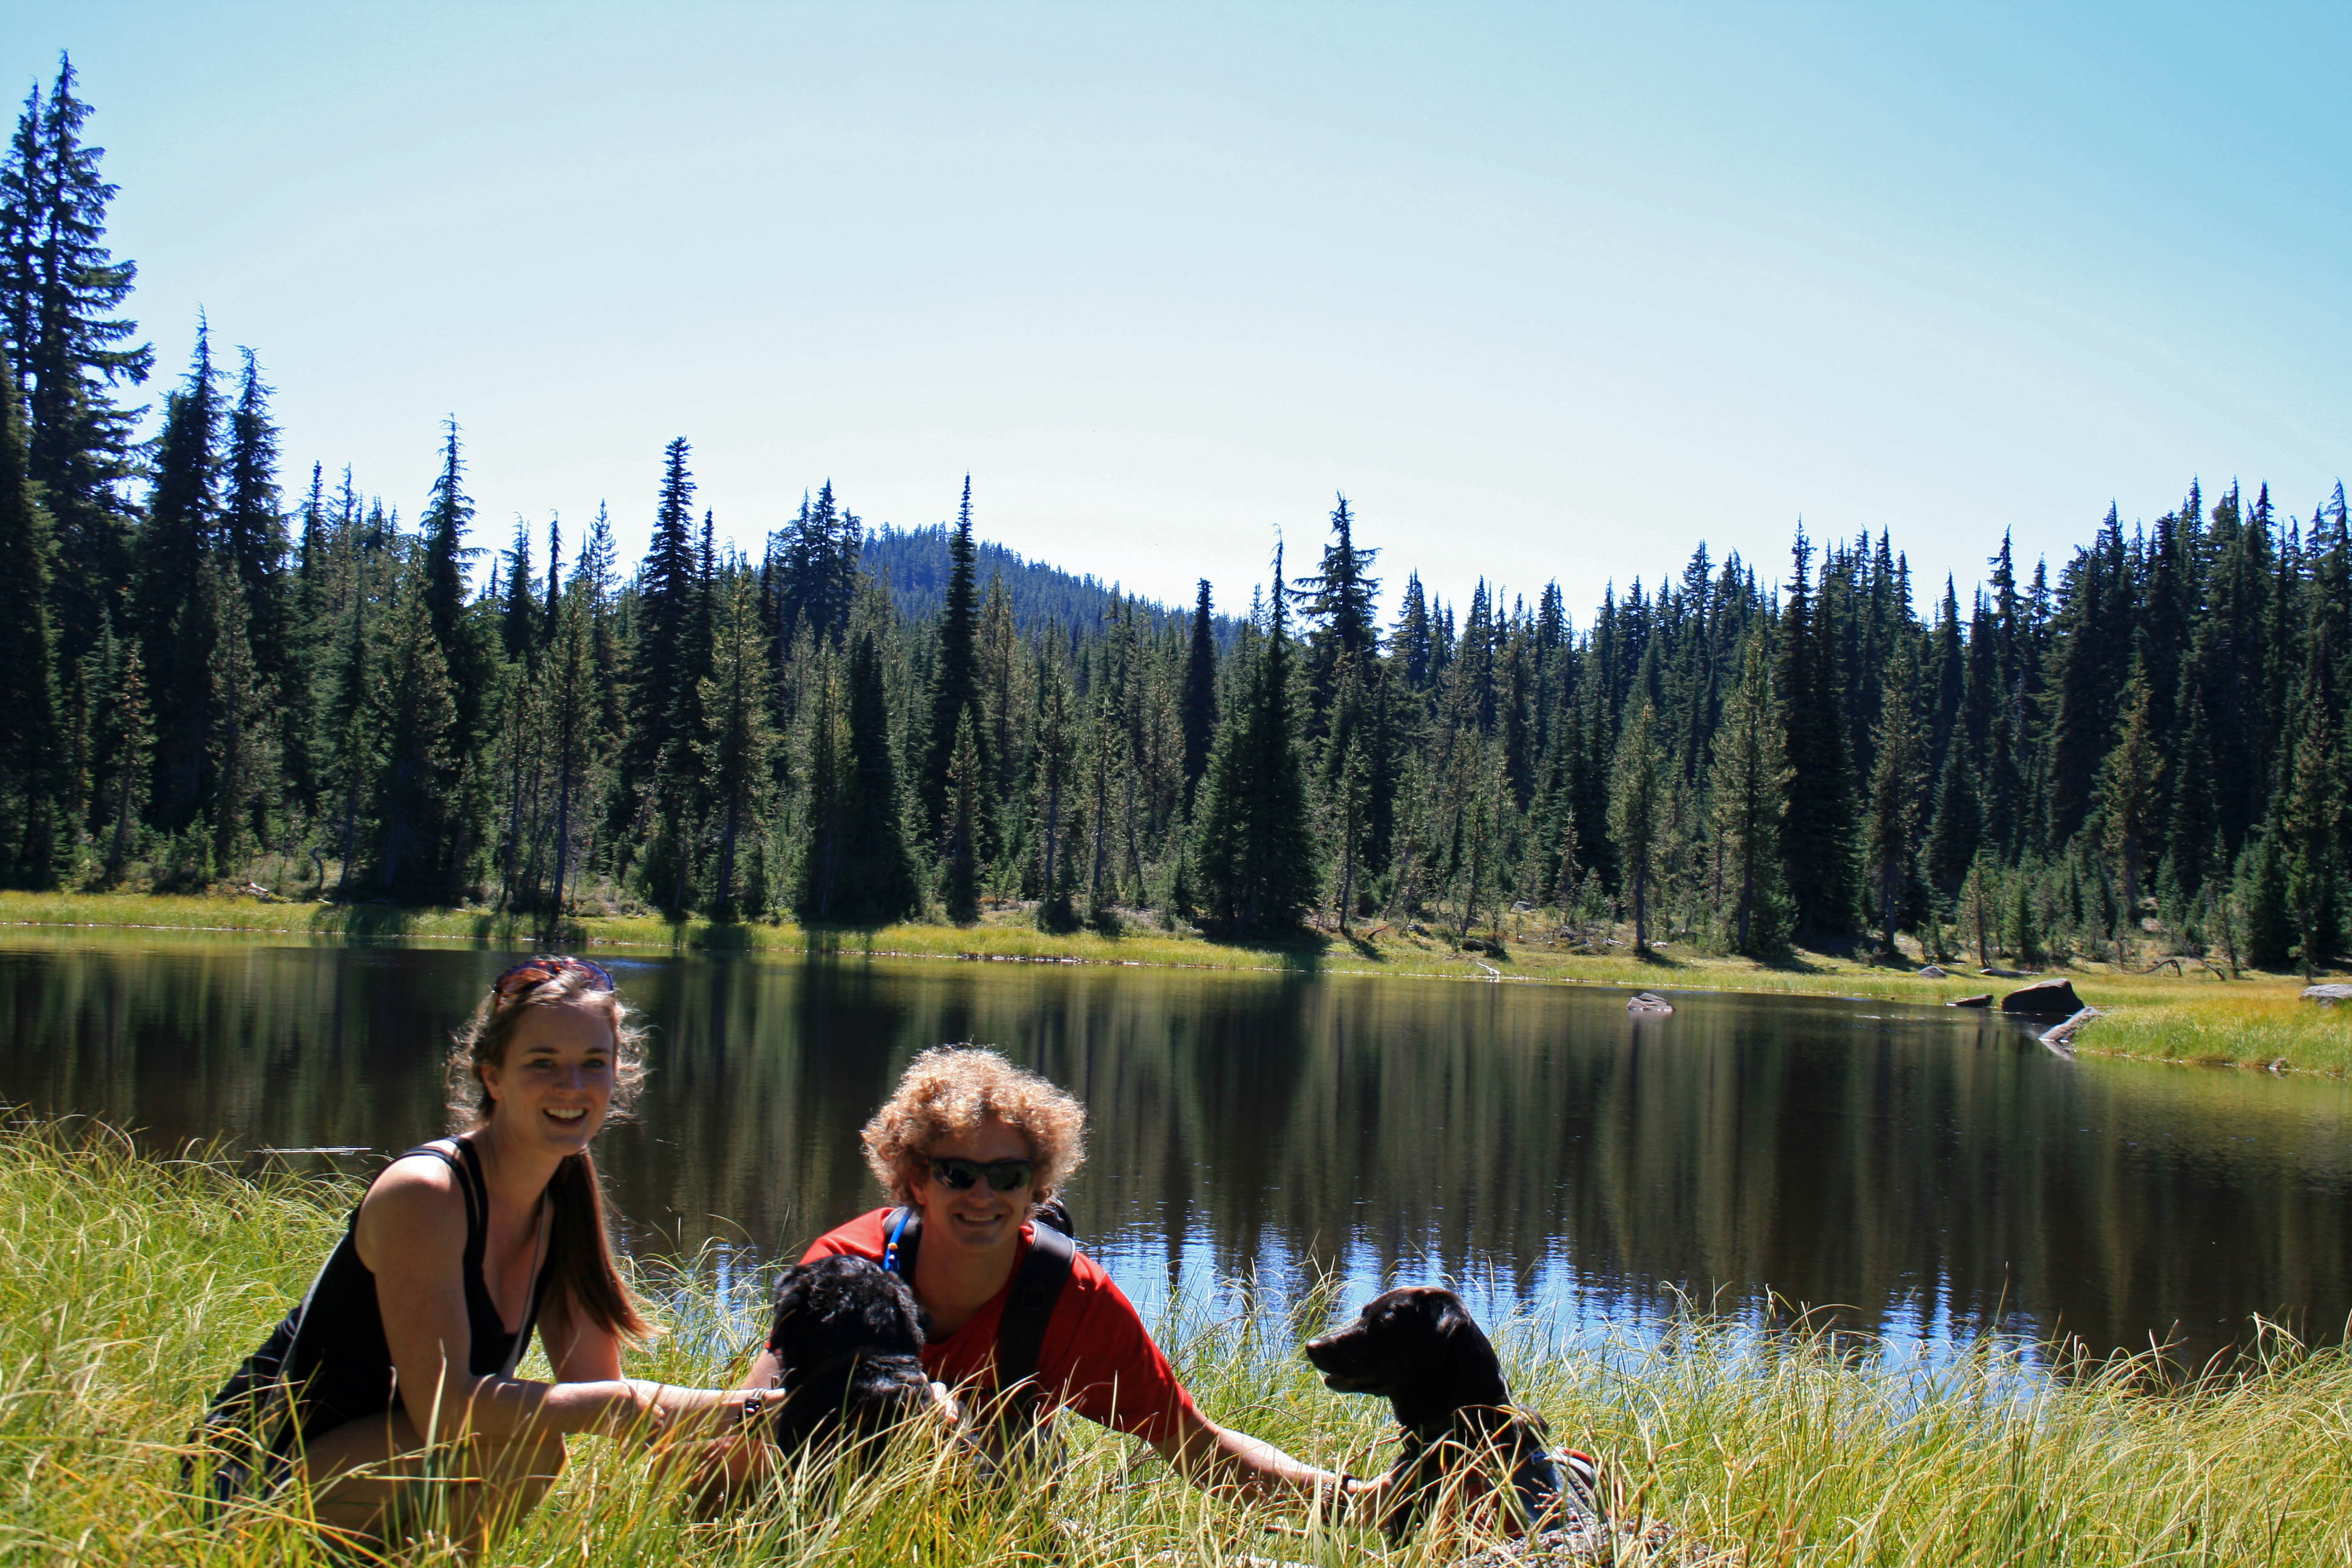
The lake is beautiful. It’s supposedly a great place for fishing, although we didn’t see any trout. We did see a ton of Salamanders swimming around though.

Big-slide-lake-island

Good morning!!!

I bet the water in the lake gets pretty warm during the summer. It looked pretty shallow all around….next time I’m packing a pool floaty.

big-slide-lake-june-wildflowers

June wildflowers along the trail.

And the wildflowers. I love all the wildflowers this time of year. I’m not a flower buff and I don’t know the official names, but I do appreciate the beautiful color.

big-slide-lake-sal-morning-swim

Sal hunting for salamanders….

So that’s Sal in picture above. He is our SUPER hyper-active pup, who’s not actually a pup anymore. He’s always game to play, whether it’s frisbee, ball, fetch, hunt for salamanders, jumping, climbing, acrobats, or rolling in nasty things. He has more energy than any other dog I’ve ever met.

Like I said in the Cons for this trail, most of the sites were already taken when we arrived at the lake. The only two sites that were still available were wedged between a group with two “dog aggressive” dogs and a group with a little girl, aged about 7, the type that Sal likes to eat for dinner. SO needless to say our sites were perfect (note sarcasm)!!!!

The first site was slightly more private, but as we were unpacking our backpacks Wonder Dog (Sal) found a lovely pile of unburied human feces and anointed himself with human shit; all over his face, neck, back, collar and harness. So we packed up and moved over to the tiniest site I’ve ever camped in…. but atleast it was further away from Sal’s poo fest. People please bury your feces…and don’t poo 15 feet outside of camp. I mean really???? I do not like having to bury other people’s poo and I’m pretty sure Steve didn’t enjoy washing someone else’s shit off of Sal.

big-slide-lake-trail-indian-paintbrush

indian paintbrush…. that’s probably not its real name

After cleaning up and setting up our micro-site we rewarded ourselves with some cabernet, thank god we packed it…. and it was well deserved. Neither of us lost our tempers… and we had a good laugh after the fact. I really wanted to call this hike Fecal Matters, but Steve vetoed it.

big-slide-lake-rhododendrons

Wild rhododendrons blooming.

After Sal went for his morning swim we hit the trail. The morning air was nice and crisp and it was the perfect hiking temperature. Parts of the trail reminded me of the hike up to Snow Lake on the way into the Enchantments, but obviously on a much smaller scale.

big-slide-lake-trail

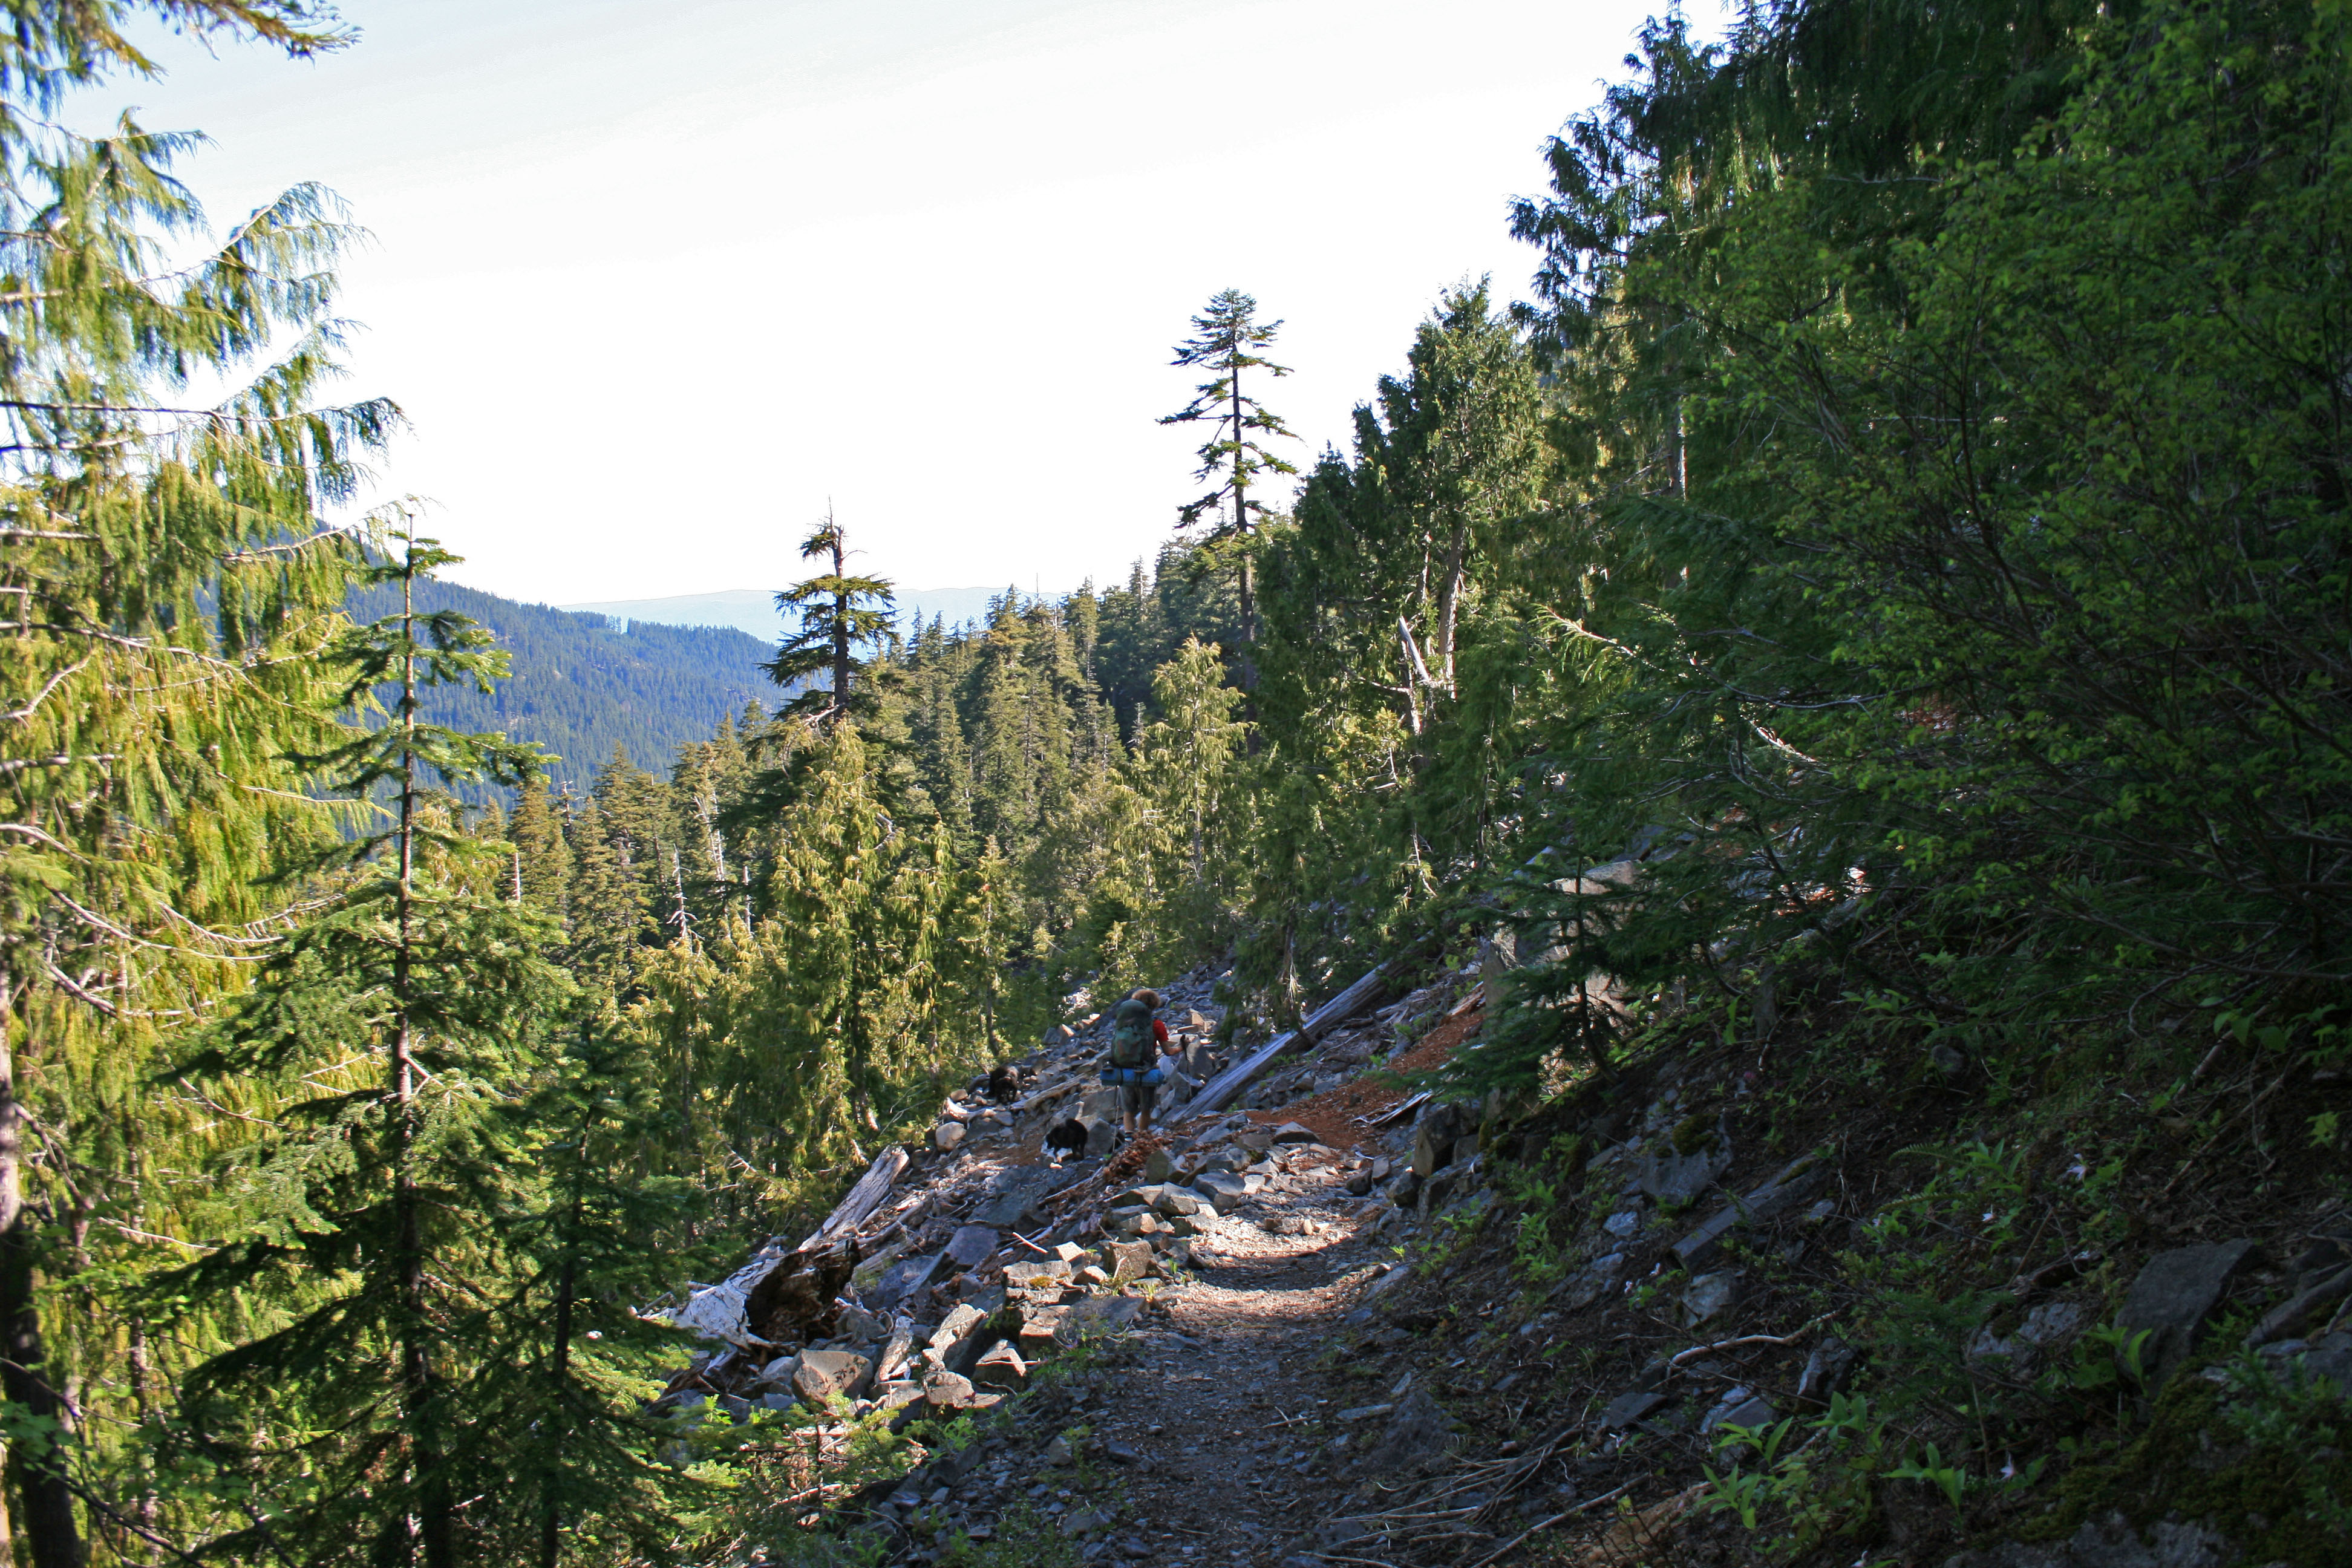
Many big slides…. I wonder how the lake got its name.

big-slide-lake-trail-sal

Parts of this trail reminded me of the Enchantments in Washington. (I think Sal is mean mugging me)

Sal loves to hike right on our heels, while Jedi is off in Jedi land with rainbows, glitter, and unicorns…. that’s why you don’t see any pics of him here.

big-slide-trail-3

Deep green forest.

The trail in the woods was really lovely, super soft for walking, not too many roots/rocks, BUT you do have to climb over probably 20 down trees along the trail…it’s a fantastic core workout!!!

big-slide-lake-trail-2

Day on the trail.

We will definitely head back to the Bull of the Woods Wilderness. It was really pretty and felt incredibly remote. I kept hoping to see a bear or other wildlife, but no luck.

Resources

60 Hikes Within 60 Miles: Portland: Including the Coast, Mount Hood, St. Helens, and the Santiam River

Summit Post

Portland Hikers


Sisters Mirror Lake

Sisters Mirror Lake family pic

The family at a little lake adjacent to Sisters Mirror Lake

Quick Stats

Distance: approx. 9 miles (more if you have time to explore)

Time: 4 1/2 hours

Difficulty: Easy to moderate with less than 1000 feet of elevation gain

Dog Friendly: Yes, it’s an off leash trail between Sept. 16 and July 14. You may run into pack animals and hunters, so know how your dog behaves around them.

Season: June to October

Permits: Northwest Forest Pass

Pros: you’re outside, close to Bend, tons of little lakes to explore and pretty meadows

Cons: No mountain views unless you head up Koosah Mountain (we only hiked up to an area where there was significant blow down, snapped a couple of pics and turned around)

This hike is so close to Bend it’s amazing that more people don’t use this trail. The trailhead was super easy to find; approximately 30 miles west of Bend on Cascade lakes Highway. There is a small parking area signed Mirror Lake Trailhead not too far passed Devils Lake (the trailhead for South Sister).

After a mile or two you come across a little pond with a large rock outcropping behind it, this is the last place for water until Sisters Mirror Lake.

sisters mirror lake pond

The last pond until you reach Sisters Mirror Lake.

Each of the lakes in the area make a perfect place for a picnic and soaking up some sun.

sisters mirror lake adjacent

Our lunch spot…all to ourselves

Sisters Mirror Lake skimps on the mountain vistas, but the large meadow, and pretty little surrounding lakes with their perfectly still surfaces totally make up for it. To find the lake you just follow the signs all the way there. There is atleast one place to camp on the far side of the lake and an even cuter place to camp at the neighboring unnamed lake (if you’re headed up Koosah).

Sisters mirror lake

Sisters Mirror Lake and a perfect fall day

I think it’s also possible to head over to Nash Lake and make a loop or balloon shaped hike… (check out a map first!!!)

You’ll reach the lake after about 4- 4 1/2 miles of hiking. And if you’re feeling good you could head down the PCT and up Koosah Mountain to get a little more burn in those quads.

South Sister from Koosah

South Sister from Koosah Mountain

To get back to your car just return the way you came….or if you end up doing the loop over to Nash Lake let me know how it goes.


Wat Do You Want Me To Do?

Buddha sculptures at Ayuthaya

Buddha sculptures at one of Ayuthaya’s many ruins.

You want me to do Wat? Oh yes, here’s a good idea lets cycle to EVERY one of Ayuthaya’s Wats… I’m sure it will only take a couple of hours. NOT!!! It’ll take more like 9 very hot and very sore hours of riding in the tropical sun….mind you, we did take a few detours and got a little lost (as in…on the road to Bangkok..oops!). I’m a white girl and the Southeast Asian sun made me feel like I was being fried in a vat of vegetable oil. In hind sight it was still pretty fun….but it’s now three weeks later and today was the first day that I’d even considered putting a bike between my legs.

Ayuthaya ruins

Lovely ruins in Ayuthaya

Wat Ayuthaya

One of the many wats scattered around Ayuthaya.

I liked sweaty Ayuthaya….which when pronounced correctly sounds more like “UTI” but more lilting and not quite as painful (barely). Ayuthaya lacked the throngs of creepy old men, coked out 20 somethings, and the painfully stereotypical tourists that plague Bangkok’s Khao San Road and Royal Palace.

We saw tons of ancient ruins,beautiful wats, and even human remains. And we ate the best Pad Thai we’ve ever had. Our guesthouse was decent enough….our bed was huge, the sheets were pretty clean, the shower was cool and the price was right. And Grandma gave me hug when I wished her a “good morning.”

ayuthaya ruin detail

Details, details, details.

Ruins in Ayuthaya

Ruins in Ayuthaya

Ayuthaya Ruins

More ruins in Ayuthaya


The details and architecture of the wats was truly impressive and seemed to defy gravity, but obviously time and the asian sun had taken their toll. With well over a hundred pics of wats and ruins it was hard to get the motivation to sift through the pics to pick out the best.

Cycling around turned out to be a great way to see the wats, the Portuguese settlement, and the countryside….We even saw a rice farmer hack up a snake that was slithering across the road….we tried to figure out why, but he didn’t speak any English and we don’t exactly speak Thai.

Didn't I mention human remains earlier??? Here they are...loads of remains buried at the Portuguese settlement in Ayuthaya.

Didn’t I mention human remains earlier??? Here they are…loads of remains buried at the Portuguese settlement in Ayuthaya.

country road ayuthaya

Off of the island you can find these beautiful (and flat) roads that will take you through rice paddy after rice paddy.

After too many close calls on our kamakazi bike ride  I was ready to toss the bike into the back of a Tuk Tuk and say “F%&k it!!” but I didn’t….and I survived.

The light at the end of the tunnel

The light at the end of the tunnel.

Quick Stats

BJ’s Guesthouse (200 Baht) was right off of Soi 2 on the island. Upstairs rooms were more atmospheric, but we took the downstairs room for the gigantic bed and the cooler temps.

The train to Ayuthaya from Bangkok was probably 80 Baht, more or less, for second class seats, but it’s even cheaper if you go with the locals.

Bike rentals were 30-40 Baht for the day.

We were given a printed map (free) from one of the TAT offices that showed where all the wats and other sights were located.

Jefferson Park Wilderness

Quick Stats

Distance: 13 miles

Time: 2+ days

Difficulty: moderate to difficult (approx. 3000 ft. gain)

Season: July to October

Permit: Northwest Forest Pass required

Dog Friendly: Yes, the trail doesn’t have much for steep drop offs, there is regular water access, and plenty of shade (aside from a couple sections that seem unrelenting) Note: some sections are kinda rocky…so know your pooches limits…especially if they have sensitive paws. Our dogs were plenty excited for a post hike swim…and it was hard to keep them out of the water.

Pros: Wildflower filled meadows, multiple stream crossings for yourself and your furry friends, views of Mt. Jefferson, alpine lakes

Cons: Busy…tons of people…and what they leave behind. We ended up burning a bunch of TP…it seems many of Jefferson Park’s backpackers have forgotten the principle of leave no trace; there is also a fire ban usually util September or October. We hardly passed anyone on the South Breitenbush trail, but Jefferson Park was quite busy.

View of Mt. Jefferson

One of the many great views of the mountain.

Jefferson Park is one of those fabled gems that my parents still speak fondly of…many, many years after their first visit. And it’s true, the scenery is absolutely stunning and so worth every ounce of sweat to get there. Following the South Breitenbush trail you’re graced with a rushing river, a damp forest, open vistas, meadows bursting with wildflowers, views of Mt. Jefferson, and crystal clear alpine lakes….what more can a backpacker ask for? Well, I guess some solitude would be nice too.

mt. jefferson and jefferson park

Even Sal stopped to admire the view.

Most people take the Whitewater trail or the Park Ridge trail into the park, but we wanted a more challenging hike with fewer people, and that’s exactly what we got. There was only one other car in the parking lot and when we hiked out the next day there were only two other cars. I would definitely hike this trail again, but I am interested in checking out the other two as well.

Over the first 1 1/2 miles the trail passes multiple little creeks and begins gaining elevation pretty quickly. The trail continues on a generally uphill path for the next few miles. If you’re feeling inclined to punish yourself further at about two miles in there is a junction with the Bear Point trail…I’m sure there are great views, but we simply weren’t interested.

After the Bear Point junction the trail gets steeper, rockier and more exposed. If you’re game to leave the trail by a couple of dozen feet you might find a partial view of Mt. Jefferson.

Jefferson wildflowers

Tons of wildflowers carpeted the meadow just before reaching Jefferson Park.

Once you’re about 3 1/2 miles in you’ll stumble into a gorgeous meadow and you’ll forget all about the trudge up the hill. The  trail meanders through the meadow, running along the streams and around little ponds.

jefferson flowers2

Still more flowers!!! and a view of one of the neighboring buttes.


After about three miles more you will finally enter Jefferson Park with it’s postcard perfect views of the mountain and it’s jewel toned lakes. There are three main lakes here: Russell, Scout and Bays. It’s important to note that camping is ONLY allowed at the spots marked by a post. The area has been loved to death by it’s biggest fans, so please tread lightly, leave no trace, and respect the wilderness. Park rangers are more than happy to fine those who build a fire (during the ban) and/or camp outside the designated spots.

jefferson view from camp

Our view from camp overlooking Russell Lake.

To complete the hike, you simply return the way you came.

jefferson park lakes

Peek-a-boo views of the lakes entice you to wander.

Mt. Jefferson with Russell Lake

Mt. Jefferson with Russell Lake in the foreground.

There are many options for daytrips from Jefferson Park and I think it would be worth it to stay an extra day or two. You could hike up to Park Ridge for the view of Mt. Jefferson, explore the many lakes, amble along a section of the PCT…you get the picture.

2012 Gift Ideas for the Adventurer in Your Life

Yep, it’s that time of year again. Time for Black Friday madness, Cyber Monday and American consumerism at its finest. Here are some great gift ideas for the adventurer in your life.

1. GoPro HD HERO2 or GoPro HD HERO3….so they can capture all of their insane adventures…in HD.

2. Sea to Summit eVent Compression Dry Sack or the even lighter Granite Gear eVent Sil Compression DrySack. Whether they’re hiking in Olympic National Park, trekking across Borneo or circumnavigating an island these will keep clothing and gear packed tight and dry.

20120217-085439.jpgGranite Gear Drysack

3. A waterproof watch like a Timex Expedition or Ironman.

4. A rugged camera like the Olympus TG-1iHS 12 MP Waterproof Digital Camera which claims to be waterproof to 40 ft., drop-proof to 6.6 ft., freeze-proof to 14°F and crush-proof to 220 pounds.

5. A compressible fleece or jacket like the Patagonia Re-Tool Snap-T® or Patagonia Down Sweater. They will love having a super warm and cozy layering piece on their next backcountry outing or summit attempt.

6. DeLorme Earthmate PN-60w with Topo North America and Map Pack and DeLorme inReach Two-Way Satellite Communicator. We LOVE our Earthmate it’s super easy to use and it works really well…even in really remote locations. Our’s is a slightly older model, but the new one combined with the inReach will give everyone some peace of mind…especially if your adventurer is an adrenaline junky, solo backpacker….or slightly reckless. The inReach allows them to send out messages saying they’re okay…or if they’re in need of help.

7. Whether they’re needing to purify water high in the Himalayas or in the backcountry of Eastern Oregon a water purification system like a SteriPEN with pre-filter makes it ridiculously easy.

8. A collapsible, foldable, backpack like the Gregory Miwok 22 Daypack that can be used for daytrips from camp or early morning summits.

9. A fleece lined wool beanie like the ones from Patagonia have an awesome fit and will keep them warm without being itchy.

10. Stocking stuffers like hand warmers, energy gels, carabiners, lithium batteries will also be greatly appreciated by your adventurer.

Southeast Asia Packing List

Steve and I are finally thinking about what to pack for our upcoming trip. Both of us have done extensive traveling abroad and have keyed in to what we want/need while traveling. While packing hiking gear won’t be appropriate for every trip, nor will scuba gear…this is the list that is most appropriate for our upcoming trip. Since we will be spending lots of time in the mountains and in the ocean our list has a little bit of everything…and since our packs are only so big we will probably have to hone our list a bit more. This a comprehensive list for the female traveler, but with a few changes could be easily adapted for the male traveler.

As with any backpacking trip it’s important to fine tune your pack and make sure that you aren’t wasting ounces since you’ll be lugging your pack around town and on and off buses, boats, planes and trains. Also, for the inexperienced traveler…you can pick up almost anything you’ll need on the road…so even if you’re thinking it’s a must, but you’ll only need it for a small part of your trip, it might be wiser and cheaper to pick it up abroad. I hope this list helps you as you pack for your next adventure. I think that this packing list would be helpful for anyone going on a RTW trip or an extended trip in South America, Africa, Asia, and even Europe depending on the activities.

Clothing

Shoes
TOMS Canvas Slip-Ons or Ballasox Foldable Ballet Flats
Vasque Waterproof Hiking Boot(already broken in)
Havaianas flip flops (they’ll last TEN times longer than the cheapies you buy at Old Navy)

Ah shoes….I hate packing them. And really don’t like the idea of packing heavy hiking boots, but with doing multiple treks in Nepal, Thailand, Vietnam, Malaysia and Indonesia I’ve decided to pack them even though I’d rather pack my super comfy and light weight ASICS Trail Runners.

Unders and Extras
5 pairs of ExOfficio underwear (moisture wicking and quick drying) and 2 pairs of cotton
3 bathing suits that can be mix and matched (PacSun and Victoria’s Secret are great resources for out of season swimwear)
1 sports bra
1 bra with convertible straps(neutral colored) (I love Calvin Klein bras for their durability, comfortability and their amazing fit)
3 pairs of socks (medium weight hiking socks (2), expedition weight (1))
1 pair of liner socks
hat (either a beanie or light weight running cap)

Invest in some super comfy moisture wicking, quick drying underwear. They may not be the sexiest, but ExOfficio, Terramar, and Patagonia all make some great underwear. Sometimes you can find them on sale at Sierra Trading Post or Patagonia which will save you some money….at $18+ a pop these might be the most expensive panties you’ll ever buy. I found a couple styles for slightly cheaper on amazon.

Bottoms
1 pair of Roxy Boardshorts
1 pair of cotton shorts
2 skirts- knee length or longer
1 pair of REI trekking pants (light weight, quick drying)
1 skinny jeans (stretchy and thin material…think jeggings, but classier)
1 pair of leggings or yoga pants (can fit under trekking pants, wear under a dress or on their own)
1 Sarong…for many reasons, skirt, dress, blanket, towel, privacy…it will be your best friend. If you don’t have one already you can easily pick one up on the road for dirt cheap!

I’m totally impartial to my Roxy Boardshorts and I’ve been known to wear them for days on end. When I was searching for them on amazon to post a link I found that they have them in more colors too, so I’m tempted to buy another pair…or two. While you can get away with short shorts in most of Thailand…you’ll need to cover up if you plan on visiting any temples or spending time in Muslim Malaysia or Indonesia; I always pack a skirt or two that hit below the knee, for this purpose exactly. Also, I like to pack my Mavi skinny jeans, they’re super stretchy and pack down really small. Steve and I hike a TON so I always pack my REI trekking pants, they’re super light weight and roll up into capris. They are similar to this pair here. Leggings are crucial too…you can sleep in them if you need to, layer them under trekking pants for an extra layer of warmth, or wear them on their own with a tunic or dress. A fold-over jersey maxi skirt is one of my new favorites. With a slightly busy pattern or stripes it can hide stains and match different tops…and it can be pulled up and worn as a dress. I couldn’t find mine online, but I really like this Ethnic Stripe Fold Over Maxi Skirt on amazon.

Tops
3 tanks (light weight cotton (2) moisture wicking (1))
3 tees (light weight cotton (1) moisture wicking (2))
2 long sleeve (moisture wicking, quick drying)
2 dresses (light weight cotton (1), wrinkle resistant (1))
1 cardigan or button-up (to throw on in a pinch to visit temples, etc.)
1 vest (extra layer of warmth for trekking in mountains)
1 Patagonia Torrentshell Rain Jacket
1 fleece hoody

Target was a godsend for finding light weight cotton tanks and tees for super cheap. They have a great feminine fit and they’re easy to care for. For moisture wicking tops Patagonia Capilene 2 (for layering) and Capilene 3 (for cooler activities) are awesome because they don’t get as stinky as some of the other brands. I hate that so many of the hiking tops are cut boxy….just because I’m hiking and traveling doesn’t mean I want to look like a slob, so I really like Lole for their perfectly fit feminine tops. I wear them at work, running errands and on the trail. I try to make sure everything I pack atleast kinda matches/coordinates so it can be easily layered. I always pack a cardigan or button up that I can throw on over a tank when we visit temples, churches, etc.

Toiletry Kit

Hygiene
hand sanitizer
body wash
shampoo
conditioner
conditioning mask
prAna headbands(3) and hair ties (10)
comb
sunscreen
chapstick/lip balm with sunscreen
deodorant
razor
shaving cream
toothbrush
toothpaste
tweezers
mirror
nail clippers
wipes
TP
Lunette Menstrual Cup or tampons
travel towel
small sewing kit (as in 1 needle and one tiny spool of threa

Meds
immodium
pepto
Cipro
Doxy
anti-malarials
ibuprofen
Arnica muscle cream

Wound care
neosporin
moleskin
bandaids
athletic tape

Other

Sleep
ear plugs
eye mask
inflatable neck pillow

Electronics
Canon EOS Rebel DSLR camera
DSLR charger
Sony Cyber-shot
camera charger
Kindle 3G
Kindle charger
Old School Apple iPod nano
Ipod charger
Netbook
Netbook charger
GoPro HD HERO2(Steve has lost two so far..so I’ll be in charge of lucky number 3)
GoPro charger
Unlocked Smartphone
smartphone chargerPen
Notepad/Journal (soft back)

Obviously you don’t need all of these electronics, but since we’ll both be blogging on our trip (and possibly working) and using different mediums to record our adventures. We’ll split up the electronics between the two of us.

Activity Items
Dive fins
Mask/Snorkel
Trekking Poles
Water bottle or bladder
Pepper’s Polarized Sunglasses(buy an extra pair in Kathmandu)
Daypack with waist belt and padded shoulder straps
Camera bag that doesn’t look like a camera bag (Koolertron)

Organization
heavy duty ziplock bags
Eagle Creek Packing Cubes: Pack-It Half Tube Cube, Black (1) and Pack-It Half Cube, Black(1)
neoprene netbook case
compression sacks (2) (Sea to Summitand REI make decent ones that are light weight)
Sea to Summit Lightweight Dry Sack(1)

Save your sanity and stay organized on the road. Nothing drives me crazier than not being able to find something and having to dig through an entire pack to find it. Invest in a couple compression stuff sacks and separate the contents. I’ll usually have one for pants, one for tops, and one for bathing suits, underwear, socks, etc. I used to separate everything into ziplock bags, but a couple of packing cubes will help you keep your toiletries and electronics organized as well. The Sea to Summit compression bags usually hold up better than the REI bags (which have a tendency to tear at the seams when overstuffed) and the Eagle Creek packing cubes are super light weight just a couple ounces verses a half pound like some of the others.

Miscellaneous
Black Diamond Spot Headlamp
Combination Lock
Pack cover or trash bag to line pack
Carabiners
SteriPENor purification tablets
Waterproof watch with alarm clock, either Timex Expedition or Garmin Forerunner GPS

I cannot emphasize enough the importance of a good headlamp while you’re travelling. It will come in handy when you’re rushing to the bathroom in the middle of the night, during the many power outages and during night hikes. You will want to bring your own lock if you’re staying in hostels….some provide a lock, but a fair number don’t and you don’t want to leave your valuables unlocked. Carabiners are one of those items that I always take with me and they are always invaluable: you can hook clothes up to dry with carabiners or hook nasty items to the outside of your pack.

Throughout your trip you will see plastic water bottles littering roads, trails, and alleys. Although bottled water is cheap, most of the countries don’t have a proper recycling system set up, so do your part by packing a Steripen or purification tablets and drink the tap water.

I love my cheap Timex watch…not exactly the prettiest watch, but it’s not going to get stolen. It has a decent alarm clock and is waterproof to 100m, so I can take it diving too. I would love to experiment with a Garmin Forerunner, but I can’t fathom spending a couple hundred dollars on a watch (even though it has GPS) when I could spend that money on another week of travel.

Documents
passport
visas
extra passport photos
permits
copies of passport
drivers license, debit card, credit card, back-up credit card
travel wallet
folder with insurance, itinerary and reservation confirmations

Before you leave home have a few passport photos made. You’ll be surprised by how often you need them (for visas, permits, scuba certification). Also, keep an extra color copy or two of your passport and don’t store them with your passport. I’ll usually keep one copy in my toiletry bag and another in my daypack, backpack, or purse….or I’ll give a copy to a travel mate, if we’re going to be traveling together for the entirety of the trip. And make sure to leave a copy with a family member or roommate, just in case you find yourself in a bind.

UPDATE:

Steve and I went on our AMAZING Southeast Asia trip. And to be completely honest, I lugged 95% of this list around for 6 months. We did however send stuff home at a couple of times during our trip. In Vietnam, after about 2 months of traveling in Thailand, Laos, and Cambodia, we sent a box home from HCMC with all of the stuff we hadn’t touched over the previous months: skinny jeans, TOMS, 1 skirt, 2 pairs of underwear, 1 camera bag. Also, I ended up not taking my trekking poles with me….they didn’t fit in my bag very well, and I didn’t want to have the strapped to the outside of my pack. I was fine, my knees didn’t bother me on any of our treks, so I’m happy I didn’t pack them.

After climbing the Pinnacles in Malaysia we sent another round of stuff home: fleece jacket,    all but one pair of socks, 1 wicking long sleeve shirt, 2 t-shirts, the SteriPen and all of the crap we bought in Nepal (and there was alot). My trekking pants were toast!!! I ripped them the first week of our trip in Thailand, stitched them up, and then I ripped them again in Cambodia and stitched them up again. I kept them through all of the hikes. After the Pinnacles they were fairly threadbare, and with the rips, and the horrible smell of sweating in the jungle, they promptly ended up in the trash.

I’m Afraid of Heights… Backpacking the Enchantments

Leprechaun Lake in the Enchantments

Leprechaun Lake with McClellan Peak in the background

Quick Stats

Distance: 21+ miles roundtrip (18 miles as a through hike); side trips abound

Time: 3+ days

Difficulty: moderate to Upper Snow Lake; very difficult to the Enchantments

Season: Mid-July to Mid-October

Dog Friendly: No, dogs are prohibited due to a fragile ecosystem, the native mountain goats, and tricky, steep hiking/climbing

Pros: Mountain views, crystal clear alpine lakes, larches, mountain goats, toilets, and no horses.

Cons: Can be crowded at times (permit system helps), tricky and dangerous rock scrambles, mosquitos early in the season, toilets, and fires are prohibited

Permit: Yes, you need a permit to camp in any of the enchantment zones and even to day hike into the Enchantments. Backpacking permits can be acquired at recreation.gov (must be picked up by 9 am on the day of your hike (or the night before) or it will be given away to another group, while day hiking permits can be acquired at the ranger station in Leavenworth…I assume. After closing hours the ranger station stores permits in a box outside its door which allows you to pick up your permit the night before and get an early start on the trail.

To celebrate fall Steve and I decided to take some time off and head up to Leavenworth, (a cute little Bavarian style town… aka a tourist trap) about a 5 hour drive north from Portland, to see the larches in their golden glory up in the Enchantment Lakes.

Fall Color in the Enchantments

Fall color in the Enchantments

Prusik Peak Larches

The larches in all their glory in front of Prusik Peak

 The Hike

So the real reason you’re here. You’re curious about the hike that left me hobbling around town for days afterward. Hiking in to the Enchantments from the Snow Lake trailhead makes you REALLY earn those lakes. The Snow Lake trail is longer than the Colchuck Lake/Aasgard Pass trail and it starts at a lower elevation.

Looking toward Leavenworth on the Snow Lake Trail

Looking toward Leavenworth on the Snow Lake Trail

Day 1 (8.5 miles)

After a relatively late night drinking beer in Leavenworth Steve and I ended up starting on the trail a little later than we had intended. We were happy to see that the wind had blown most of the smoke from the Wenatchee Complex and Cashmere Mountain fires out of the valley and were able to breathe freely as we hauled ourselves up the hill with our overloaded packs.

Nada Lake on the Snow Lake Trail

Nada Lake on the Snow Lake Trail (5000 ft. elevation)

The hike from the Snow Lake Trailhead to Nada Lake is essentially all uphill with switchback after switchback for 5 ½ miles gaining 3600 feet. There are a few pretty campsites at Nada and the lake itself is stunning. From Nada Lake the trail continues uphill gaining another 400+ feet switchbacking up a talus slope until dropping in to the Snow Lakes.

Talus Slope Switchbacks on Snow Lake Trail

Talus slope switchbacks on Snow Lake Trail

We camped at the very far end of Upper Snow Lake, just before the stream crossing, so we would be able to get an early start on our dayhike up to the Enchantments. We made it to camp just in time, the wind was starting to pick up and the temperature was dropping fast.

Snow Lake Hammock

Steve was finally able to try out his new hammock

Steve made quick time hanging up his new ENO Hammock and we were able to chill and drink whiskey spiked apple cider while we watched the last rays of sun light up the hillside across the lake and turn the sky a brilliant orange. Exhausted from our hike we retired to our sleeping bags by nine….no card games played and no stories told.

Day 2 (4 miles)

We knew this day would be the hardest; in fact it made Day 1 look like a cake walk. The “hike” from Snow Lake up to the Enchantments is as psychologically challenging as it is physically. I had never considered myself to be afraid of heights….and maybe I’m not, but I am definitely afraid of falling.

The Trail Disappears

The trail in to the Enchantments literally disappears beneath your feet

The trail from Snow Lake up to Lake Viviane had me questioning whether I should continue or not. The “trail” follows rock cairns across granite slabs where a missed step could send you careening over a cliff. In places, foot holds have been blasted into the rock and cement “steps” have been put in place to make it easier, but it is not easy…I found myself using my hands more often than not and spider crawling more than I should have been. Steve loved the challenge, while I just wanted to get up to the lakes so I could be on flat ground and away from a cliff edge for a bit. The first lake you reach is Lake Viviane which is flanked by Mount Temple and Prusik Peak.

Viviane Lake Larches

Beautiful fall color at Lake Viviane

When we reached Lake Viviane I was convinced we were in the clear, but no…we still had to finish climbing up the granite…. affectionately called “Trauma Rib” to reach the remaining lakes. Once in the basin my heart rate slowed and I dug my camera out of my pack and started taking pics.

Prusik Peak and the Temple

Prusik Peak and the Temple

We passed by Leprechaun Lake, nestled between Lake Viviane and McClellan Peak, Sprite Lake, Perfection Lake and finally to Inspiration Lake before we turned around to head back to our campsite at Upper Snow Lake.

Little Annapurna above Perfection Lake

Little Annapurna above Perfection Lake in the Enchantments

Inspiration Lake

Inspiration Lake and the rock scramble to get up to the upper Enchantments

Perfection Lake with McClellan Peak

Perfection Lake with McClellan Peak

In hindsight I would have packed lighter, applied for a permit earlier in the year, so could have camped in the Enchantment Basin and would have stayed longer. There were tons of areas to explore if we had had more time: the Druid Plateau, Gnome Tarn, Crystal Lake, Shield, Earle and Mesa Lakes, summiting Little Annapurna, etc.

Snow Creek Valley from Enchantments

View of the Snow Creek valley from the Enchantments

Our second night was even colder than our first night at about 35 degrees Fahrenheit.

Surreal lighting at Snow Lake

Surreal lighting at Snow Lake

Day 3 (8.5 miles)

On day 3 we took our time packing up camp, but once we hit the trail we passed many different groups on their way up… including a couple packing their small child and a HUGE pack up to camp in the Enchantments for a couple of days. We had a hard enough time with just our daypacks and nothing makes you feel like a big wuss than seeing a family carry their baby with all their baby gear up; and to throw salt on an open wound we were passed by an elderly man who whizzed by us just as fast as the trailrunners. Ready for a beer and some food that hadn’t been freeze dried we hurried down the hill only stopping to strip layers and have the occasional snack.

GPX File of Our Hike

I’ve included a downloadable GPX file for the Enchantments based on our hike. Unfortunately, the batteries on our Garmen Earthmate PN-60 died during the second day so we don’t have tracks for the Upper Enchanted Lakes area. It’s not perfect, but at least it has a bunch of waypoints for the lower parts of the hike.

Download The Enchantments GPX File Here

Resources

Places to Eat, Drink and Camp in Leavenworth

Permit: www.recreation.gov

100 Classic Hikes in Washingtonby Ira Spring and Harvey Manning

Trekking Washington (Backpacker Magazine)by Mike Woodmansee

www.wta.org

Every Trail amazing trip report with waypoints


Goat Lake Loop

Mt. Adams from the Goat Lake trail

View of Mt. Adams from the Goat Lake trail

During September’s cold snap Steve and I decided it would be a good idea to hit the trails for a quick overnighter in the Goat Rocks Wilderness. Braving sleet and below freezing temperatures we hiked up to Snowgrass Flat, then over to Goat Lake and down Jordan Basin to complete a loop hike starting at the Snowgrass Trailhead.

Quick Stats

Distance: 13 miles (with tons of options for side trips, ours ended up being around 16 miles)

Time: 2 days or more

Difficulty: Moderate (only because of the exposure and 3000 ft. elevation gain)

Season: End of July to October

Dog Friendly: Yes, as long as they know to stay on the trail and are confident walking on narrow trails with steep drop offs

Pros: Stunning views of Mt. Adams, wildflowers, mountain goats, plenty of water

Cons: busy trail, horse use in places, weather can change quickly

Day 1

On the first day we hiked up to Snowgrass flat on trail #96, a pretty straightforward easy 4 mile hike. After continuing about a mile past the flat to find a site closer to day two’s destination, and finding the best sites already taken, we ended up backtracking to the flat and camping near a pretty little creek. Shortly after we set up camp a small storm blew in and brought with it sleet, hail and very cold temps. We were so happy we packed warmly and brought our waterproof gear.

Wildflowers at Snowgrass Flat

There were still tons of wildflowers in Snowgrass Flat

If we hadn’t been worried about the weather we could have done one of the great side trips on the PCT over to Cispus Basin or up to the summit of Old Snowy, both have been highly recommended by fellow hikers.

Wildflower filled meadow on Lily Basin trail between Snowgrass Flat and Goat Lake

Atleast our detour to find a suitable camp led us to this wildflower filled meadow on the Lily Basin trail between Snowgrass Flat and Goat Lake.

Day 2

As I was laying in the tent debating whether to leave my positively toasty Marmot sleeping bag or not, I looked up and thought “Wow, there’s no condensation we must have vented the tent really well.” NOT, all that condensation was FROZEN. The whole meadow had a frozen layer of frost/ice over it, but happily we woke up to a stunning view of Mt. Adams peeking through the trees on the other side of the flats. We were glad to see the skies had cleared and we would finally have some views. A hiker we passed on the trail said his thermometer read 22 degrees Fahrenheit….brr, no wonder everything was frozen.

Mt. Adams from Snowgrass Flat

Good morning and goodbye clouds. Our morning view of Mt. Adams.

Lily Basin Trail Sign

Continue on the Lily Basin trail to get to Goat Lake.

Wildflowers Goat Rocks Wilderness

Bring on the wildflowers; they’re never ending on the beautiful trail.

The hike over to Goat Lakes on the Lily Basin trail (#86) is pretty moderate, just a slow and steady uphill with spectacular views of the valley, wildflowers, and Mt. Adams. After about 3 miles you’ll reach Goat Lake, which was still partially frozen in September. If you’re lucky you might see some mountain goats up on the slope behind the lake; we saw at least 20 mountain goats above the lake.

Wildflowers with Mt. Adams in background

Didn’t I promise you views and wildflowers!!!

View of the valley from the Lily Basin trail before Goat Lake

View of the valley and Mt. Adams from the Lily Basin trail before you reach Goat Lake.


Goat Lake, Goat Rocks Wilderness

Goat Lake still partially frozen….maybe if you have really amazing eyes you can see the mountain goats on the slope behind the lake.

Hiking down from the lake the trail is fairly narrow and was even muddy in a couple places, so watch your step. If you turn around and look back the way you came you have a great view of Old Snowy.

Old Snowy, Goat Rocks WIlderness

Here’s your view of Old Snowy.

Less than a mile past the lake is a junction which takes you up to the top of Hawkeye Point and over to Lily Basin. To complete the loop continue straight and head down into gorgeous Jordan Basin,which looks like it just drops off at the base. There is a really pretty campsite near the bottom, although fairly exposed.

Jordan Basin, Goat Rocks Wilderness

The trail through steep Jordan Basin. The trail in this picture is characteristic of the trails on this loop hike.

Continue on trail 95 or to check out the Goat Ridge lookout detour to 95A which rejoins 95 as it heads back down to the start of your hike. To complete the loop either walk on the road back to your car or take the trail marked Snowgrass Flats that goes through Berry Patch and over to where your car is parked at the Snowgrass trailhead.

As you pack for this trip don’t forget the Ten Essentials and to pack your layers.

Planning Resources:

100 Classic Hikes in Washington
by Ira Spring and Harvey Manning

One Night Wilderness: Portland: Quick and Convenient Backcountry Getaways within Three Hours of the City
by Douglas Lorain

Washington Trail Association

Broken Top Loop

Broken Top from Park Meadow

Broken Top from Park Meadow; Day 1

Quick Stats

Distance: 23+ (our hike was approximately 26.5)

Time: 3 days

Difficulty: Difficult

Season: End of July to beginning of October

Dog Friendly: To Golden Lake, yes; to Green Lakes, yes; Green Lakes to end of the loop, NO!!!

Pros: Gorgeous meadows, views of Broken Top, all Three Sisters, Mt. Jefferson, Mt. Washington, and Mt. Bachelor

Cons: Busy trail that is pounded to dust, off-trail section is over steep, sometimes loose rock, no water source on third day after leaving the glacier, no fire allowed at golden or green lakes

Day 1

The trail begins at a parking lot just before the Driftwood Creek Campground at Three Creeks Lake. For the loop follow the signs to Park Meadow. The dusty trail will switchback up to the ridge where you might get a glimpse or two of the surrounding mountains before descending to the Snow Creek irrigation ditch and a four way junction, turn left here and continue onward to Park Meadow. Y

ou will be greeted with wildflowers, a view of Broken Top, and pretty Park Creek. This is a great place to take a break and refill water. You’ve made it about 6.4 miles at this point. Cross the creek and continue gradually uphill.

Park Meadow Broken Top

View of wildflowers and Broken Top from Park Meadow.

At about 7.2 miles there is a dusty unsigned trail that leads to Golden Lake, your camp for the night, once you reach the lake cross the outlet creek on the left and continue a bit further to the inlet creek, here follow a boot path up along the creek to some amazing campsites.

Golden Lake Camp

Our camp above Golden Lake with Broken Top in the background.

We camped near the creek about a mile or so up the hill, but it’s rumored there are a couple of tarns just a bit further that have even better views. We, however, were exhausted and decided that our unofficial campsite with views of Broken Top and South Sister was perfect.

Golden Lake, Middle and North Sister

The view on our hike back down the hill from our campsite shows Middle and North Sister reflected in Golden Lake.


Day 2

Make sure to wake up early to watch the morning sun dance across the mountains and light them up with a red glow. Today, hike back down to the main trail and take a left. The trail will ascend to about 7000 feet at a pass between Broken Top and South Sister and then descends again into the Green Lakes Basin. The basin is super crowded, has designated campsites, and fires are prohibited so I recommend continuing on to camp closer to the day 3 push up Broken Top.

Green Lakes Basin

The parting view of Green Lakes Basin looking toward the pass you just came from.

Meadow, Green Lakes, Broken Top

Meadow with a great creek for refilling water bottles with Broken Top in the background.

Once you leave the basin the trail continues through meadow and open forest, so make sure your water supplies are good. You will come to a Y in the trail, keep to the left toward Broken Top. Once you reach Camp Creek and the Drainage start looking for a place to camp. The better camps are uphill, but there is one nice camp about a ¼ mile down the drainage, that has a nice sheltered meadow, that was perfect for an afternoon nap.

Day 3

Today is going to be long, hot and exposed, so start early and put on some sunscreen!!! Make sure ALL of your water bottles/platypus bags are full, and I recommend filling up before you leave Camp Creek behind and at any other decent source of water before you reach the Tam McArthur Rim Trail because there is NO water once you reach the rim, it’s 7+ miles without water.  To reach the Bend Glacier and the iceberg filled lake that it fills, follow Camp Creek till it starts to level off and then head east toward a rock outcropping, we hiked just to the right of this and were able to pick up a trail that we followed nearly all the way to the lake.

View of Mt. Bachelor from Broken Top boot path

View of Mt. Bachelor from the boot path leading up to the lake in front of Bend Glacier. At this point you’re almost to the lake.

Frozen Lake on top of Broken Top Mountain

Hey look, there are wildflowers even up here near this partially frozen lake on Broken Top.

After you leave the lake, begin the long hot push to the rim trail. Take care crossing the snowfields and remember that big rocks move too. Once you reach the rim “trail” you will have amazing views of all the surrounding mountains. The path here is sketchy and kinda comes and goes as you climb over and around rocks; I promise that the trail gets better the further east you go. Just continue on the trail, through the dust, and dry forest.

Broken Top Views to the North

So, I finally dragged my ass up the hill to the rim and it was totally worth it. You know it’s been a hard hike if Sal is resting in the shade. From up top you can see the Three Sisters, Mt. Washington, and Mt. Jefferson to the North and Mt. Bachelor….and maybe Mt. Thielson to the South. Beautiful!!!

Tam McArthur Rim

This pic makes the trail look “not so bad” don’t be fooled; day three is a pretty crappy hike and you’ll be wondering how you got sucked into it.

Our poor dog Jedi, would race to each shady spot and lie down. I would NOT recommend any part of day 3 for your pup, if you must take your dog invest in booties, joint supplements and take some baby aspirin with you as well. I wish someone had warned us. Steve and the dogs finished their water less than halfway through the day’s hike, so we were left to ration out the remaining 1 ½ Liters that I still had. We were very relieved to get back to the car, blast the AC and get rehydrated.

GPX File of Our Hike

I’ve included a link to a GPX file of my hike around Broken Top as recorded by my Delorme Earthmate PN-60. You can load this file into Google Earth or any GPX-compatible GPS device to follow my path.

Download the Broken Top GPX file here

Photo Aug 23, 16 50 36 Photo Aug 23, 16 51 17 Photo Aug 23, 16 53 02 Photo Aug 23, 16 53 36 Photo Aug 23, 16 55 13 Photo Aug 23, 16 55 27 Photo Aug 23, 16 55 53 Photo Aug 23, 16 56 47

Planning Resources

US Forest Service Central Oregon Website great for general info and trail conditions

Portland Hikers Field Guide a great resource for trip reports, tips, and insider info