Sisters Mirror Lake

Sisters Mirror Lake family pic

The family at a little lake adjacent to Sisters Mirror Lake

Quick Stats

Distance: approx. 9 miles (more if you have time to explore)

Time: 4 1/2 hours

Difficulty: Easy to moderate with less than 1000 feet of elevation gain

Dog Friendly: Yes, it’s an off leash trail between Sept. 16 and July 14. You may run into pack animals and hunters, so know how your dog behaves around them.

Season: June to October

Permits: Northwest Forest Pass

Pros: you’re outside, close to Bend, tons of little lakes to explore and pretty meadows

Cons: No mountain views unless you head up Koosah Mountain (we only hiked up to an area where there was significant blow down, snapped a couple of pics and turned around)

This hike is so close to Bend it’s amazing that more people don’t use this trail. The trailhead was super easy to find; approximately 30 miles west of Bend on Cascade lakes Highway. There is a small parking area signed Mirror Lake Trailhead not too far passed Devils Lake (the trailhead for South Sister).

After a mile or two you come across a little pond with a large rock outcropping behind it, this is the last place for water until Sisters Mirror Lake.

sisters mirror lake pond

The last pond until you reach Sisters Mirror Lake.

Each of the lakes in the area make a perfect place for a picnic and soaking up some sun.

sisters mirror lake adjacent

Our lunch spot…all to ourselves

Sisters Mirror Lake skimps on the mountain vistas, but the large meadow, and pretty little surrounding lakes with their perfectly still surfaces totally make up for it. To find the lake you just follow the signs all the way there. There is atleast one place to camp on the far side of the lake and an even cuter place to camp at the neighboring unnamed lake (if you’re headed up Koosah).

Sisters mirror lake

Sisters Mirror Lake and a perfect fall day

I think it’s also possible to head over to Nash Lake and make a loop or balloon shaped hike… (check out a map first!!!)

You’ll reach the lake after about 4- 4 1/2 miles of hiking. And if you’re feeling good you could head down the PCT and up Koosah Mountain to get a little more burn in those quads.

South Sister from Koosah

South Sister from Koosah Mountain

To get back to your car just return the way you came….or if you end up doing the loop over to Nash Lake let me know how it goes.


The Ten Essentials

10 Essentials for Backpacking

Everything you need for safe backpacking: navigation, sun protection, insulation, illumination, first-aid, fire, repair kit, nutrition, hydration, and emergency shelter

If you’re headed in to the wilderness don’t be an idiot….be PREPARED! Shit can hit the fan….and it eventually will. Here are the 10 Essentials necessary for safe wilderness travel.

1. Navigation

Delorme PN-60 GPS
Topographic map and compass….and make sure you know how to use them. The time to learn is not when you’re lost in the wilderness. We always take a topo, compass, and GPS…you never know what could happen.

2. Sun Protection

Sunscreen and sunglasses….especially above treeline, or in the high desert.

3. Insulation

Layering is the easiest way to regulate your body temperature. Make sure to pack warm and waterproof clothing. Living in the Pacific Northwest I ALWAYS pack my Patagonia Torrentshell Jacket; it’s light enough and does an excellent job blocking wind and rain…and it didn’t cost an arm and a leg. Check the weather ahead of time and pack appropriately. It can get cold and windy especially at high elevations.

4. Illumination

A headlamp and/or a flashlight. Pack your headlamp for hands free light around camp and on the trail, but don’t forget to pack extra batteries.

5. First-aid supplies

And a couple Band-Aids don’t count. Make sure to pack a real first-aid kit with antiseptic wipes, neosporin, Band-Aids, tape, sterile gauze, pain-reliever, and butterfly bandages. If you’re taking your dogs make sure to pack for them too. Dove-Lewis Animal Hospital puts on a FREE clinic that discusses basic animal first-aid and gives great advice for trailside animal care. The next clinic is Nov. 3, 2012.

6. Fire

Bring multiple sources of firestarters. Lighter, waterproof matches, magnesium fire starters are all great and easy to use. We also take some strike-anywhere firestarters, which work great if you’re trying to get a fire started in wet conditions.

7. Repair kit

Knife, duct tape, needle and thread, multi-tool and whatever else you could see yourself needing to fix gear on the fly.

8. Nutrition

You need to eat. Make sure to pack extra and make it count, you never want to run out of food on the trail. Yes, you can pack chocolate…and I think you should, but don’t forget to pack some protein, fruit/veg and complex carbs. If you’re new to backpacking a great way to try a few different meals is with this Mountain House® Kit.

9. Hydration

You won’t last long without water…and getting giardia or some other waterborne parasite will put a damper on your trip, so pack a filter, SteriPEN, or purification tablets. You’re dog can get sick too, so be prepared to filter/treat their water too.

10. Emergency Shelter

If backpacking you’ll obviously have a tent or some other shelter device planned, but even on a daytrip accidents happen, so at the very least pack a reflective emergency blanket or bivy.

Broken Top Loop

Broken Top from Park Meadow

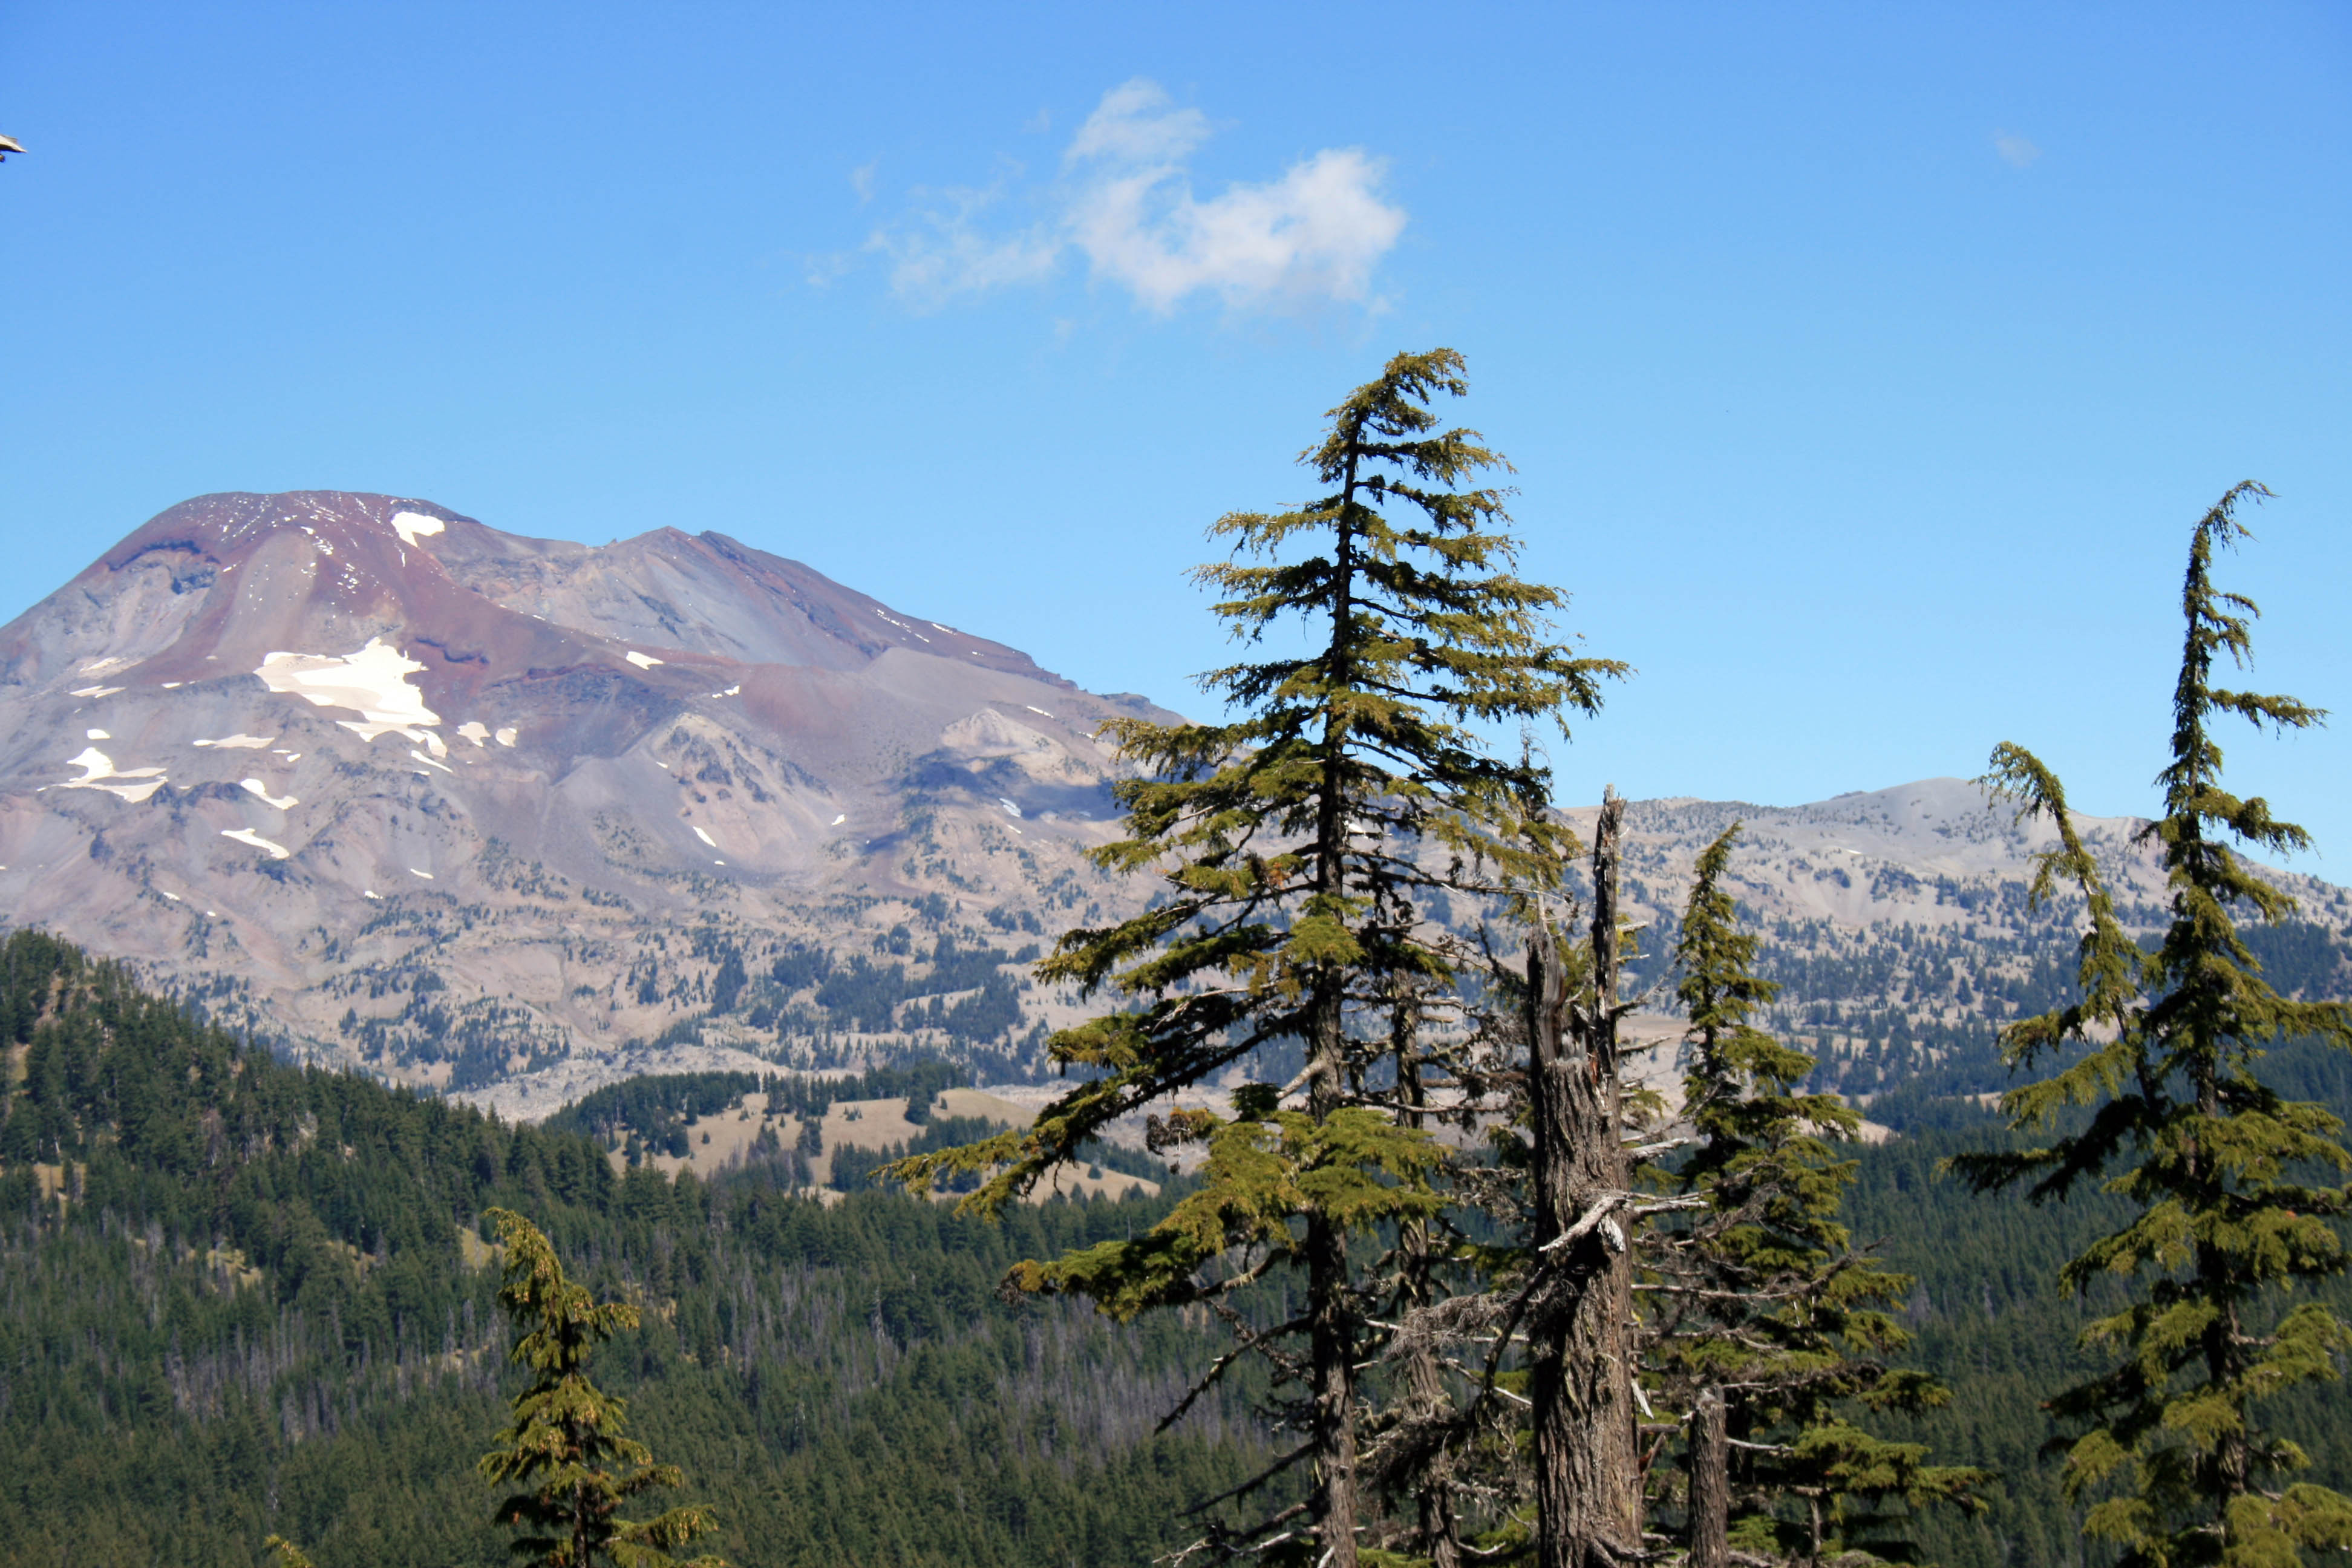
Broken Top from Park Meadow; Day 1

Quick Stats

Distance: 23+ (our hike was approximately 26.5)

Time: 3 days

Difficulty: Difficult

Season: End of July to beginning of October

Dog Friendly: To Golden Lake, yes; to Green Lakes, yes; Green Lakes to end of the loop, NO!!!

Pros: Gorgeous meadows, views of Broken Top, all Three Sisters, Mt. Jefferson, Mt. Washington, and Mt. Bachelor

Cons: Busy trail that is pounded to dust, off-trail section is over steep, sometimes loose rock, no water source on third day after leaving the glacier, no fire allowed at golden or green lakes

Day 1

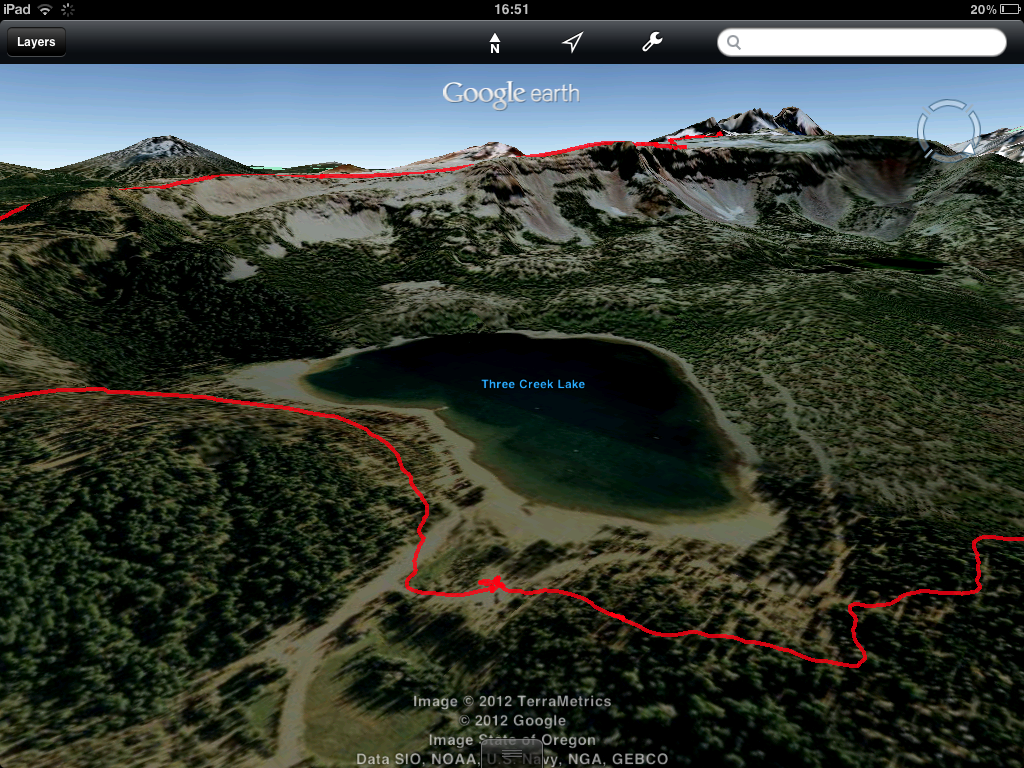
The trail begins at a parking lot just before the Driftwood Creek Campground at Three Creeks Lake. For the loop follow the signs to Park Meadow. The dusty trail will switchback up to the ridge where you might get a glimpse or two of the surrounding mountains before descending to the Snow Creek irrigation ditch and a four way junction, turn left here and continue onward to Park Meadow. Y

ou will be greeted with wildflowers, a view of Broken Top, and pretty Park Creek. This is a great place to take a break and refill water. You’ve made it about 6.4 miles at this point. Cross the creek and continue gradually uphill.

Park Meadow Broken Top

View of wildflowers and Broken Top from Park Meadow.

At about 7.2 miles there is a dusty unsigned trail that leads to Golden Lake, your camp for the night, once you reach the lake cross the outlet creek on the left and continue a bit further to the inlet creek, here follow a boot path up along the creek to some amazing campsites.

Golden Lake Camp

Our camp above Golden Lake with Broken Top in the background.

We camped near the creek about a mile or so up the hill, but it’s rumored there are a couple of tarns just a bit further that have even better views. We, however, were exhausted and decided that our unofficial campsite with views of Broken Top and South Sister was perfect.

Golden Lake, Middle and North Sister

The view on our hike back down the hill from our campsite shows Middle and North Sister reflected in Golden Lake.


Day 2

Make sure to wake up early to watch the morning sun dance across the mountains and light them up with a red glow. Today, hike back down to the main trail and take a left. The trail will ascend to about 7000 feet at a pass between Broken Top and South Sister and then descends again into the Green Lakes Basin. The basin is super crowded, has designated campsites, and fires are prohibited so I recommend continuing on to camp closer to the day 3 push up Broken Top.

Green Lakes Basin

The parting view of Green Lakes Basin looking toward the pass you just came from.

Meadow, Green Lakes, Broken Top

Meadow with a great creek for refilling water bottles with Broken Top in the background.

Once you leave the basin the trail continues through meadow and open forest, so make sure your water supplies are good. You will come to a Y in the trail, keep to the left toward Broken Top. Once you reach Camp Creek and the Drainage start looking for a place to camp. The better camps are uphill, but there is one nice camp about a ¼ mile down the drainage, that has a nice sheltered meadow, that was perfect for an afternoon nap.

Day 3

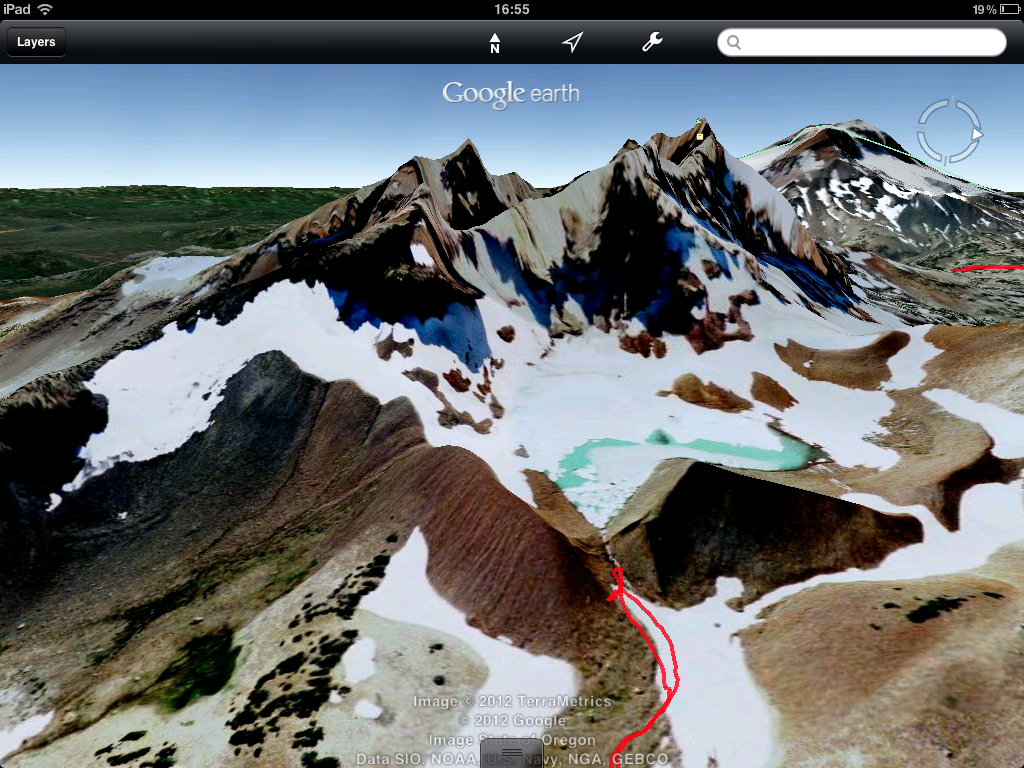
Today is going to be long, hot and exposed, so start early and put on some sunscreen!!! Make sure ALL of your water bottles/platypus bags are full, and I recommend filling up before you leave Camp Creek behind and at any other decent source of water before you reach the Tam McArthur Rim Trail because there is NO water once you reach the rim, it’s 7+ miles without water.  To reach the Bend Glacier and the iceberg filled lake that it fills, follow Camp Creek till it starts to level off and then head east toward a rock outcropping, we hiked just to the right of this and were able to pick up a trail that we followed nearly all the way to the lake.

View of Mt. Bachelor from Broken Top boot path

View of Mt. Bachelor from the boot path leading up to the lake in front of Bend Glacier. At this point you’re almost to the lake.

Frozen Lake on top of Broken Top Mountain

Hey look, there are wildflowers even up here near this partially frozen lake on Broken Top.

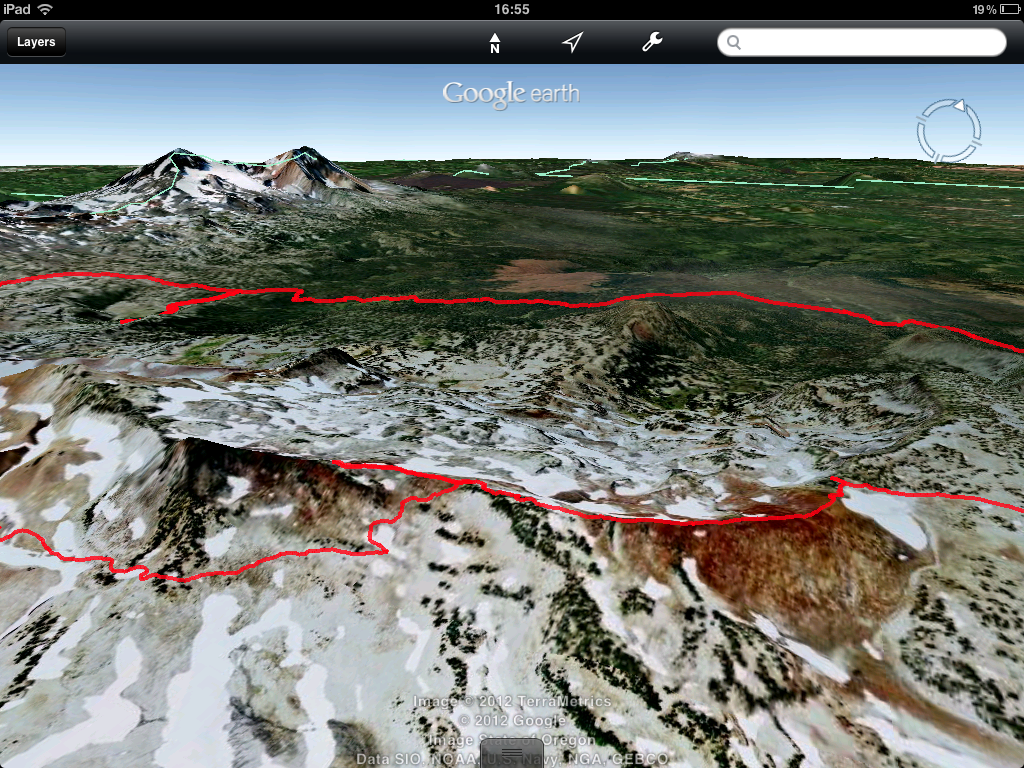
After you leave the lake, begin the long hot push to the rim trail. Take care crossing the snowfields and remember that big rocks move too. Once you reach the rim “trail” you will have amazing views of all the surrounding mountains. The path here is sketchy and kinda comes and goes as you climb over and around rocks; I promise that the trail gets better the further east you go. Just continue on the trail, through the dust, and dry forest.

Broken Top Views to the North

So, I finally dragged my ass up the hill to the rim and it was totally worth it. You know it’s been a hard hike if Sal is resting in the shade. From up top you can see the Three Sisters, Mt. Washington, and Mt. Jefferson to the North and Mt. Bachelor….and maybe Mt. Thielson to the South. Beautiful!!!

Tam McArthur Rim

This pic makes the trail look “not so bad” don’t be fooled; day three is a pretty crappy hike and you’ll be wondering how you got sucked into it.

Our poor dog Jedi, would race to each shady spot and lie down. I would NOT recommend any part of day 3 for your pup, if you must take your dog invest in booties, joint supplements and take some baby aspirin with you as well. I wish someone had warned us. Steve and the dogs finished their water less than halfway through the day’s hike, so we were left to ration out the remaining 1 ½ Liters that I still had. We were very relieved to get back to the car, blast the AC and get rehydrated.

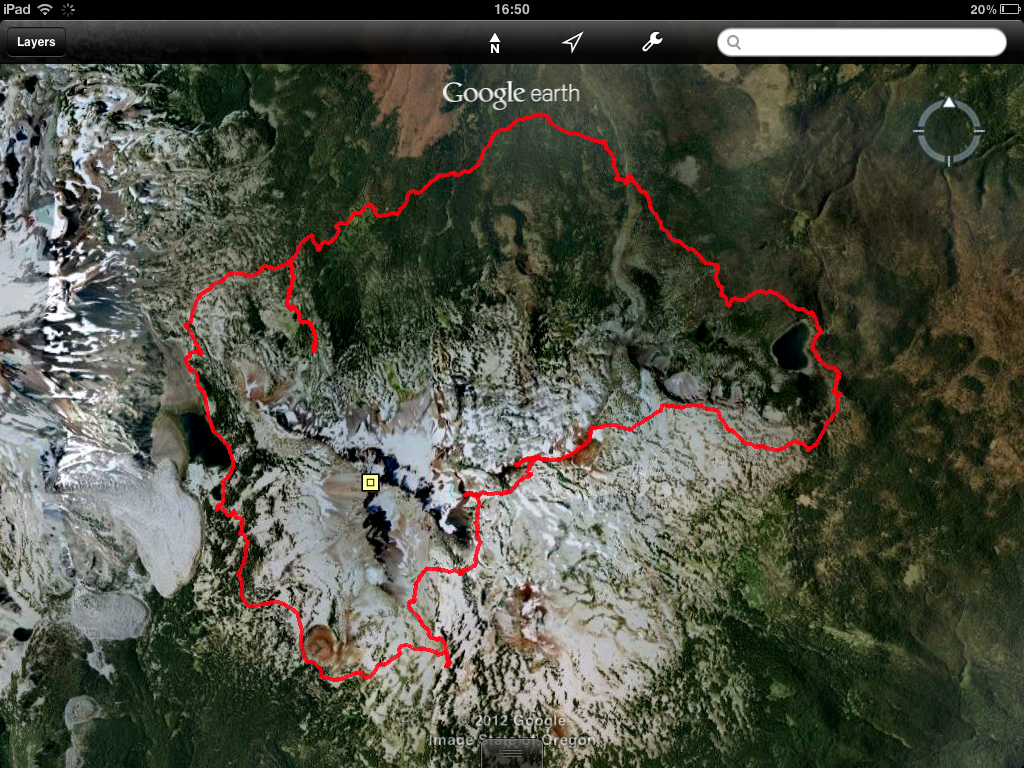
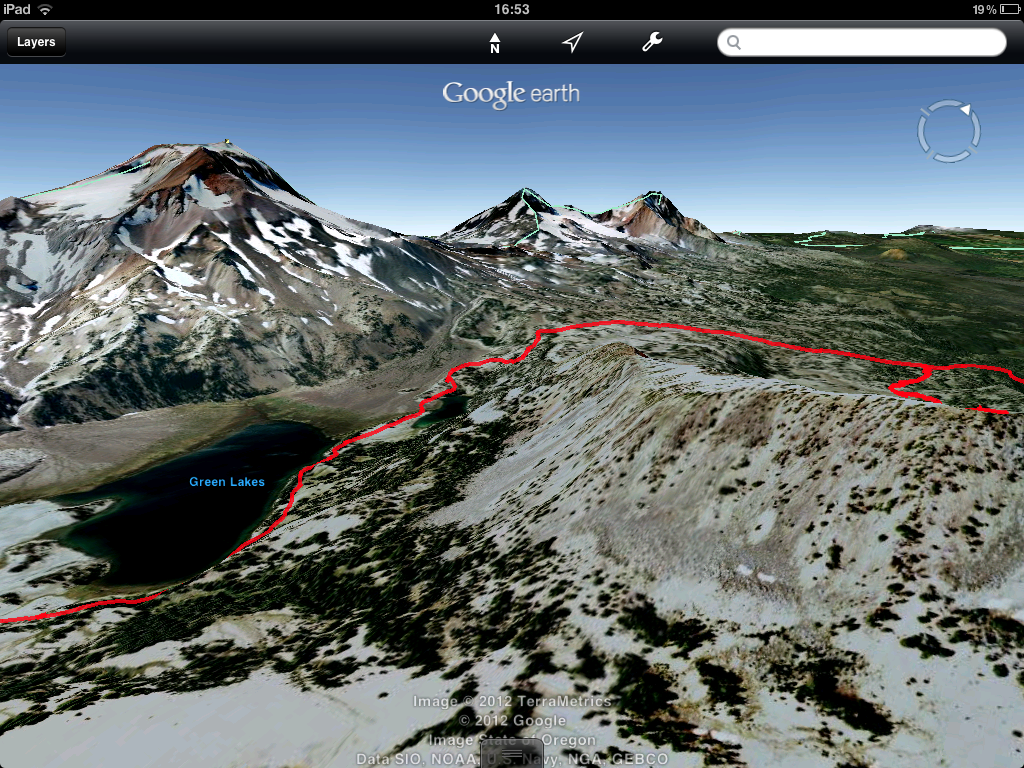
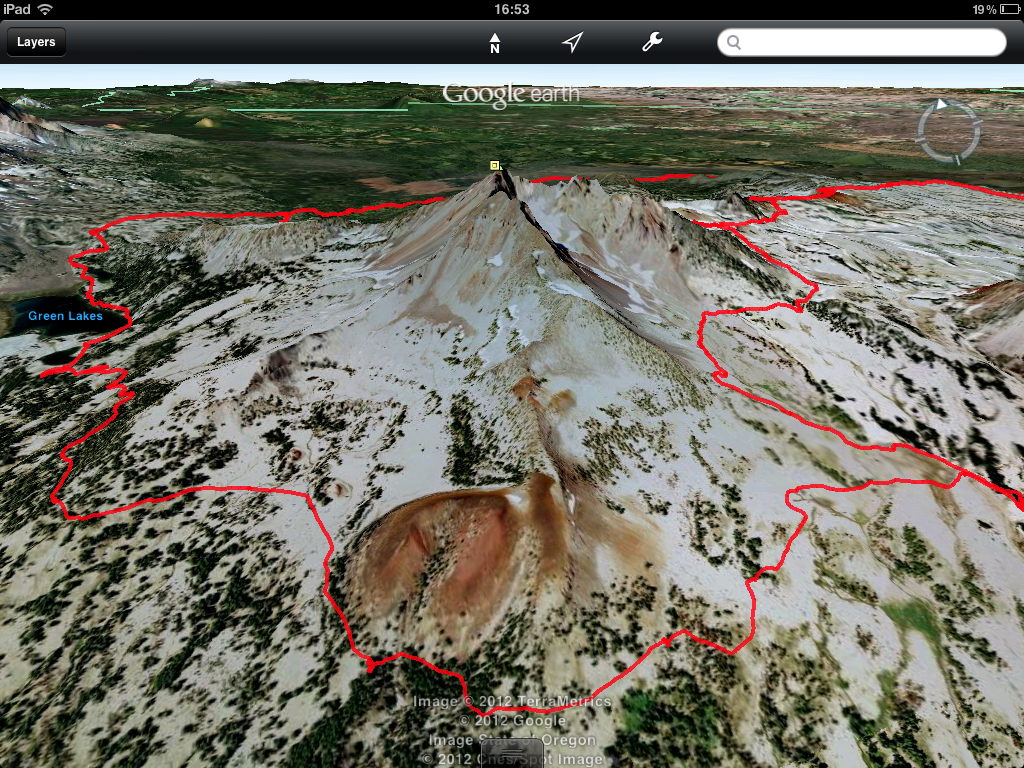
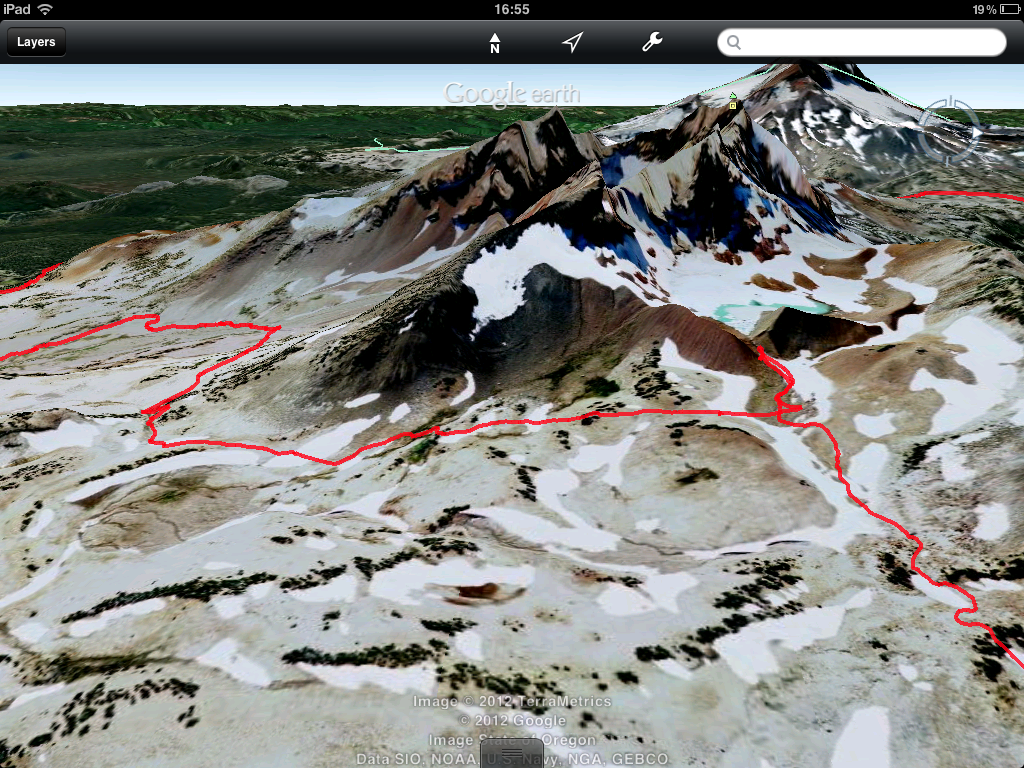
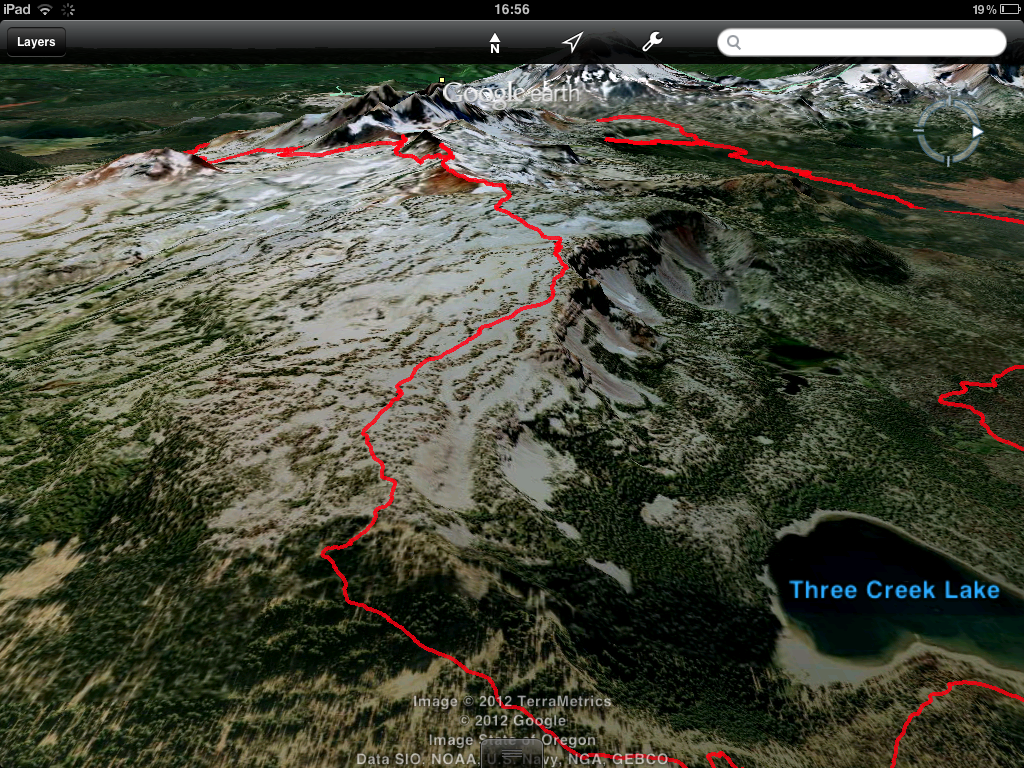
GPX File of Our Hike

I’ve included a link to a GPX file of my hike around Broken Top as recorded by my Delorme Earthmate PN-60. You can load this file into Google Earth or any GPX-compatible GPS device to follow my path.

Download the Broken Top GPX file here

Photo Aug 23, 16 50 36 Photo Aug 23, 16 51 17 Photo Aug 23, 16 53 02 Photo Aug 23, 16 53 36 Photo Aug 23, 16 55 13 Photo Aug 23, 16 55 27 Photo Aug 23, 16 55 53 Photo Aug 23, 16 56 47

Planning Resources

US Forest Service Central Oregon Website great for general info and trail conditions

Portland Hikers Field Guide a great resource for trip reports, tips, and insider info